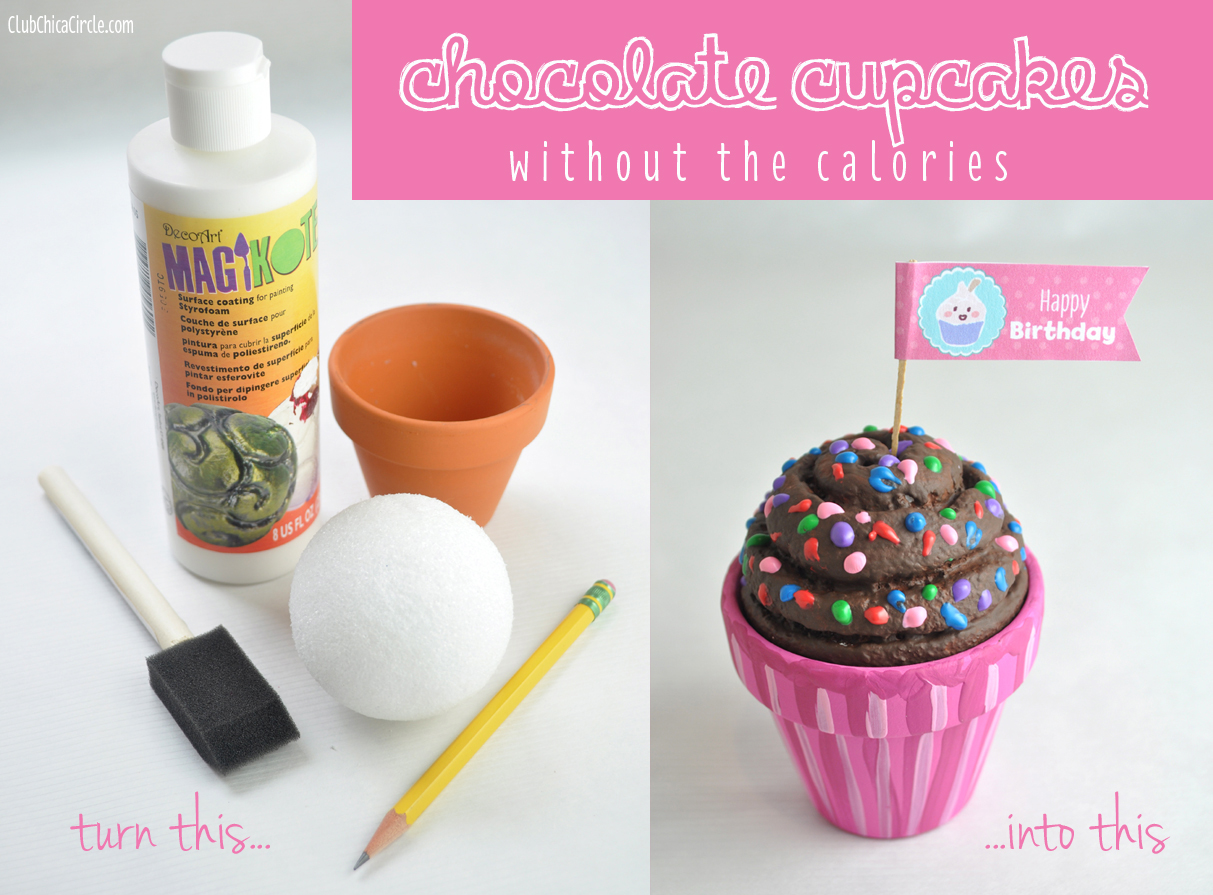
Ok, maybe I am a little obsessed with cupcake crafting. I can admit it.
I’ve made mason jar cupcakes with caulk, cupcake onesies gifts, spa-sleepover birthday cupcakes with Topsie Turvy hairwraps, and cupcake holiday ornaments, just to name a few.
I have been dying to try DecoArt’s MagiKote on something, and what better craft idea than a cupcake! Better yet, chocolate cupcakes without the calories!
DecoArt MagiKote is a surface coating that can be applied to Styrofoam so that it can easily be painted. Styrofoam is a versatile craft material. It’s lightweight and can be cut into or carved easily. But it isn’t always the best surface to paint on. It is such a porous and textural material, that the paint just kind of sticks onto the surface leaving tiny white holes in between, making it hard to paint a solid color on top.
The solution – DecoArt MagiKote.
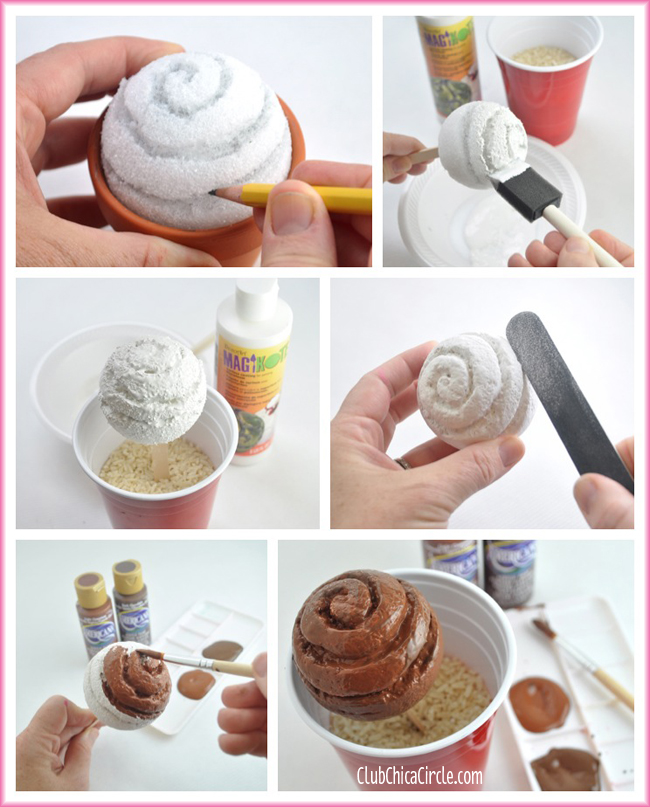
Here is how I made the cupcake shape:
First I started with a Styrofoam sphere shaped ball with a diameter of about 2.5″. Then with a pencil, I carved in a swirl on the top of one half of my Styrofoam ball.
Then, I applied a coat of MagiKote on top and let dry overnight. I used my “cup filled with rice trick” from my painted beads DIY. I stuck a craft stick in the bottom of the ball and stuck it into a cup filled with rice to hold in place and allow to dry without the sides touching anything. I applied a second coat and let that one dry too.
To touch up some of the swirl carving and make the surface nice and smooth, I used a nail file to lightly sand the carved cupcake ball. Then it was ready to paint a yummy chocolate color.
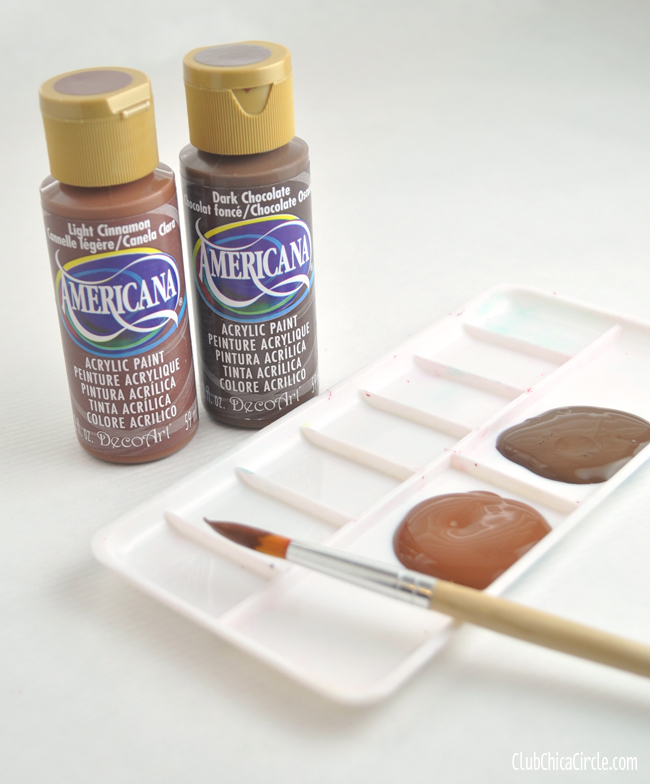
For the perfect chocolate color, I used a combination of Americana acrylic paint in Light Cinnamon and Dark Chocolate.
Yes, there is a paint color called Dark Chocolate. Love it!
While the chocolate ball was drying, I painted a couple “cupcake liner” pots. I used small terra cotta pots that fit the 2.5″ diameter Styrofoam ball perfectly inside of it, with the top half sticking out.
The trick to painting a faux cupcake liner is picking three colors in the same color family, but in a light, medium, and dark tone.
For instance for a red cupcake liner pot, I used Americana Acrylic paint in Naphthol Red as the base color, and Allizarin Crimson for the dark tones, and Peony Pink for the lightest tone.
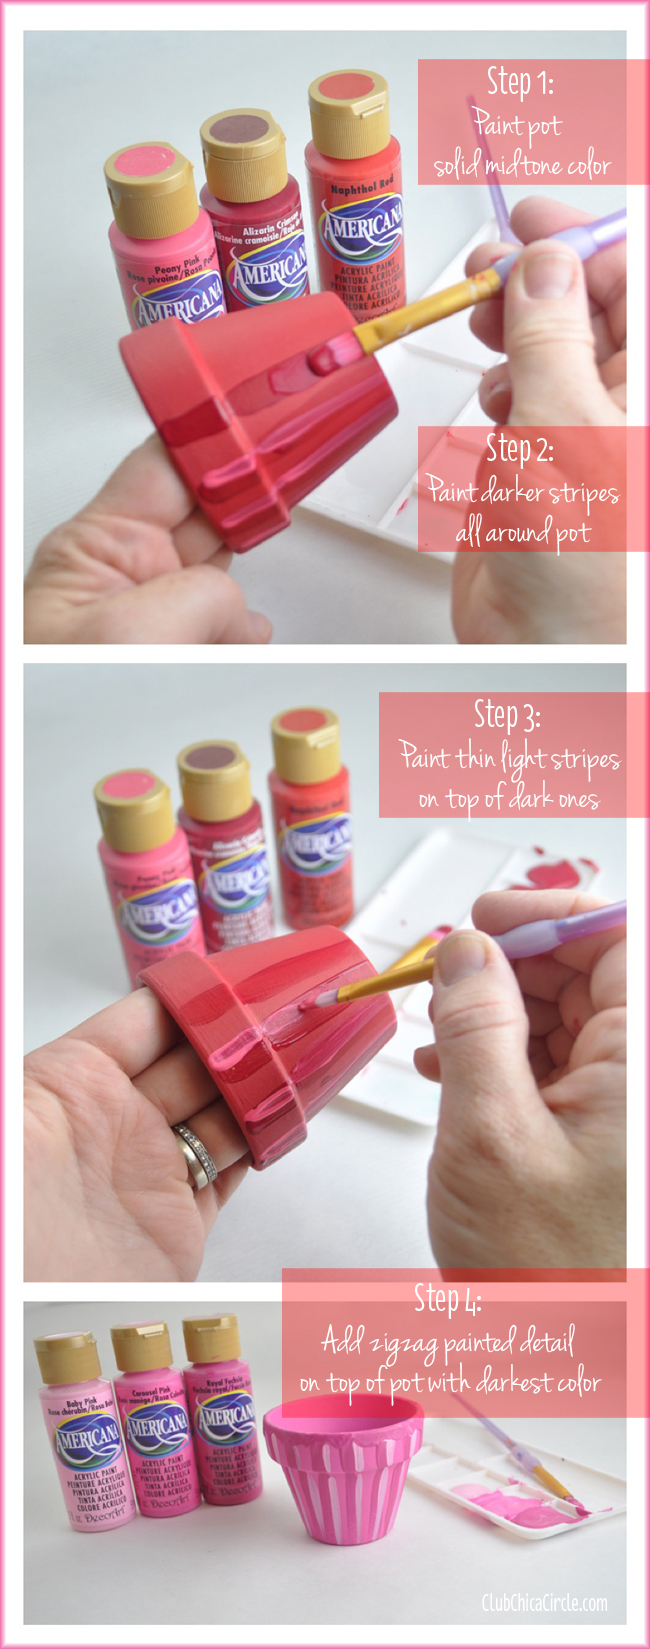
For a pretty pink cupcake liner pot, I used Carousel Pink for the base, Royal Fuchsia for the dark details, and Baby Pink for the light ones.
First, paint the whole pot, inside and out, with the midtone paint color.
Second, paint vertical dark stripes all around the outside.
Third, paint thinner stripes on top of the dark ones with the lightest paint color.
Finally, add a zigzag detail all along the top of the pot with the darkest color paint, and let dry completely.
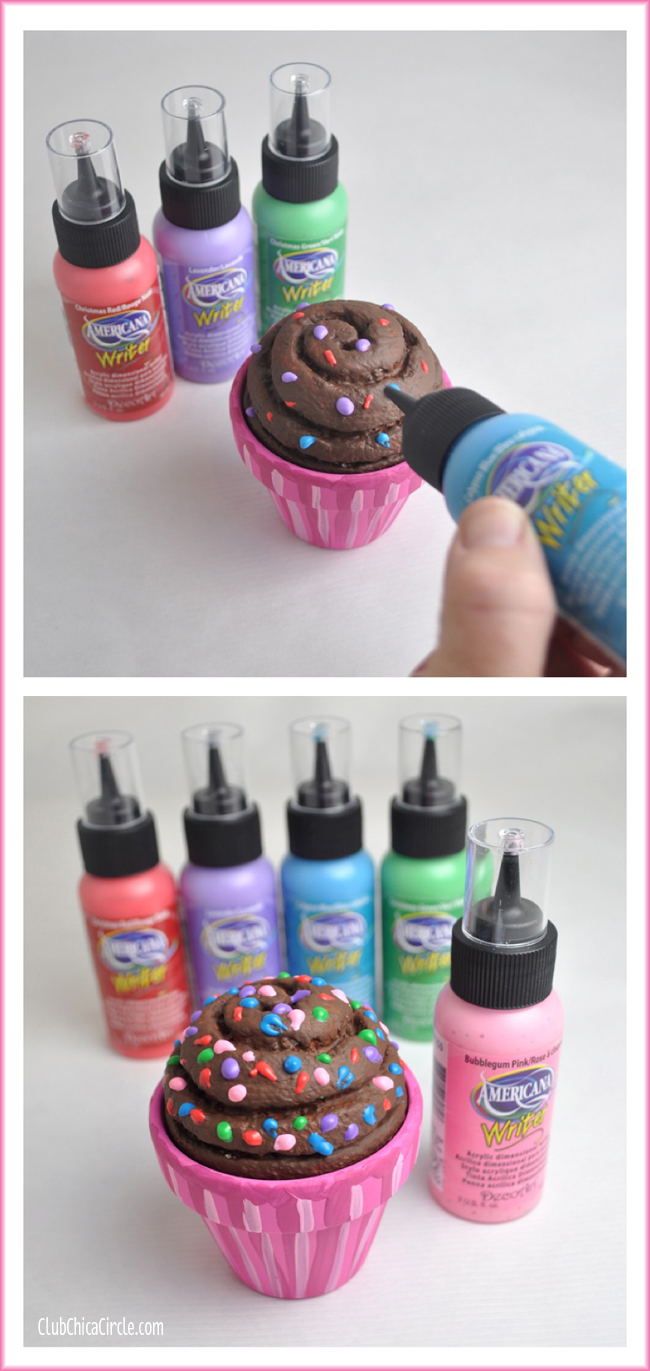
Now, for some extra special detail to your chocolate cupcake – colored sprinkles, of course!
I used Americana Writers in Bubblegum Pink, Christmas Red, Lavender, Christmas Green, and Calypso Blue. Just squirt quick dots on top of the chocolate cupcake ball, and voilá, sprinkles!
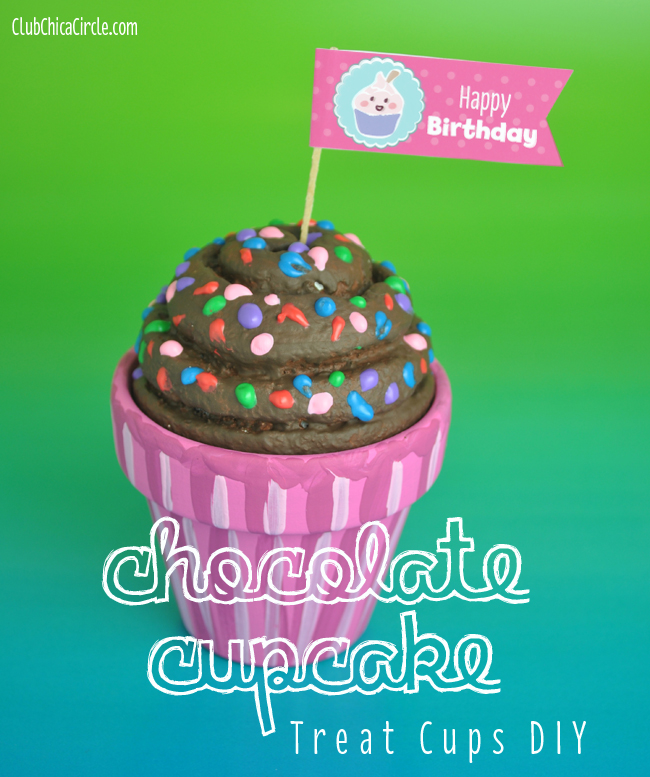
When all the crafty pieces are dry, you are ready to add them together. You have yourself a beautiful cupcake decoration or even a party treat cup.
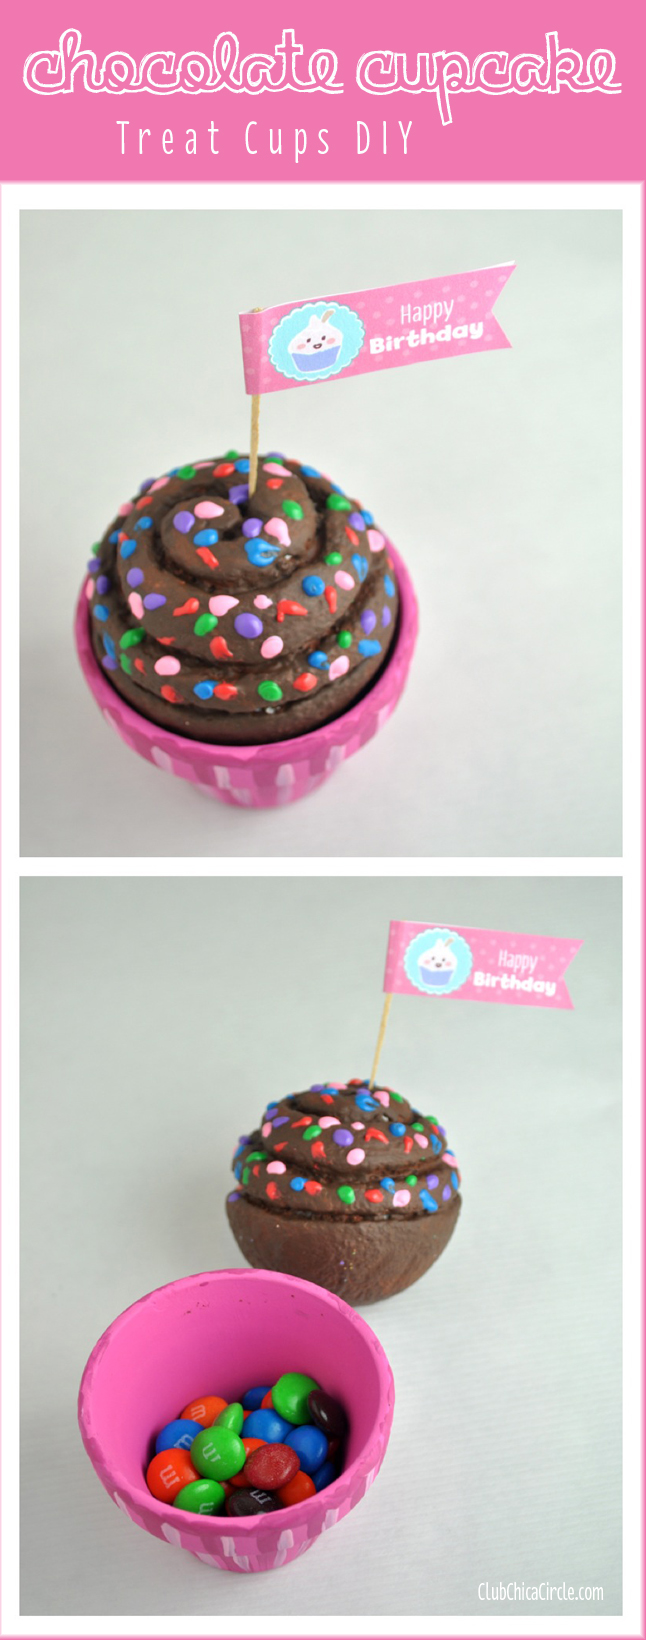
Add a few calories back in and fill the bottom of the pot with candies, like M&Ms. You can top your “cupcakes” with cute flags or toppers.
Grab my free birthday printables here.
Delectable!
Happy crafting!
If you liked this post, and want more, you can subscribe to be on our mailing list here.
Feeling social? Follow ChicaCircle on Facebook or Twitter, and follow me on Pinterest or Instagram.
As a member of the DecoArt core blogger team, this post is brought to you in part by DecoArt. All thoughts, crafts, photographs, and ideas are my own.


