I NEED YOUR HELP!
Recently I attended the Craft & Hobby Association Conference and the FaveCrafts Blogger Networking event. I came back excited to try out some new craft products from some of my favorite brands, which today’s DIY is going to be the first of many from the great swag I received from the various vendors at the event.
I attended the same event last year—and just like last year—FaveCrafts is hosting a Best Blogger Craft Contest.
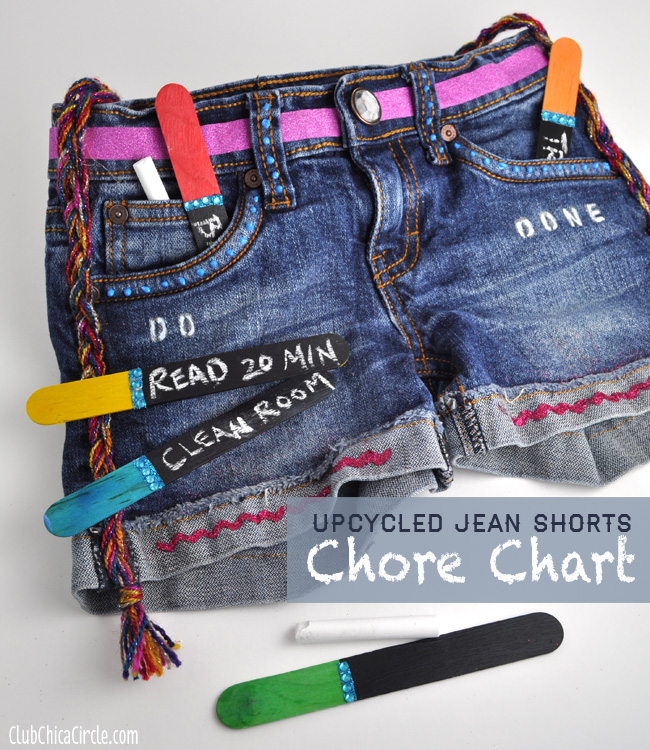
Remember last year’s craft idea? I made this interactive Upcycled Denim Chore Chart with various goodies from last year’s event. It turned out so cute, I think!
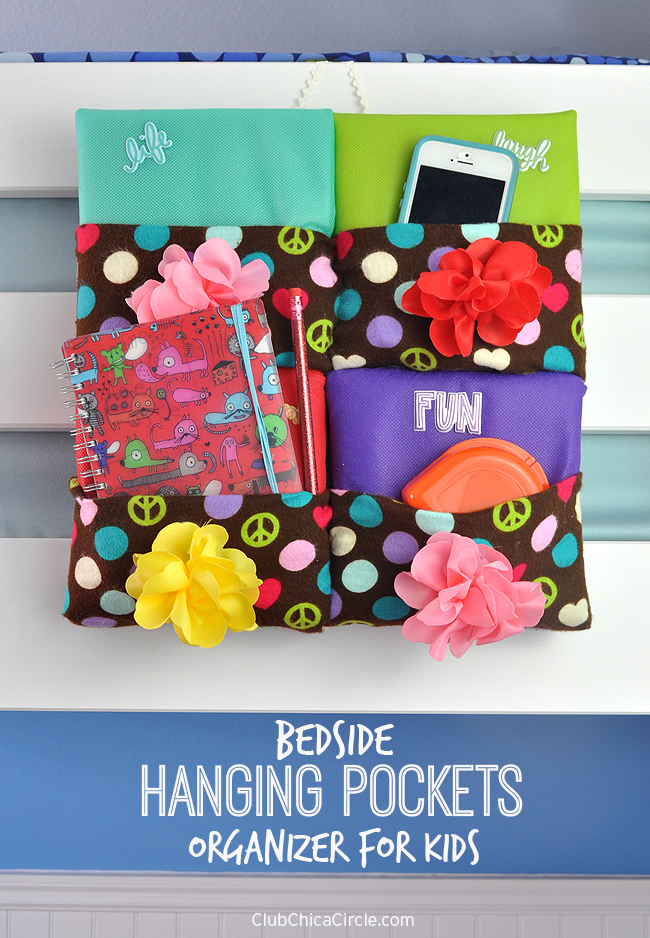
This year, I created another craft geared towards my tween daughter. The Hanging Pocket Organizer helps keep her organized and stores the essentials she needs, right next to her bed. Actually, she just recently got a new loft bed in her room, and because she doesn’t have a nightstand any longer, this cool organizer is perfect for her to put her phone, her retainer case, her journal and pencil.
There were two of the coolest new products that I had never used before, that I was dying to try out. The first was this Design Foam with soft, pattern-cut tiles and self-adhesive sticky back. The second was this cool new fabric called Oly Fun, which is water-resistant, does not fray, can be used indoors and out, and it easy to sew and work with.
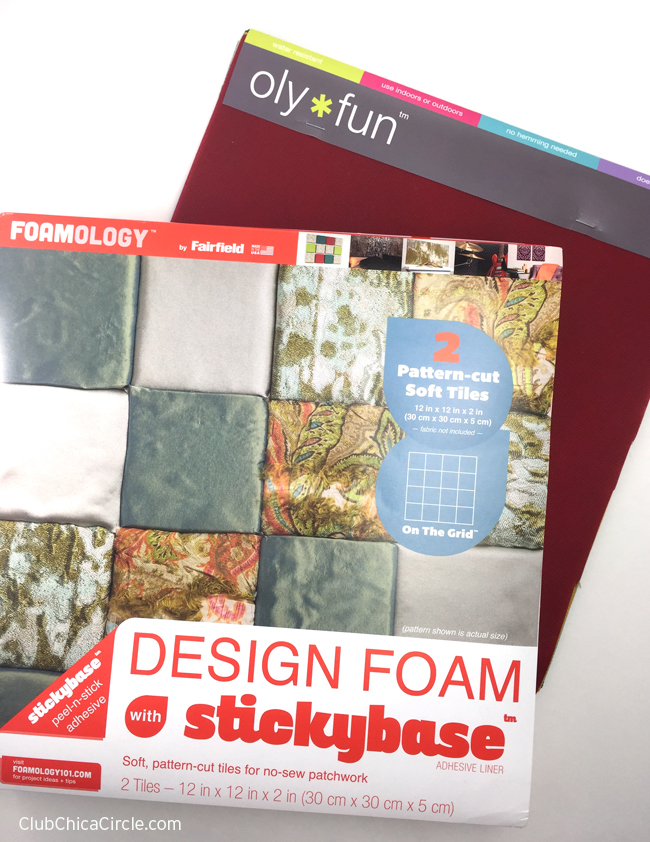
I received one 12″ x 12″ Design Foam square with 16 pattern-cut tiles on the top layer. The whole tile is 2″ thick with the top 1″ being cut out in squares for easy tucking of fabric into. I also received a sampling of 12″ x 12″ Oly Fun fabrics in multitude of colors.
These two paired together with a decorative flannel fabric that I had on hand, were the making of the perfect tween/teen hanging pocket organizer.
Here is my complete supply list for this project:
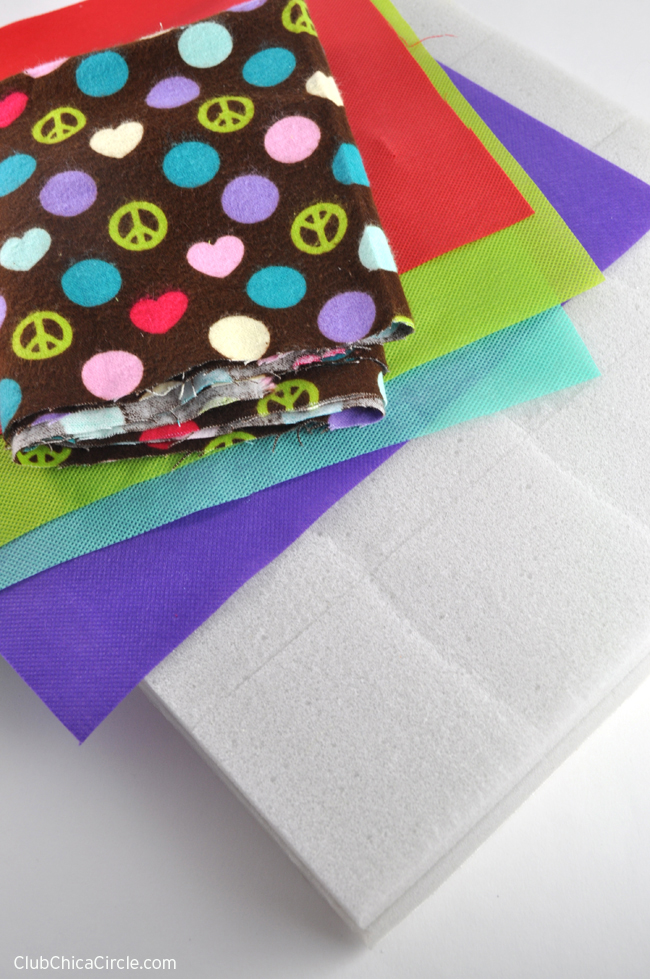
- Five 12″ x 12″ sheets of fabric (I used Oly Fun in Cherry Pop red, Kiwi green, Sea Green blue, Jelly purple, and Hot Fudge dark brown)
- Patterned fabric of choice – approx. 12″ x 36″ (I used a pretty flannel fabric)
- Foamology Design Foam with pattern-cut squares
- Glue gun
- Scissors
- Decorative elements of choice (I used Little B pull flowers and scrapbook puffy stickers)
- 18″ of ribbon or rick rack ( I used small white rick rack)
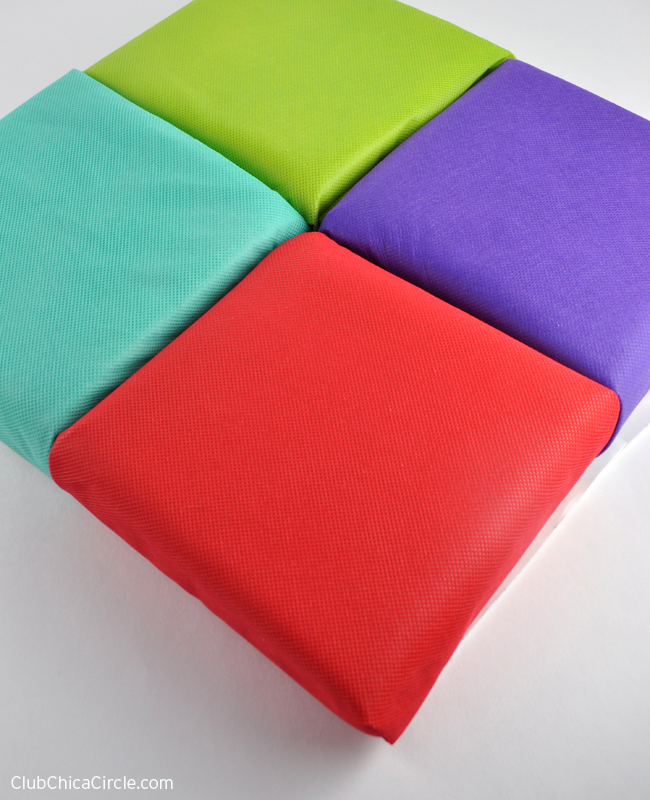
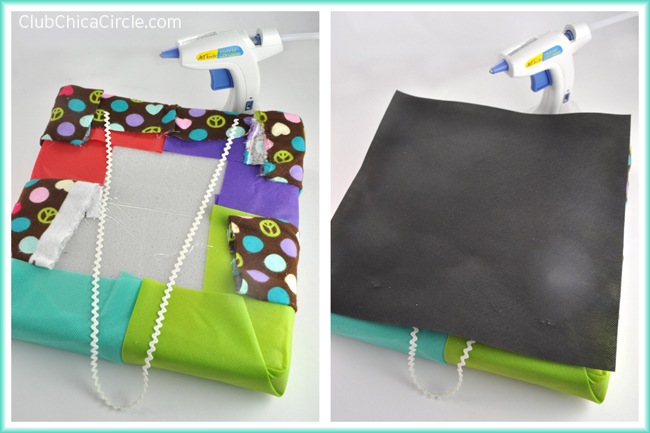
I wanted to first create four color blocks on my Design Foam square. I lined up my first square of Oly Fun fabric on one corner, and tucked in the edges into the foam design (see below).
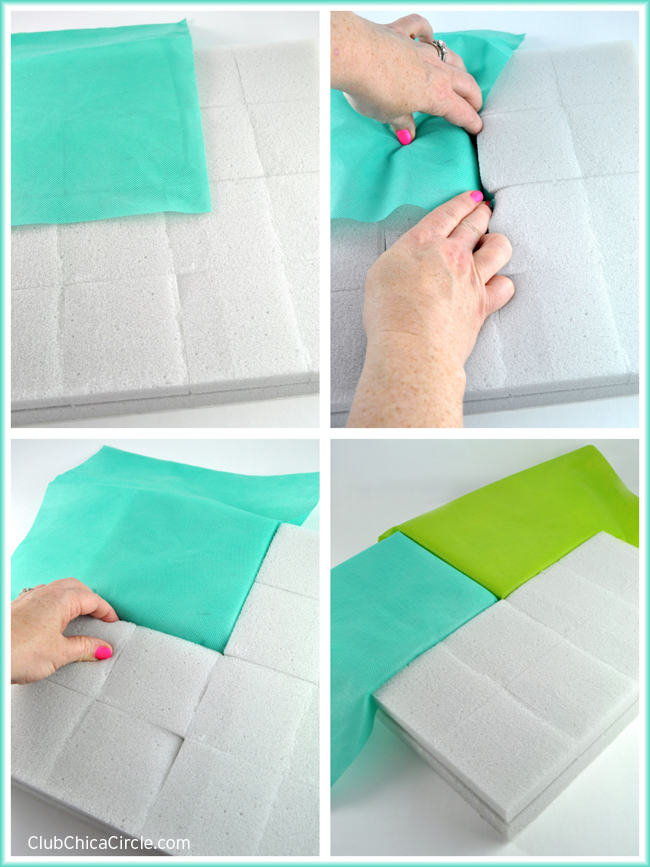
And I repeated this for all four bright colors that I picked out. When I had them tucked in how I liked them, I folded the rest of the fabric neatly around the edges (just like if I was wrapping a present) and peeled back the paper to reveal the self-adhesive sticky back of the Design Foam.
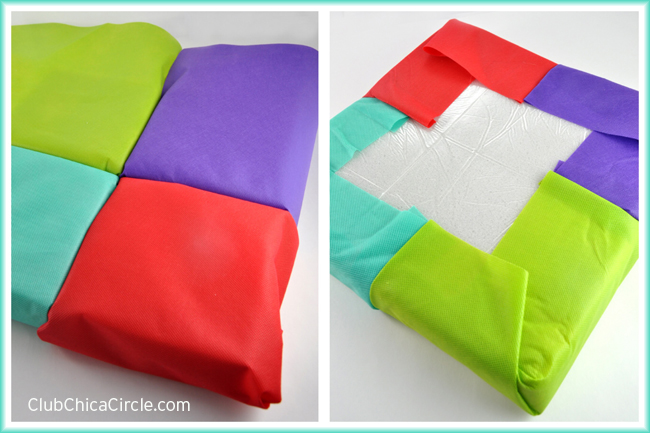
I turned my square back over, and carefully peeled back each color that I tucked in, and secured with a little hot glue from my glue gun to secure permanently.
Now it was time to create the pockets for the organizer with my patterned fabric. I cut two pieces, approximately 12″ x 18″). The height depends on how tall you want your pockets. I folded my fabric in half to create a nice clean edge for the top of each pocket, leaving the cut edges for me to tuck into the Design Foam.
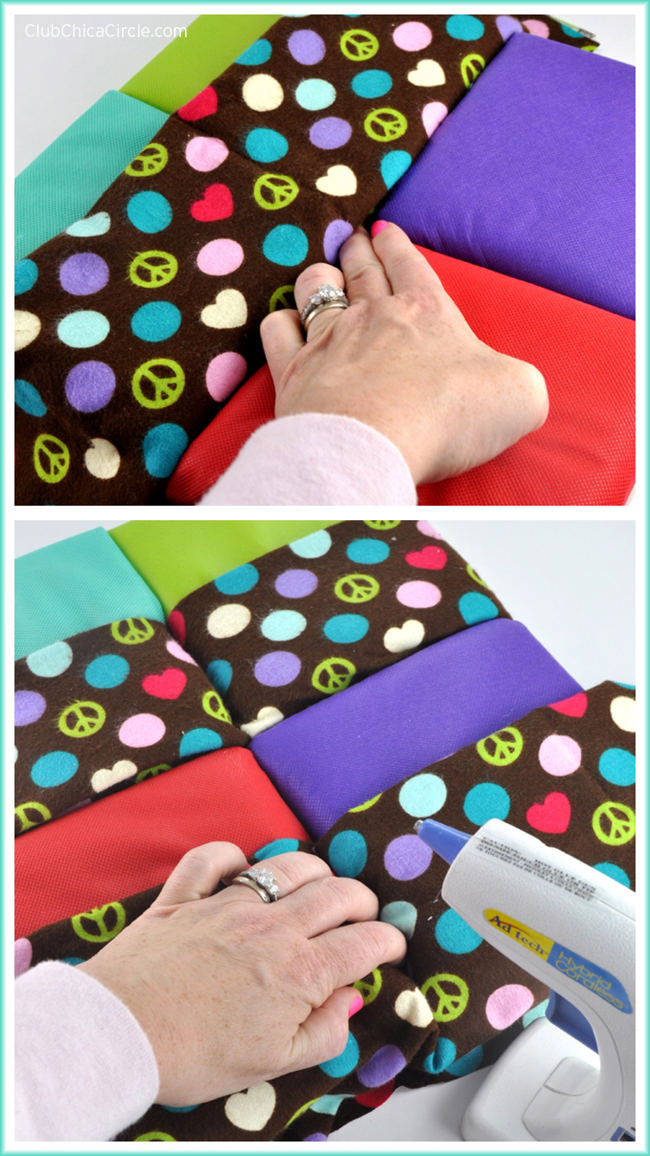
I secured the flannel fabric with a hot glue in every crease, and along the sides and along the back.
Then, I created a hanger by arranging the rick rack on the back side, and sandwiching it between my last square piece of Oly Fun fabric. I then secured all of the corners with glue.
To finish off my project, I added some flair on each of the pockets with these super cool decorative pull flowers.
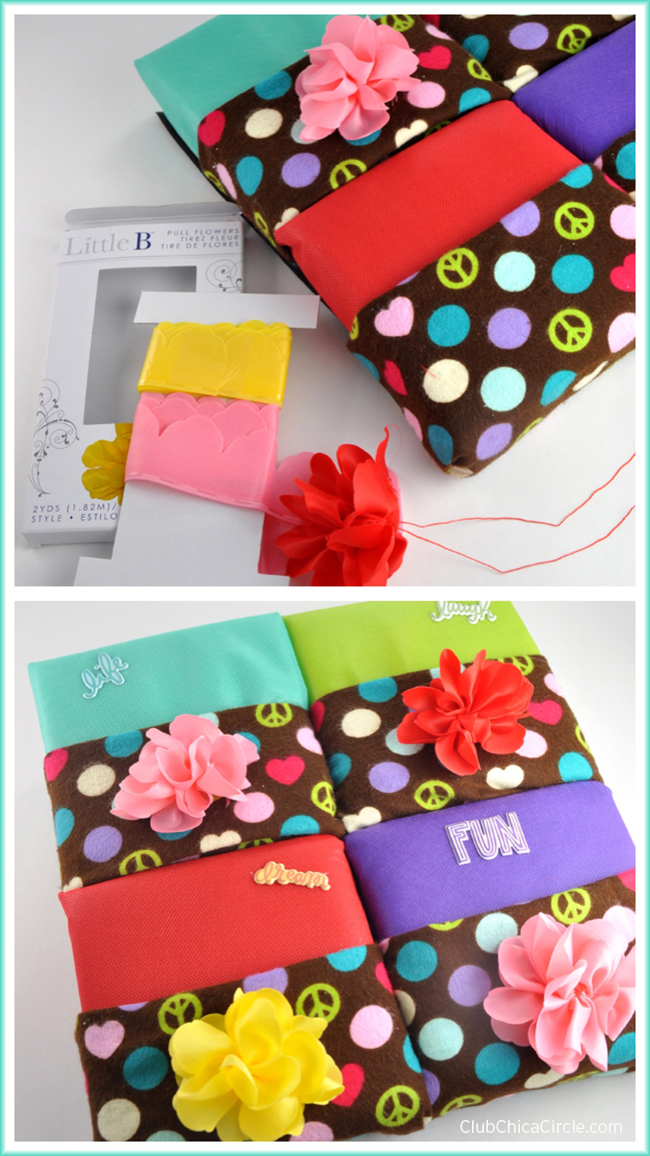
And I added cute puffy scrapbook stickers on the front too.
The pockets are perfect to hold small things like a phone, retainer case, glasses, a small journal, etc.
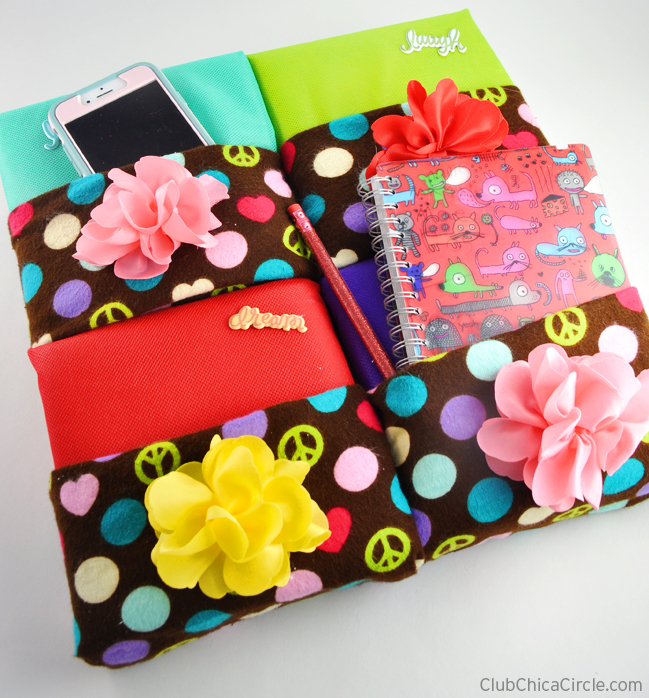
We hung it on the side of her loft bed, and now she has everything she needs without having to climb out of bed!

It looks so great in her room! This one got a big thumbs up from my girl.
Now, I need your help – pretty please with glitter on top!
I would be ever so grateful if you could head on over to the FaveCrafts Best Blogger Contest board and give it a big thumbs up too! Look for my name – Pauline Molinari, and this project, and please, pretty please give it your vote.
Thank you SO much for your help!


4 comments for “Bedside Hanging Pockets Organizer DIY”