As part of the Make It: Fun Team, this post is sponsored in part by FloraCraft. As always, ALL photographs, ideas, and opinions are my own.
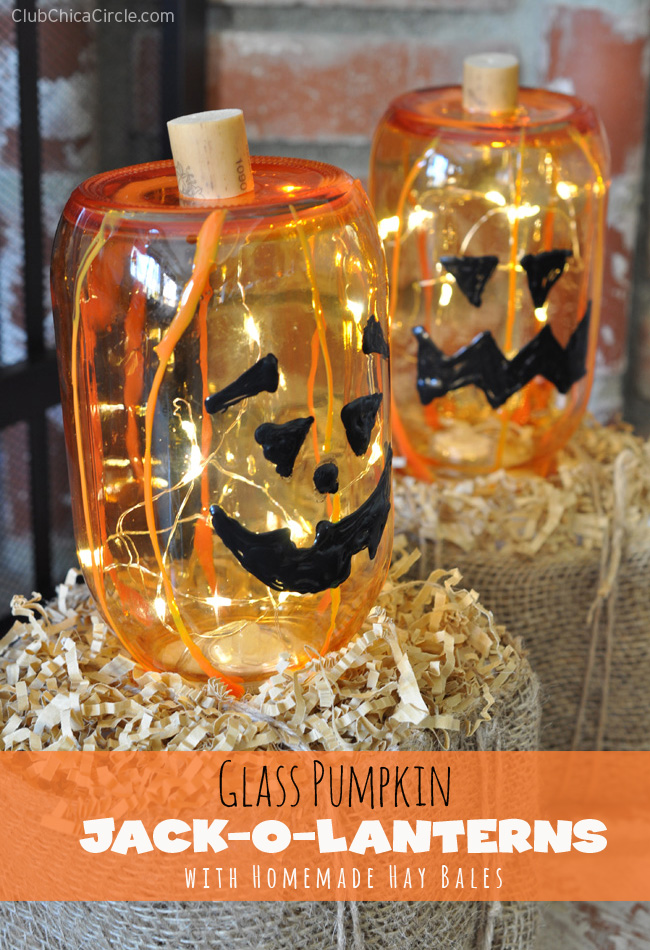
Don’t you just love this time of year? There is so much festive crafty fun to be had — and lots of fun ways to decorate your house inside and out for Halloween. This easy craft idea makes a great Halloween decor idea!
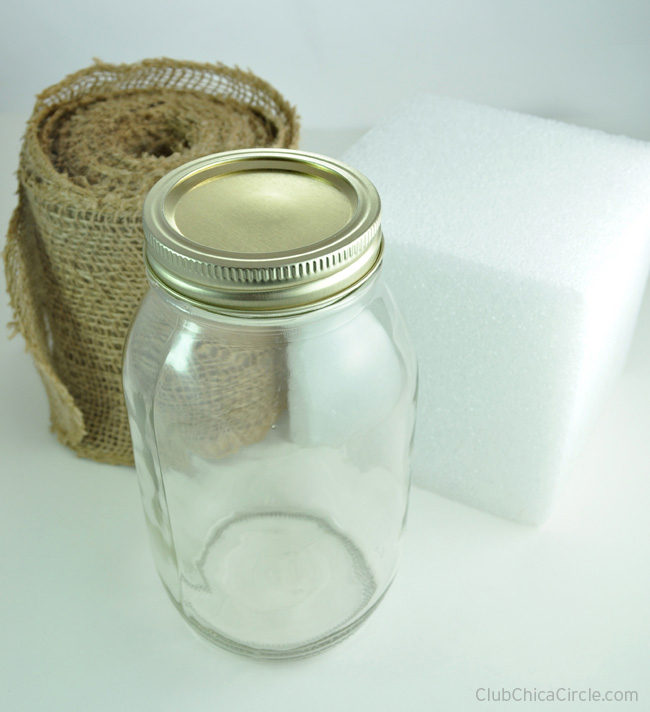
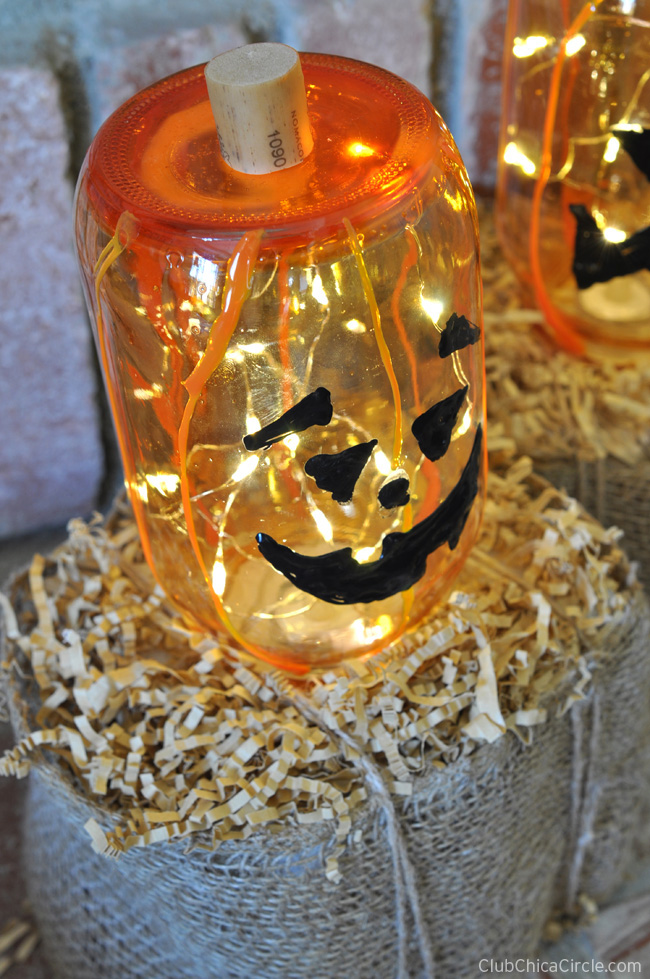
This is a spooky, spine-tingling tale of how the mason jar met a foam block who brought along his burlap friend to make the coolest glass pumpkin luminary in all the land.
Hee-hee…
Seriously, this craft was actually my creative brainstorm captured here in our Creative Blog Talk series about creativity. It was so fun to see my sketch come to life!
Last year I made these cute mason jar candy corn luminaries, this year I wanted to try jack-o-lantern luminaries. I could have just tried using the jars right side up, but I wanted to use them upside-down making the bottom of the jar now the top of my pumpkins—and what better for them to sit on, but homemade hay bales!
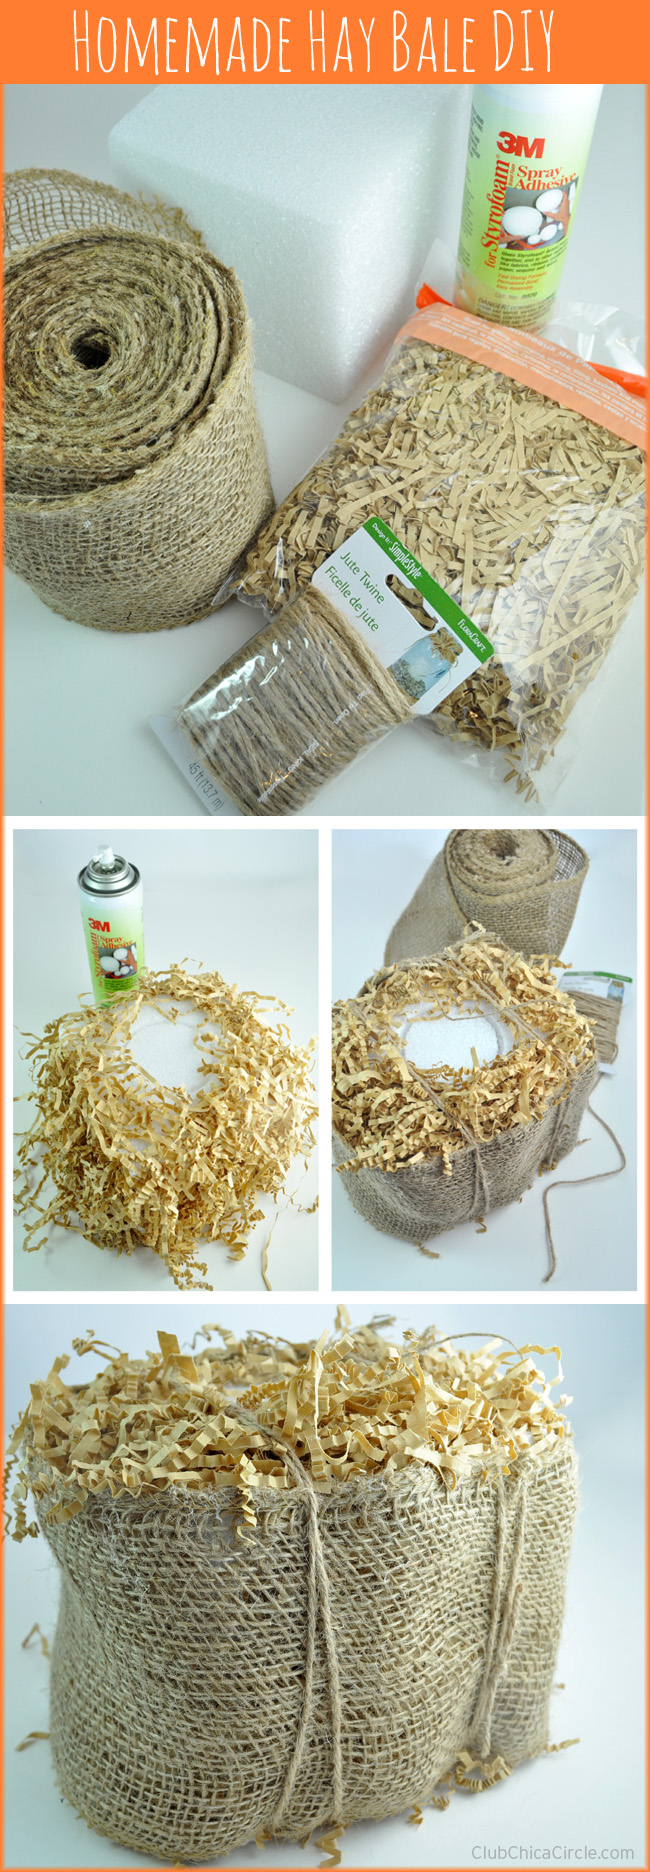
Here is my complete supply list for this Halloween decor craft idea:
- Quart-sized mason jars
- Floracraft 7″ foam blocks
- Brown Paper Crinkle (found in the gift wrap aisle)
- FloraCraft Burlap Garland
- FloraCraft Jute Twine
- 3M Stryrofoam Spray adhesive
- DecoArt Glass Stain in Orange
- Americana 3D Opaque Gloss Enamel in Black
- Americana 3D Gloss Enamel in Orange
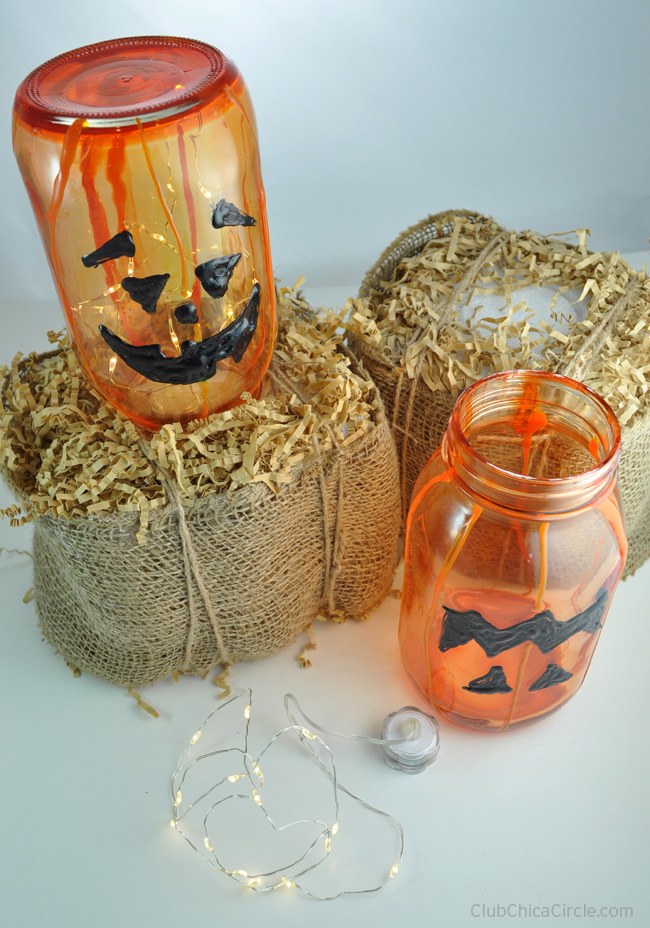
- FloraCraft Battery-operated LED Light Strand
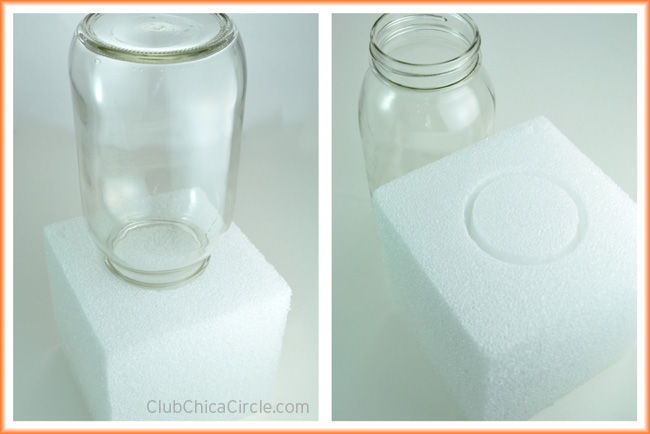
First I needed to prep my foam block and glass jar. I pressed the top of the jars down onto the top of one side of my foam blocks to create a well or divot to hold my glass jar in place.
Then it was time to tint the jars orange and create a jack-o-lantern design on the front. I’ve hand-tinted jars before, like my shamrock and rainbow jars, but this time I wanted to add a jack-o-lantern face on the front and turn them into pumpkins.
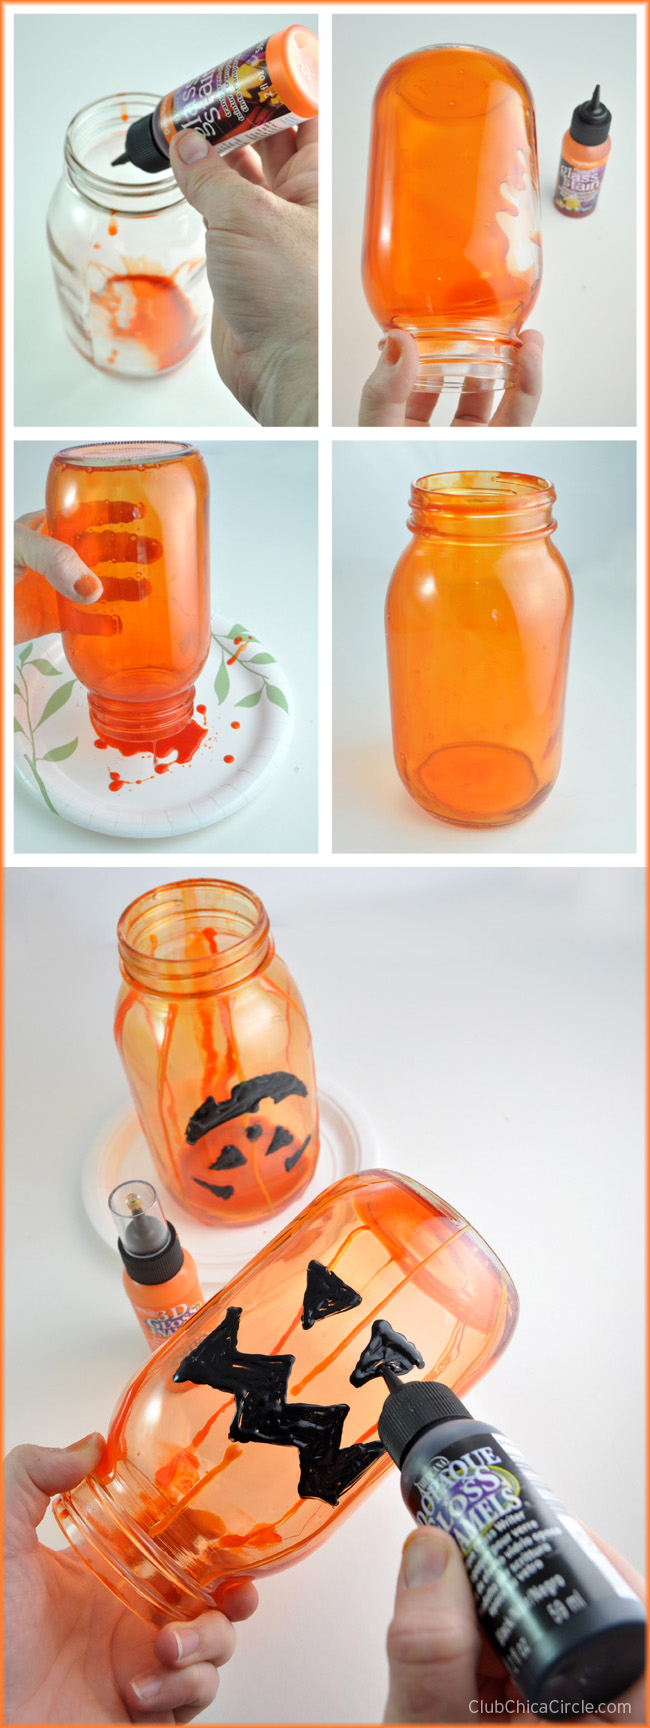
I used glass stain to color the inside of each of my glass jars. I squeezed some on the bottom of the jar and then let gravity do its work by swirling the color all along the inside. Then I let the excess drip out and sat if back upright to dry.
After about an hour drying outside, I drew on my jack-o-lantern face with the black 3D Opaque writer, and added orange stripes along the outside with the 3D Gloss Enamel paint for my glass pumpkin design. Then I let that design dry as well for another hour outside in the sun.
While the jars were drying, I made the hay bales.
I sprayed the 4 outer sides of my cube with the 3M spray glue made especially for foam and the top along the edges outside of the jar circle I created in the first step. Then I pressed the crinkly paper all along the outsides and the top. I cut a length of my burlap to completely wrap around the outside of my cube, and secured it on with two strips of the twine on either side of my circle on the top. The crinkly paper under the burlap and the two twine ties give the perfect illusion of mini hay bales!
When my glass pumpkins were completely dry, and the glass stain and jack-o-lantern design was no longer tacky, it was time to put it all together.
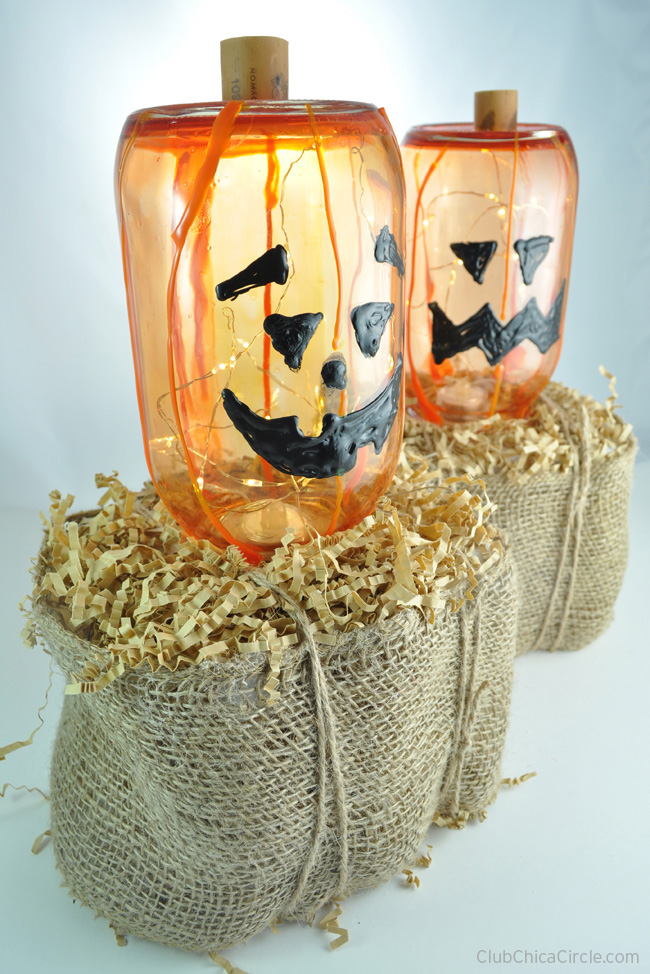
The battery-operated light strands were perfect to use on the inside of my jar. The wire that the LED lights are attached to give it just enough structure to stand up and fill the glass inside in a random fashion. I placed the lights in the middle, turned them on, and replaced my glass pumpkins back into the circle spot I had created on the top in the beginning.
One last detail, I cut a wine cork in two and glued each portion on the top of my glass pumpkins.
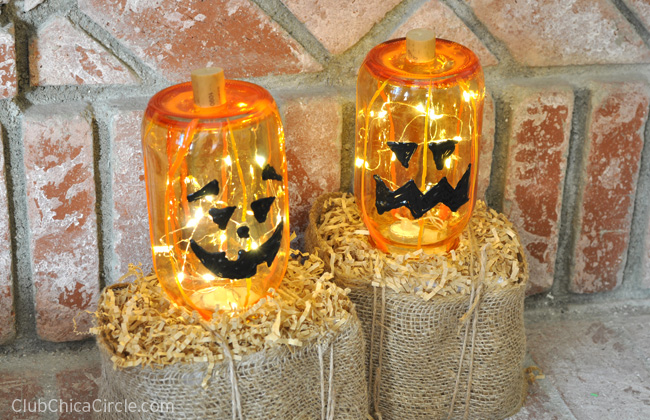
These look so great next to our fireplace, but they would look just as great outside on the front porch.
I love how they turned out!
Enjoy!
As part of the Make It: Fun Team, this post is sponsored in part by FloraCraft. As always, ALL photographs, ideas, and opinions are my own.




4 comments for “Glass Pumpkin Jack-o-Lanterns on Homemade Hay Bales”