As a member of the DecoArt core blogger team, this post is brought to you in part by DecoArt. All thoughts and ideas are my own.

Have you planted your summer garden yet? One of my favorite things from our garden are fresh homegrown tomatoes. I have to admit, I don’t have the biggest green thumb. I cannot take credit for the lovely flowers and vegetables in our backyard garden, kudos to my husband for that, but I certainly to appreciate it. What I can contribute is a beautiful garden globe for some extra added color and decoration. I’m good at adding crafty homemade touches to our backyard, like the repurposed flower basket outdoor chandelier, but ask me to plant a garden, mmm, not so much.
I couldn’t wait to try the pearlescent DecoArt glass stains I recently received. I paired them with DecoArt 3D Opaque Gloss Enamel Paint in silver for a cool stained glass effect.
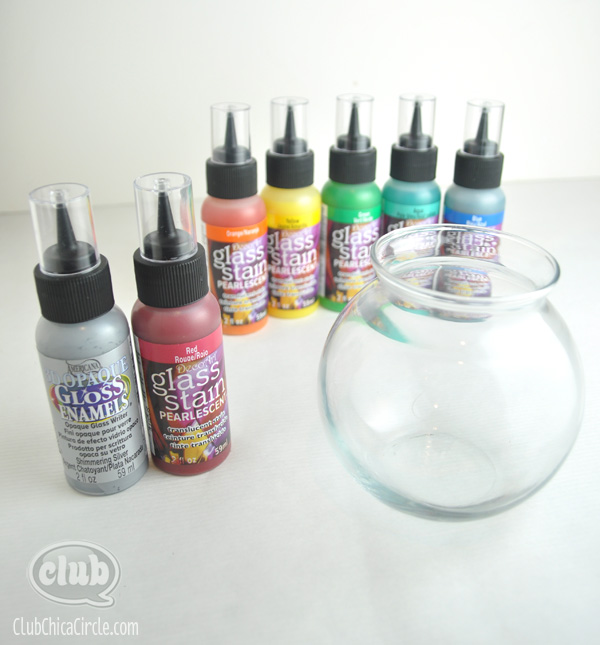
Here are the exact DecoArt glass paints that I used:
- Shimmering Silver 3D Opaque Gloss Enamel Writer
- Glass Stain Pearlescent paint in red, orange, yellow, green, aqua, and blue
Good news, DecoArt glass paints can be found at Michaels!
On my morning neighborhood walks, I have long been admiring a neighbor’s beautifully painted garden globe. I knew I could create a mini homemade version of this with a little creativity and some simple items paired together.
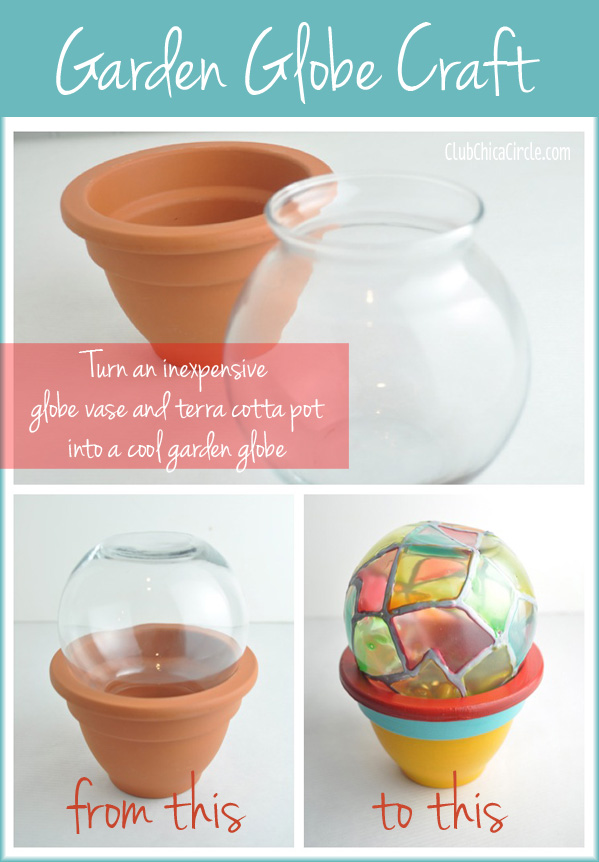
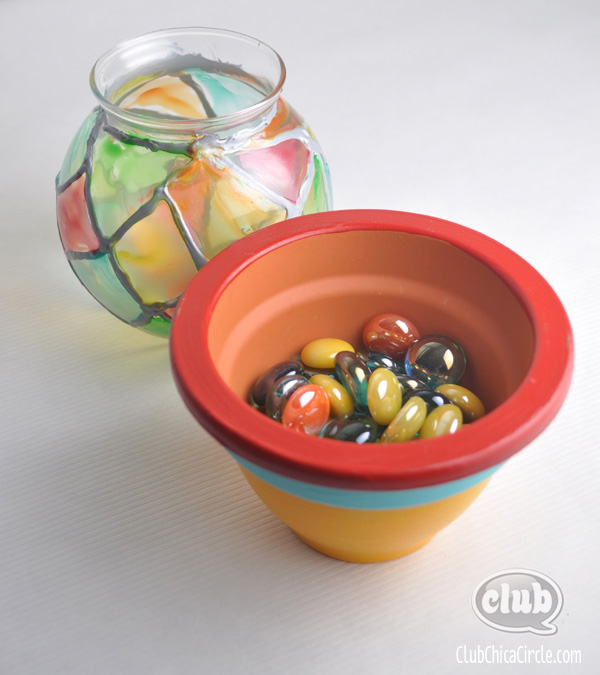
I started with a really inexpensive fish-bowl shaped globe vase and a bell shaped terra cotta pot. Both of them together cost me less $3. Paired together, they made the perfect garden globe shape I was going for.
First I started with painting the globe jar. I began with the silver 3D Gloss Enamel writer and created a random geometric pattern on the globe. This step needs to dry completely before adding the glass stains.
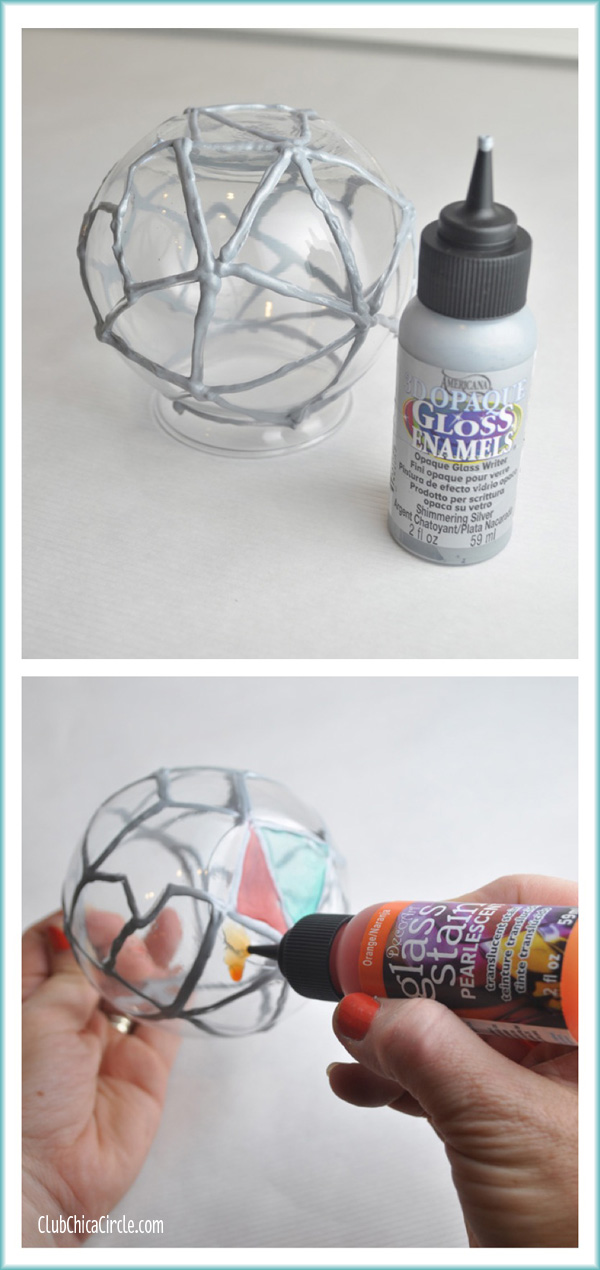
When my “stained glass” globe was dry, I applied the rainbow of color glass stains randomly in each shape. Keep in mind the glass stain paint is really thin, so a little goes a long way. While I was holding the jar in one hand, I would draw in the stain with the other. I used had Q-tips handy catch any excess drips that went beyond my silver lines. I love how it colored or “stained” the glass while still being see-through. I let that dry completely as I moved onto painting the terra cotta pot.
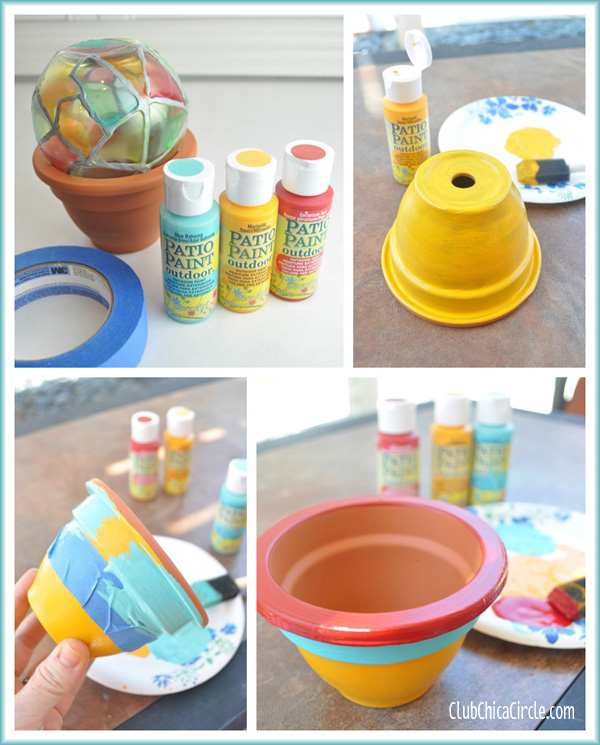
I love the outdoor Patio Paint from DecoArt which is weather and water resistant. I picked three colors that I thought matched the stained glass globe nicely.The exact paint colors I used were Marigold, Blue Bahama, and Geranium Red.
I started by applying 2 coats of the yellow marigold color onto the whole pot with a sponge brush. Then I used some painter’s tape to mask off the top edge and painted a stripe of the teal blue bahama color. I finished off the top edge of my pot with the brilliant geranium red paint color and let the whole pot dry.
You will need to let the paints set and dry completely for 72 hours to ensure that the paint is weather and water resistant.
To complete the garden globe craft, I filled the bottom of the pot with some beautifully colored decorative glass beads for extra flair and weight on the bottom of the pot.
Now, my only problem was figuring out the best place to display my homemade garden globe.

I tried a number of places, and it was really hard to decide. I think I may have to make more of these to go around our yard and garden.
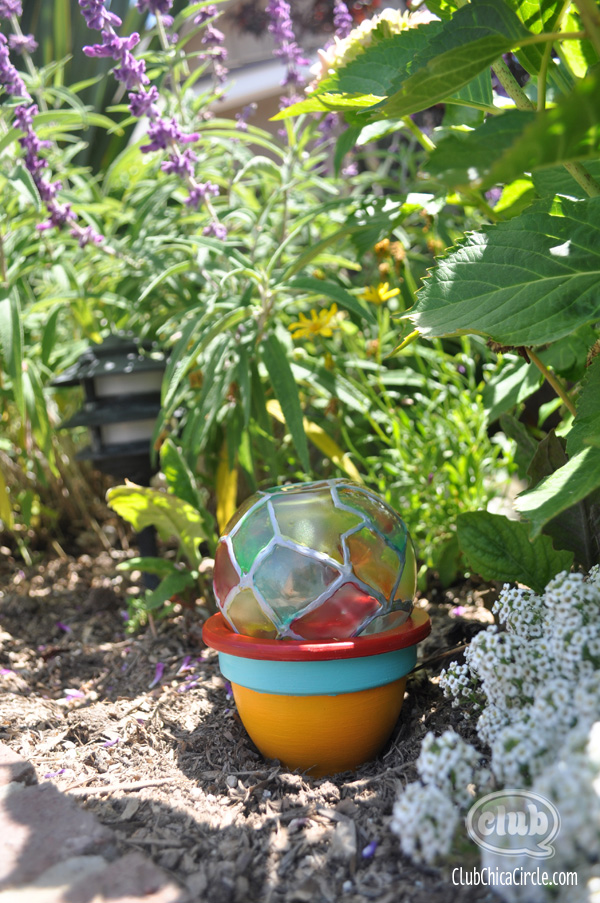
I love how when the sun hits it just right you can get a glimpse of the pretty glass rocks inside too.
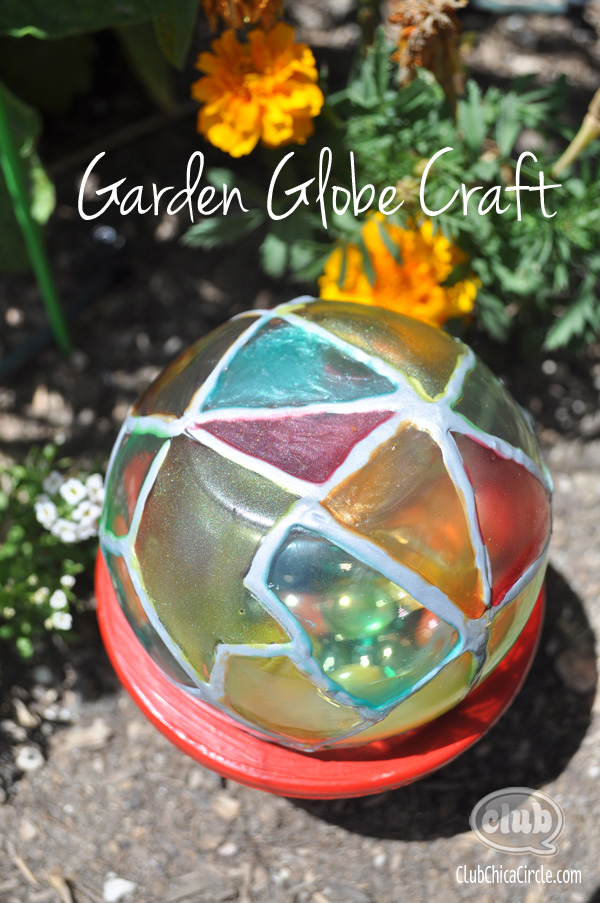
Try this simple summertime craft today, and spruce up any garden!
And if you looking for another great garden craft idea, you have to check out this homemade Fairy House from Crafts by Amanda. I love how she turned a wood birdhouse into a cute fairy house.

Happy crafting!
If you liked this post, and want more, you can subscribe to be on our mailing list here.
Feeling social? Follow ChicaCircle on Facebook or Twitter, and follow me on Pinterest or Instagram.


6 comments for “Garden Globe Craft DIY”