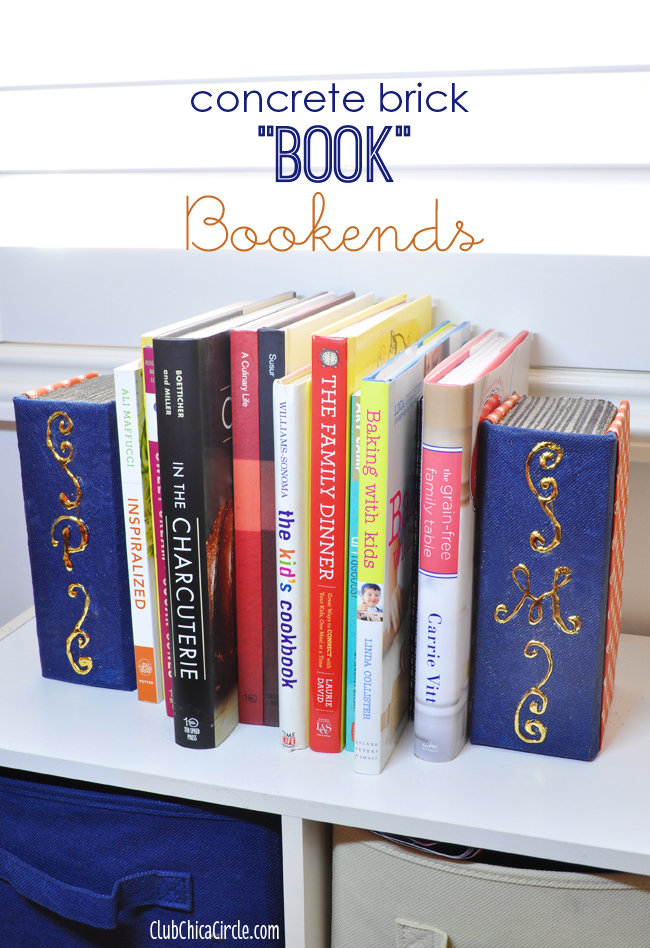
Today’s DIY craft idea is part upcycling, part home decor and 100% cool and functional.these custom bookends started as simple concrete bricks that I bought at my local Home Depot hardware store. I recently bought some single bricks before the Halloween holiday to make these cute concrete pumpkins. I had a few extra that I didn’t turn into jack-o-lanterns, and decided to turn them into books instead.
Yep, books—at least for show, that is. These concrete bricks are the perfect weight for bookends. I just needed to dress them up so they didn’t look like concrete bricks.
To make my concrete brick bookends I used:
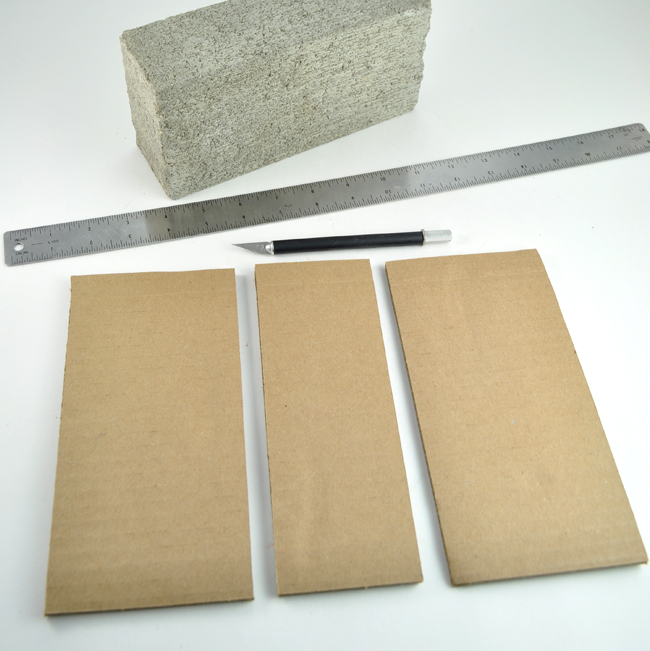
- 2″ x 4″ x 8″ concrete bricks
- cardboard
- fabric
- decoupage
- permanent marker
- ruler
- sponge brush
- X-Acto knife
- Glue gun
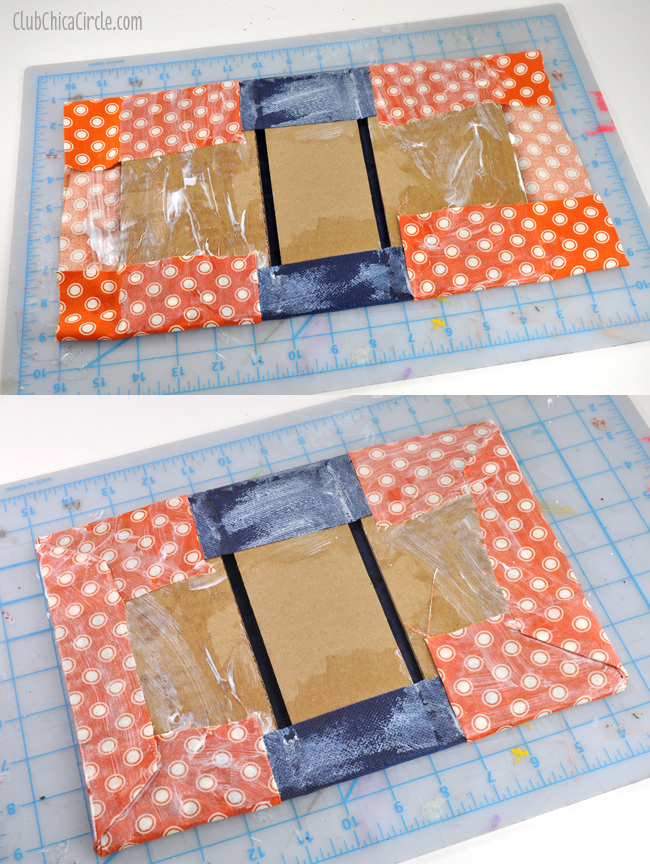
My brick was going to be the “pages” in my book, so I needed to create a pretty book cover. I cut three pieces of cardboard to size. One for the spine (about 2.5″ x 8″) and two for the front and back cover (about 4″ x 7.75″).
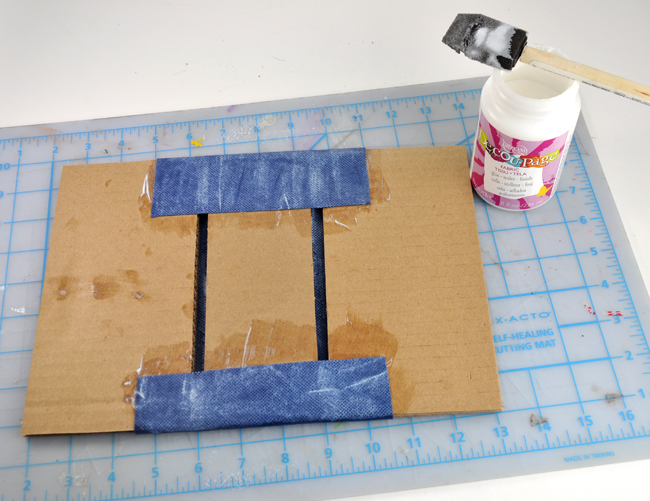
Then I got to work covering my makeshift book cover with fabric.
I cut a piece of pretty navy blue fabric (about 5″ x 11″) for the spine of my “book”. I decoupaged it onto my cardboard pieces, making sure that the cardboard pieces would wrap around and fit nicely around my brick to look like a book cover. This meant that I had to leave about a 1/4″ gap in-between each piece.
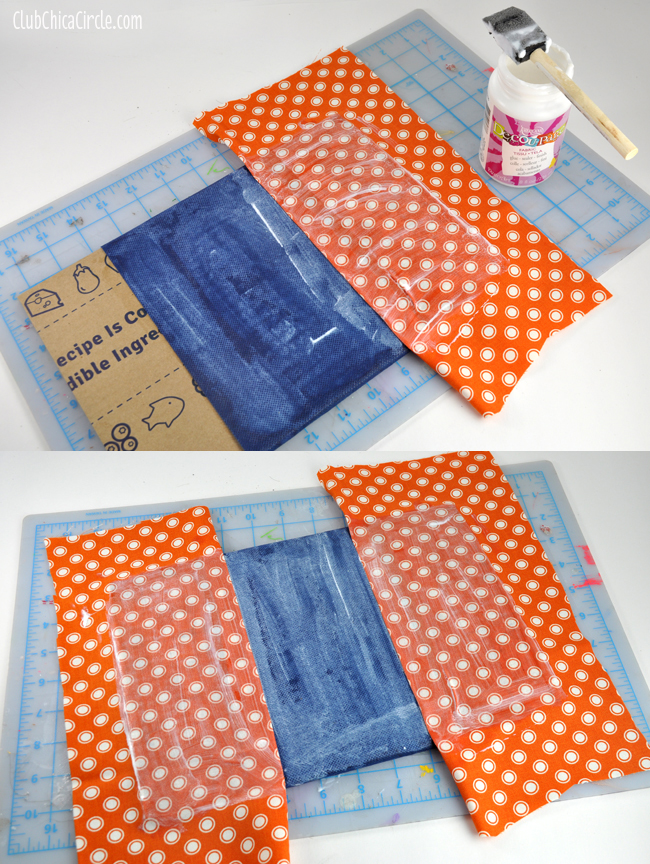
Then for the front and back covers, I cut two pieces of patterned fabric (about 6″ x 11″ each).
I decoupaged those onto the either side of the center spine, folding over one side to create a finished edge on my fake book cover.
I decoupaged the pieces on front and back.
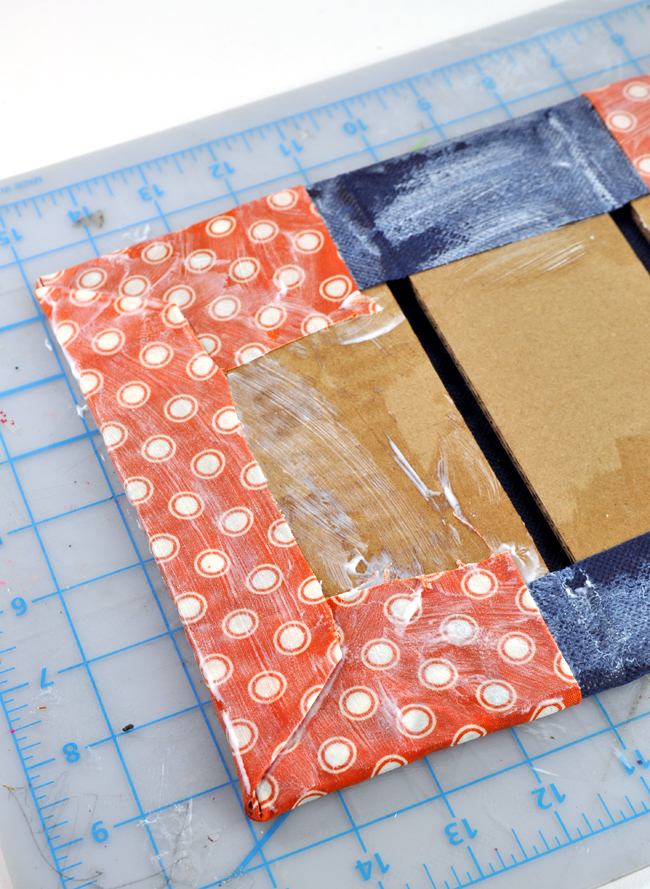
Then it was a matter of making nice corners and securing with more decoupage. It is just like wrapping a present.
Yes the decoupage part is messy, and because of that I made sure to decoupage on a surface that I could easily clean up and that my book cover wouldn’t adhere to. Decoupage will clean up easily with soap and water. Don’t be afraid to get your hands messy to smooth out the fabric and create your neat corners.
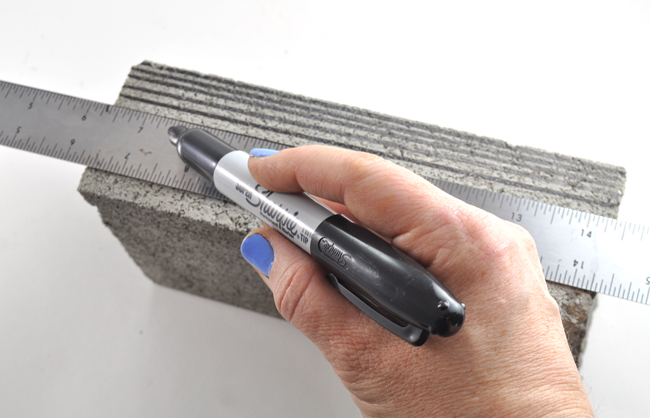
While my covers were drying, I drew lines along the side and top and bottom using a ruler and a Sharpie.
This gave the illusion of book pages.
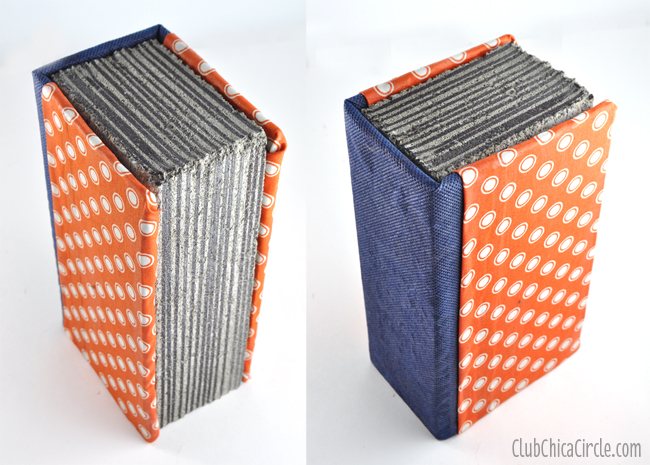
Once my book covers were dry, I wrapped them around my brick and secured them with glue from my glue gun.
Now, they look great just like this, but I wanted to add a little personalization, and test out a new craft product. I found Deco Foil at a trade show last year, and thought this would be the perfect craft test for it.
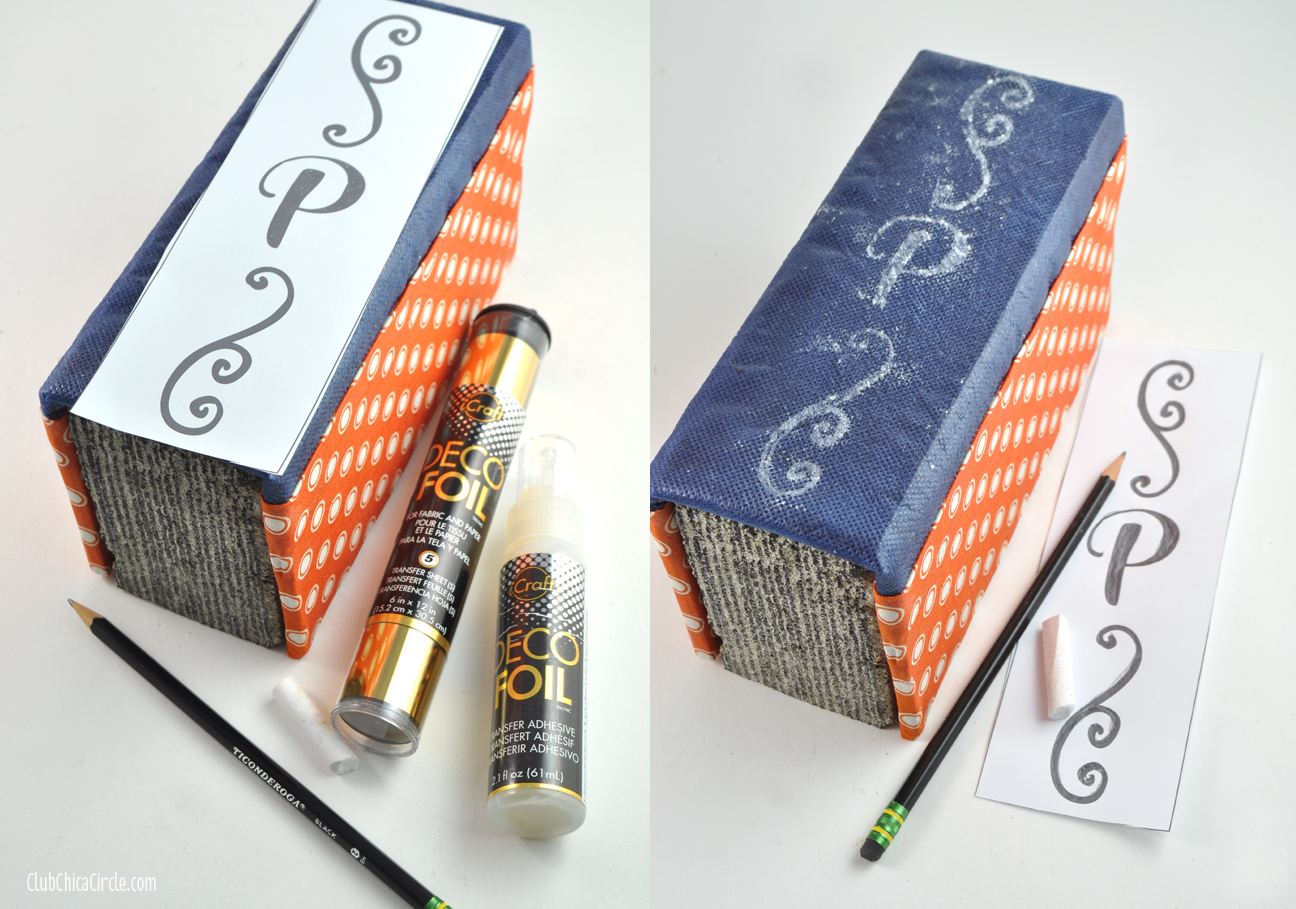
First I created a spine design and printed it out on from my computer. Then I used this easy transfer process where you apply chalk to the back of your template paper, and draw over your design with a pencil. The pressure from your pencil lines adheres the chalk to your surface.
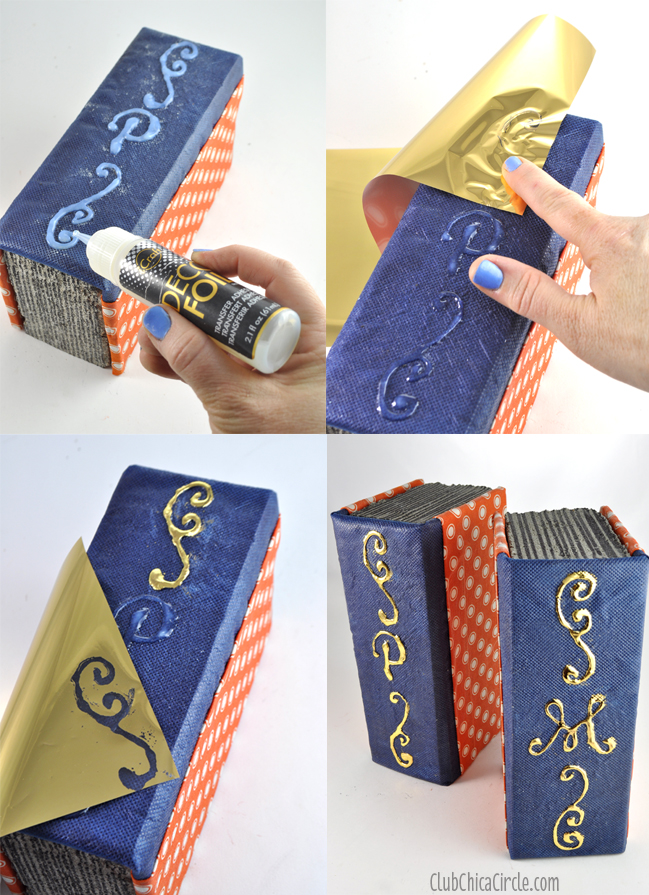
Then I used my chalk lines as a guide to apply the first step of the Deco Foil process, which was to apply the transfer adhesive on my surface. Just like decoupage, It goes on milky white but dries clear. You will know it is time for the second part of the process when the transfer adhesive is clear.
To complete my design, I took a sheet of the gold Deco Foil and simply pressed it onto the adhesive. Using just the pressure of my finger, the gold foil stuck to my design and what remained was a really pretty 3-D gold design.
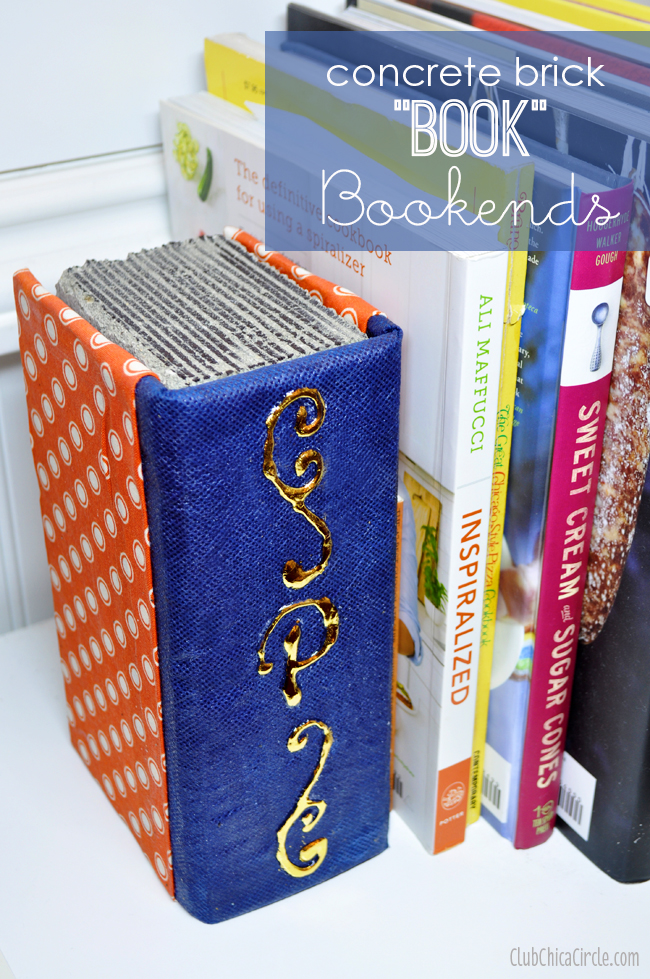
I absolutely love how they turned out!
And just think about the possibilities. So functional and pretty! You can make your own, pick our your own fabric choices and easily match your own home decor color scheme.
These “book” bookends are the perfect way to display and keep organized my favorite set of cookbooks.

