I don’t know about you, but there have been some really special teachers in my daughter’s life that I know have made a huge impact on the student she is today.
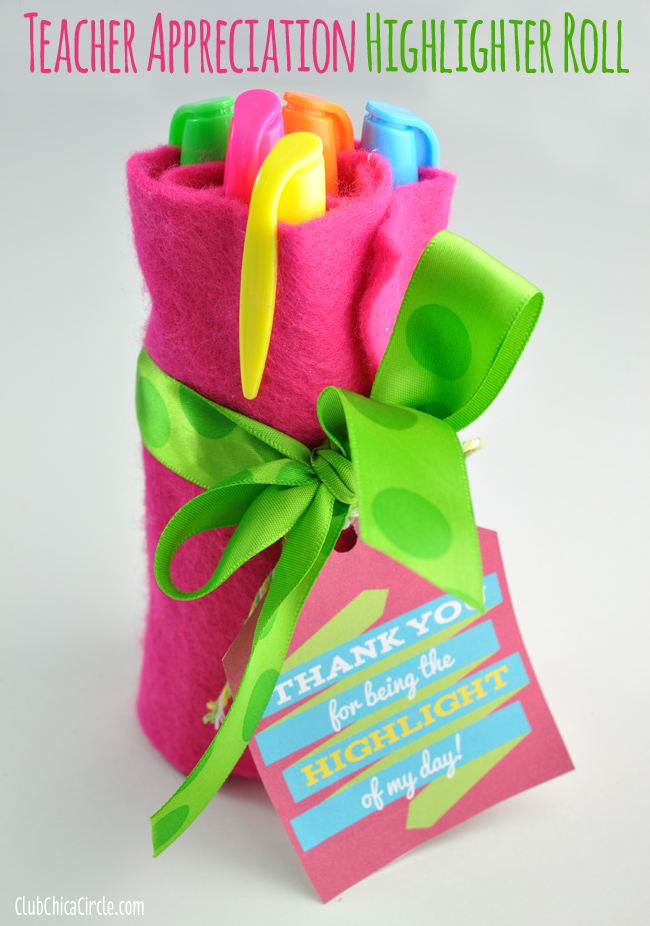
Teacher Appreciation week is coming up at the beginning of May, but I don’t think it’s ever a bad time to show true appreciation to a special teacher. I know about this time of year, school supplies are usually running low, and this craft idea caters to something that every teacher usually uses—highlighters.
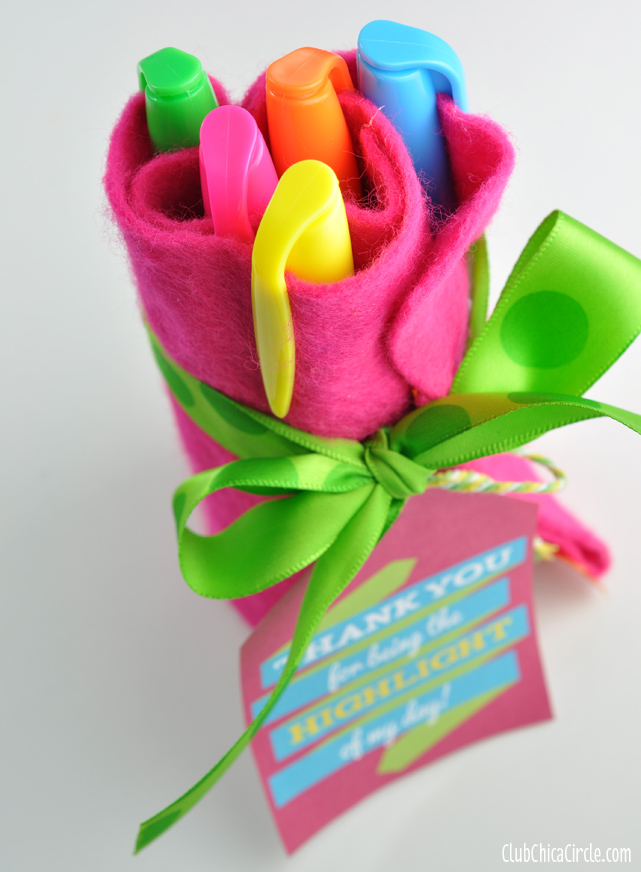
I’ve created a simple decorative highlighter roll that not only keeps them organized, but is also a pretty package.
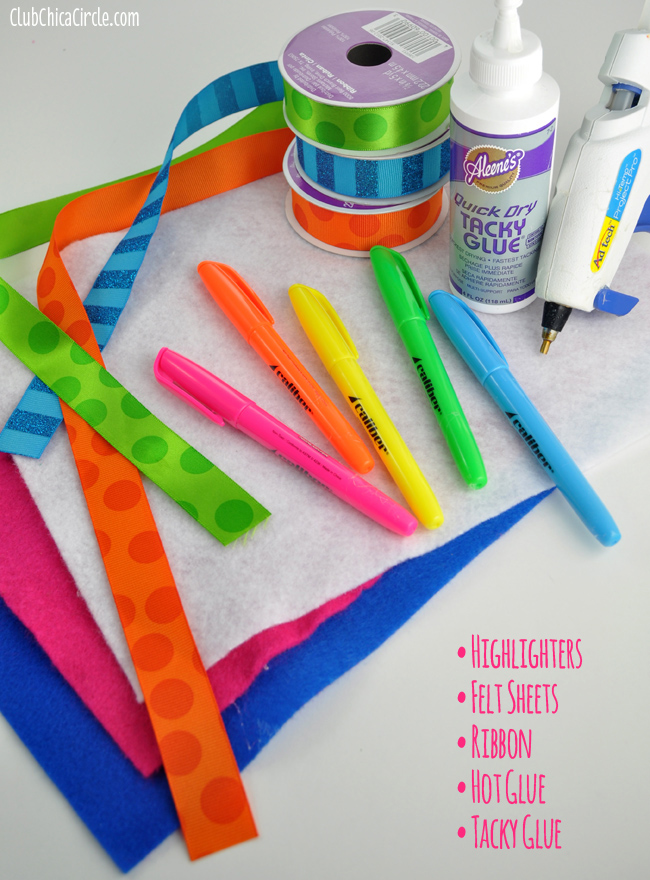
All you need are:
- Highlighters
- 9″ x 12″ sheets of felt
- Glue gun
- Decorative ribbon
- Tacky Glue
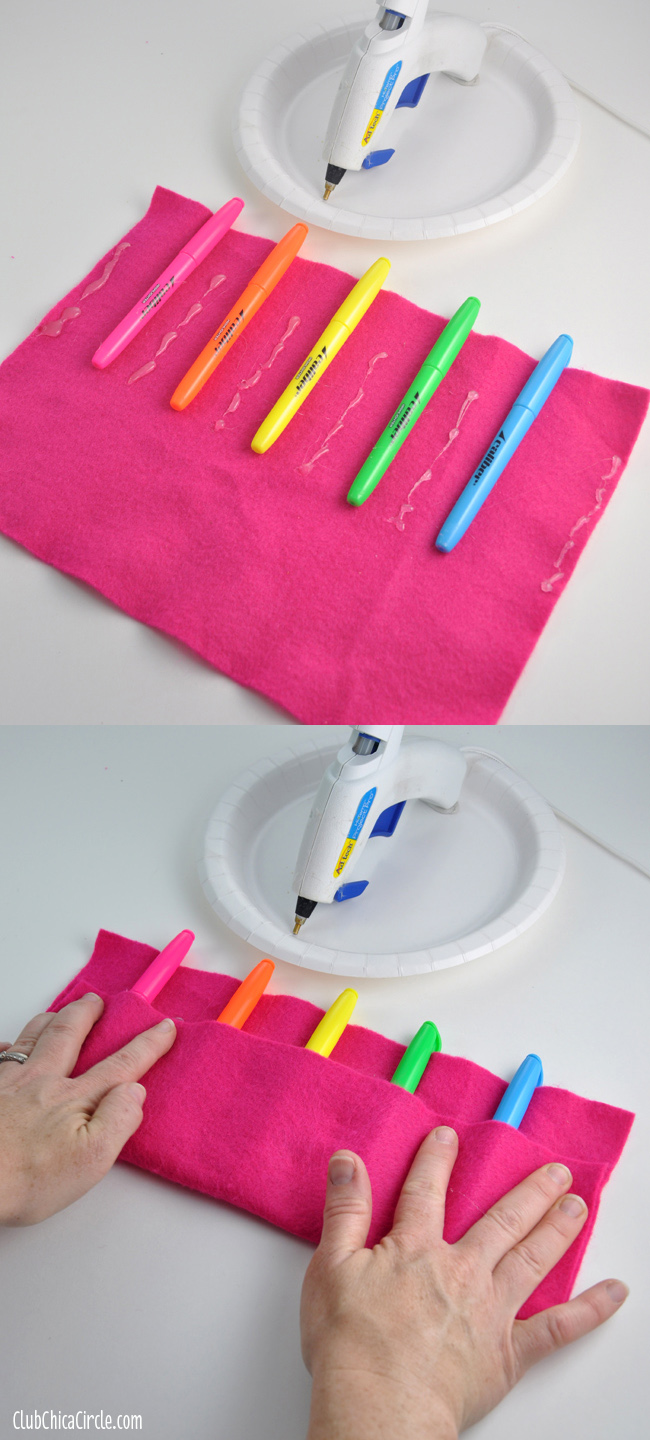
Start by lining your highlighters along the top of the horizontal part of your felt sheet. Space them out evenly in the center leaving space on either side of each highlighter pen.
Fold the bottom edge up on top to see how how it will reach, and apply stripes of hot glue in between each marker and along the edge ending at the bottom of each.
While the glue is still hot, start with the outer edges and work your fingers in to secure the felt on top creating highlighter pen sleeves.
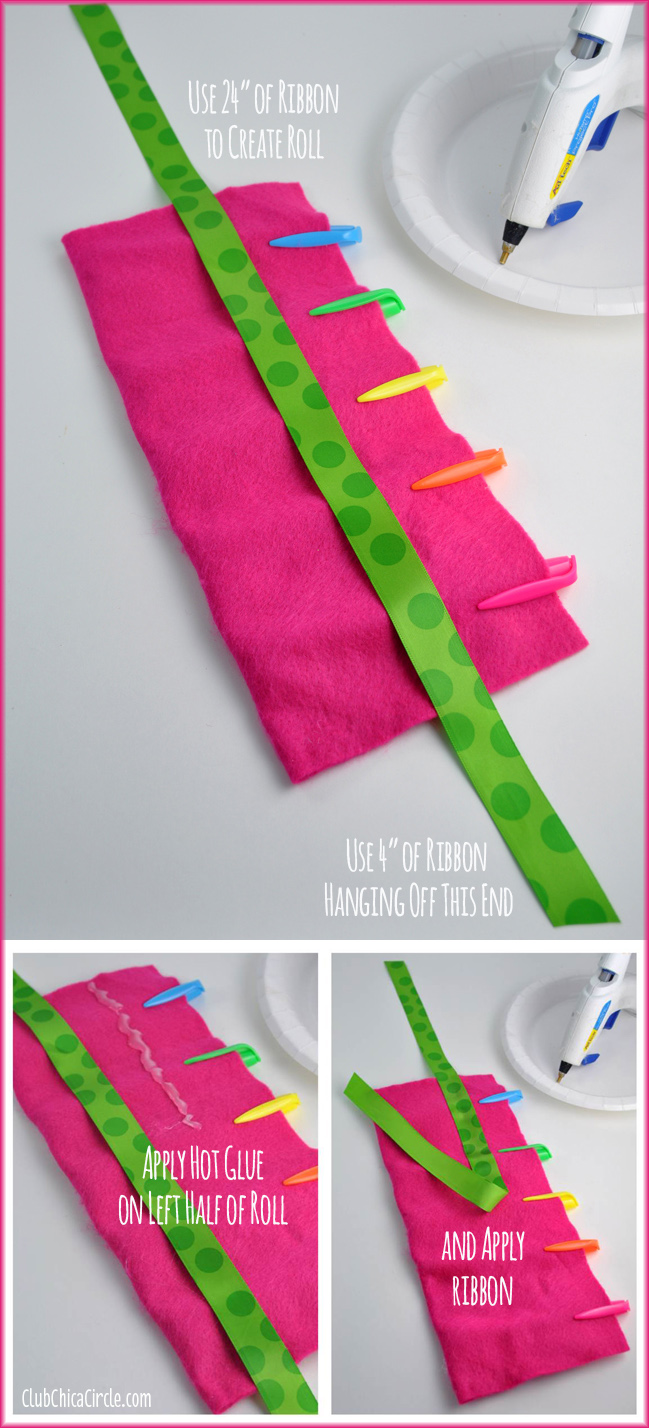
To create the roll closure, cut a length of ribbon about 24″ in length. Line the ribbon along the back of your newly created highlighter pen sleeve leaving 4″ hanging off the right side and the longer end hanging off the left. I placed my ribbon about 2/3 of the way up from the bottom of the sleeve.
Now, slide your ribbon down slightly and add a stripe of glue from the left edge of the felt stopping in the center. Once again, while the glue is hot, attach the ribbon onto to the back and rub with your fingers to secure.
Flip the sleeve back over and now you can add some ribbon decoration on the front. How much is up to you.
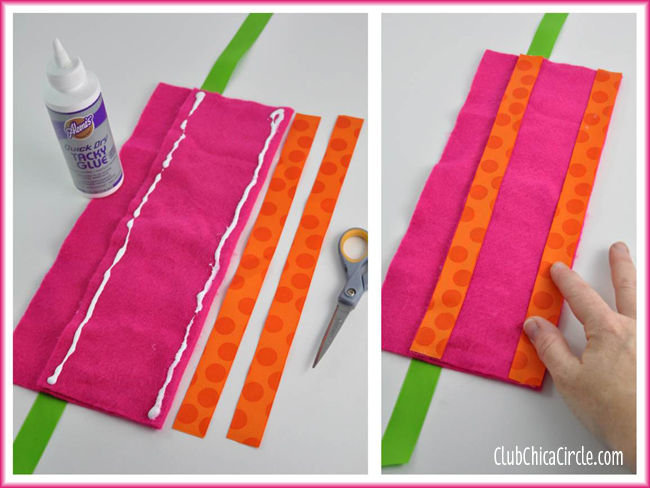
I cut two lengths of ribbon the same size as my felt roll and applied two stripes of tacky glue along the top and bottom edges.
Then I used my fingers to rub the ribbon stripes on top to secure. The tacky glue takes a little longer than the glue gun stripes, so I set the sleeves aside for a little bit to dry. But your roll is basically complete at this point.
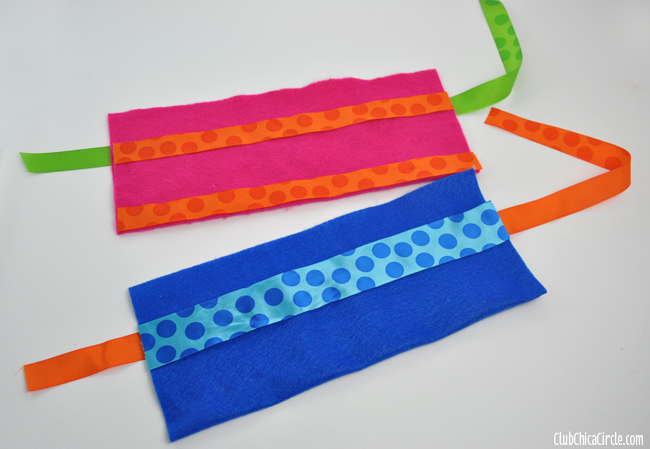
Put as many decorative ribbon stripes on the front as desired.
While the highlighter sleeves are drying, grab your Highlighter Teacher Appreciation Free Printable here.
Download and print off the tags, cut them out and punch a hole at the top. I designed four different color choices to choose from.
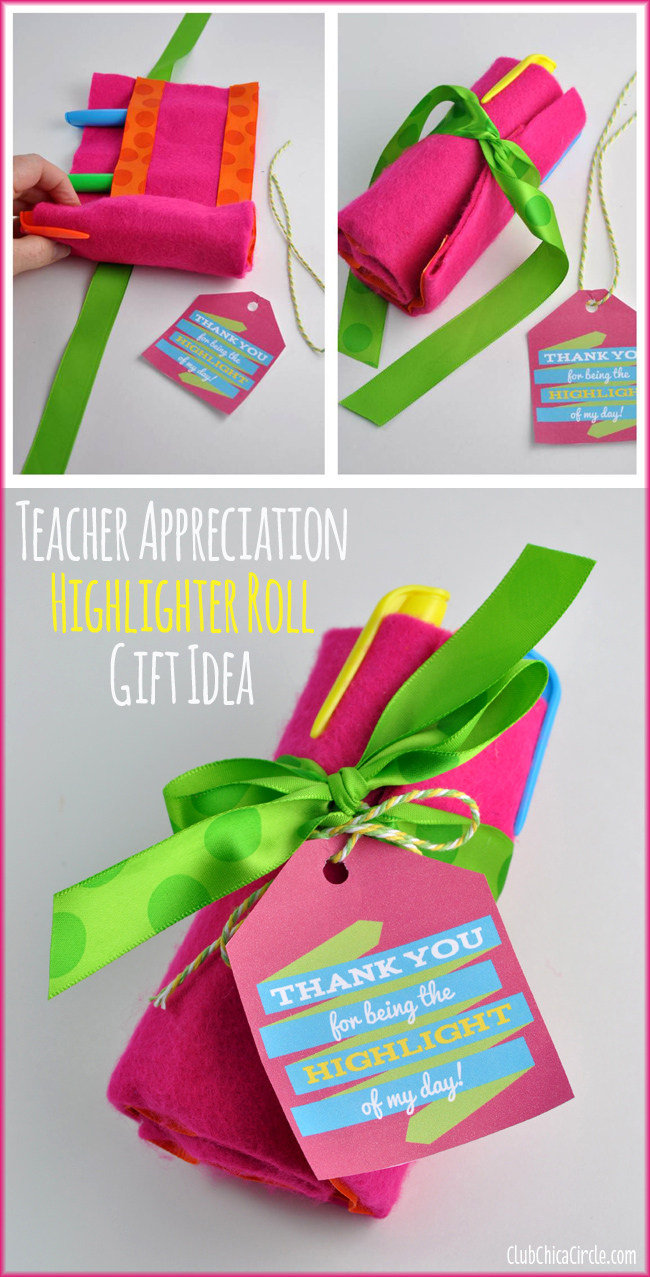
Now, this is where the magic “roll” comes in. Load the sleeve back up with your highlighters, and start rolling up your sleeve now from the left edge. Keep going until the outer ribbons meet and you can tie them into a bow.
Add your cute gift tag and it is ready to give to that special teacher.
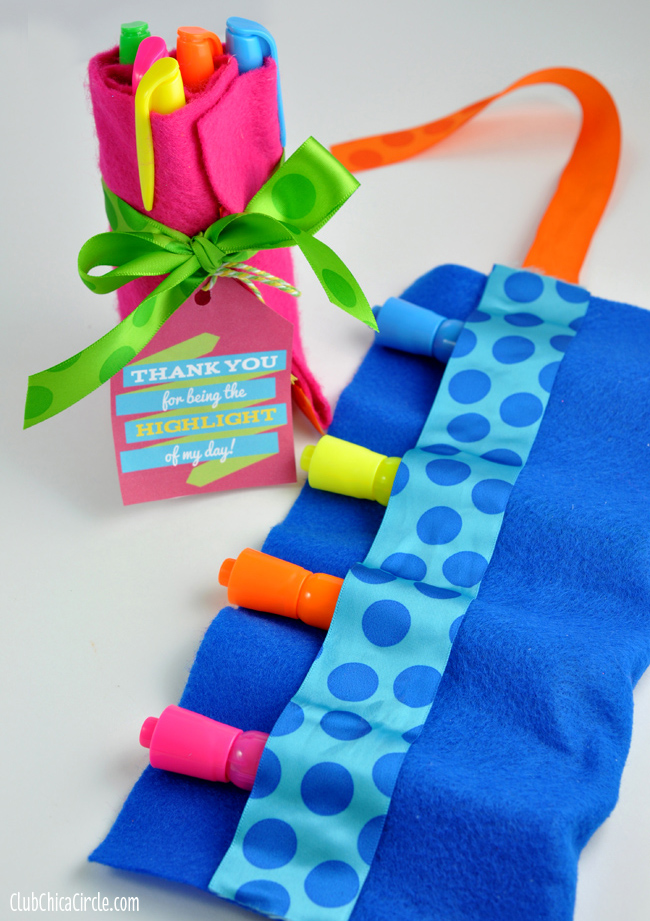
You can modify how many highlighter sleeves you need, depending on the highlighter set you have. For instance, the blue one I made I modified to fit 4 thicker pens.
So cute!
I love the colors and how the highlighter rolls turned out. I had to make an extra one for my daughter already, that she has packed into her backpack for school!
And, to boot, this craft can be done in under 15 minutes! How’s that for a simple homemade gift idea?! Talk about Craft Lightning! = )
Check out more Teacher Appreciation Craft Lightning ideas by clicking on the graphic below.
Happy crafting!
If you liked this post, and want more, you can subscribe to be on our mailing list here, and make sure to get your Free Cupcake Toppers Printables for Every Occasion.
Feeling social? Follow ChicaCircle on Facebook or Twitter, and follow me on Pinterest or Instagram.



5 comments for “Teacher Appreciation Highlighter Roll Gift Idea”