I recently stumbled on a crafty site called the Tinkerlab. I was inspired to take their Paper Bag Challenge, and wanted to share my paper bag project DIY with all of you! One of my favorite things about crafting is reinventing something ordinary (like a paper bag) into something fabulous (like a painted rose bouquet). Check out the paper bag challenge Pinterest board and be inspired by other’s creations, or decide to take the challenge yourself, and post your own paper bag crafts. Oh, and by all means repin my paper bag creation and vote for me to win the contest prize!
This paper bag painted rose bouquet would make a great home decoration, or crafty homemade gift, especially with Valentines Day coming up. Real roses die, these beautifully painted ones won’t. And the best thing is, they are super simple to make! You and your tween will have a blast creating your own painted paper bag rose bouquet. There really isn’t a way to mess this one up, all you need is a desire to paint, cut, and glue.
Here is what you will need:
- 2 grocery size paper bags
- various colors of paint (I used acrylic, but tempura would just fine too)
- paintbrush
- scissors
- glue gun
- green pipe cleaners
Here is how to make your own paper bag painted rose bouquet:
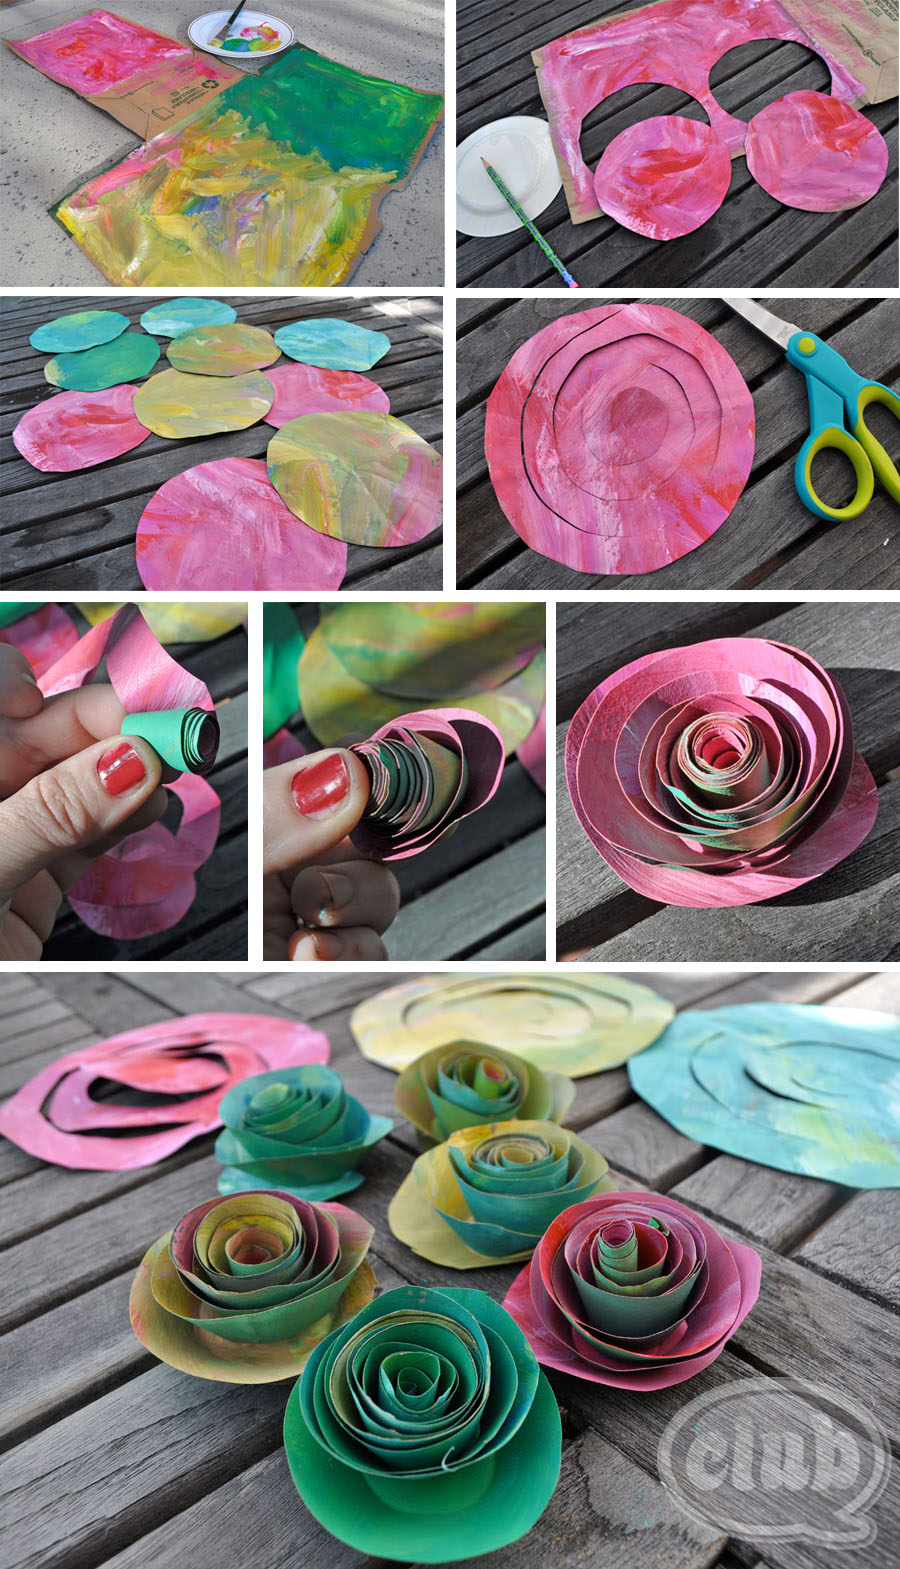
- Start by making the roses. First prep one paper bag, by cutting two slits down the side of the front of the bag and opening up so that it lays flat. It should look like a big “T” shape. Paint one side of the bag in a variety of colors. By all means, mix colors to get a painterly effect. For me, this was my favorite parts, because I love to paint, and there is no wrong way to paint color on the bag. I didn’t paint the bottom of the bag because when it comes to cutting out pieces for the roses and folding, the creases will make it a little too hard. Let dry and then paint the other side. Here is the cool thing, paint the other side a different color than the front to get a cool effect. Let dry again.
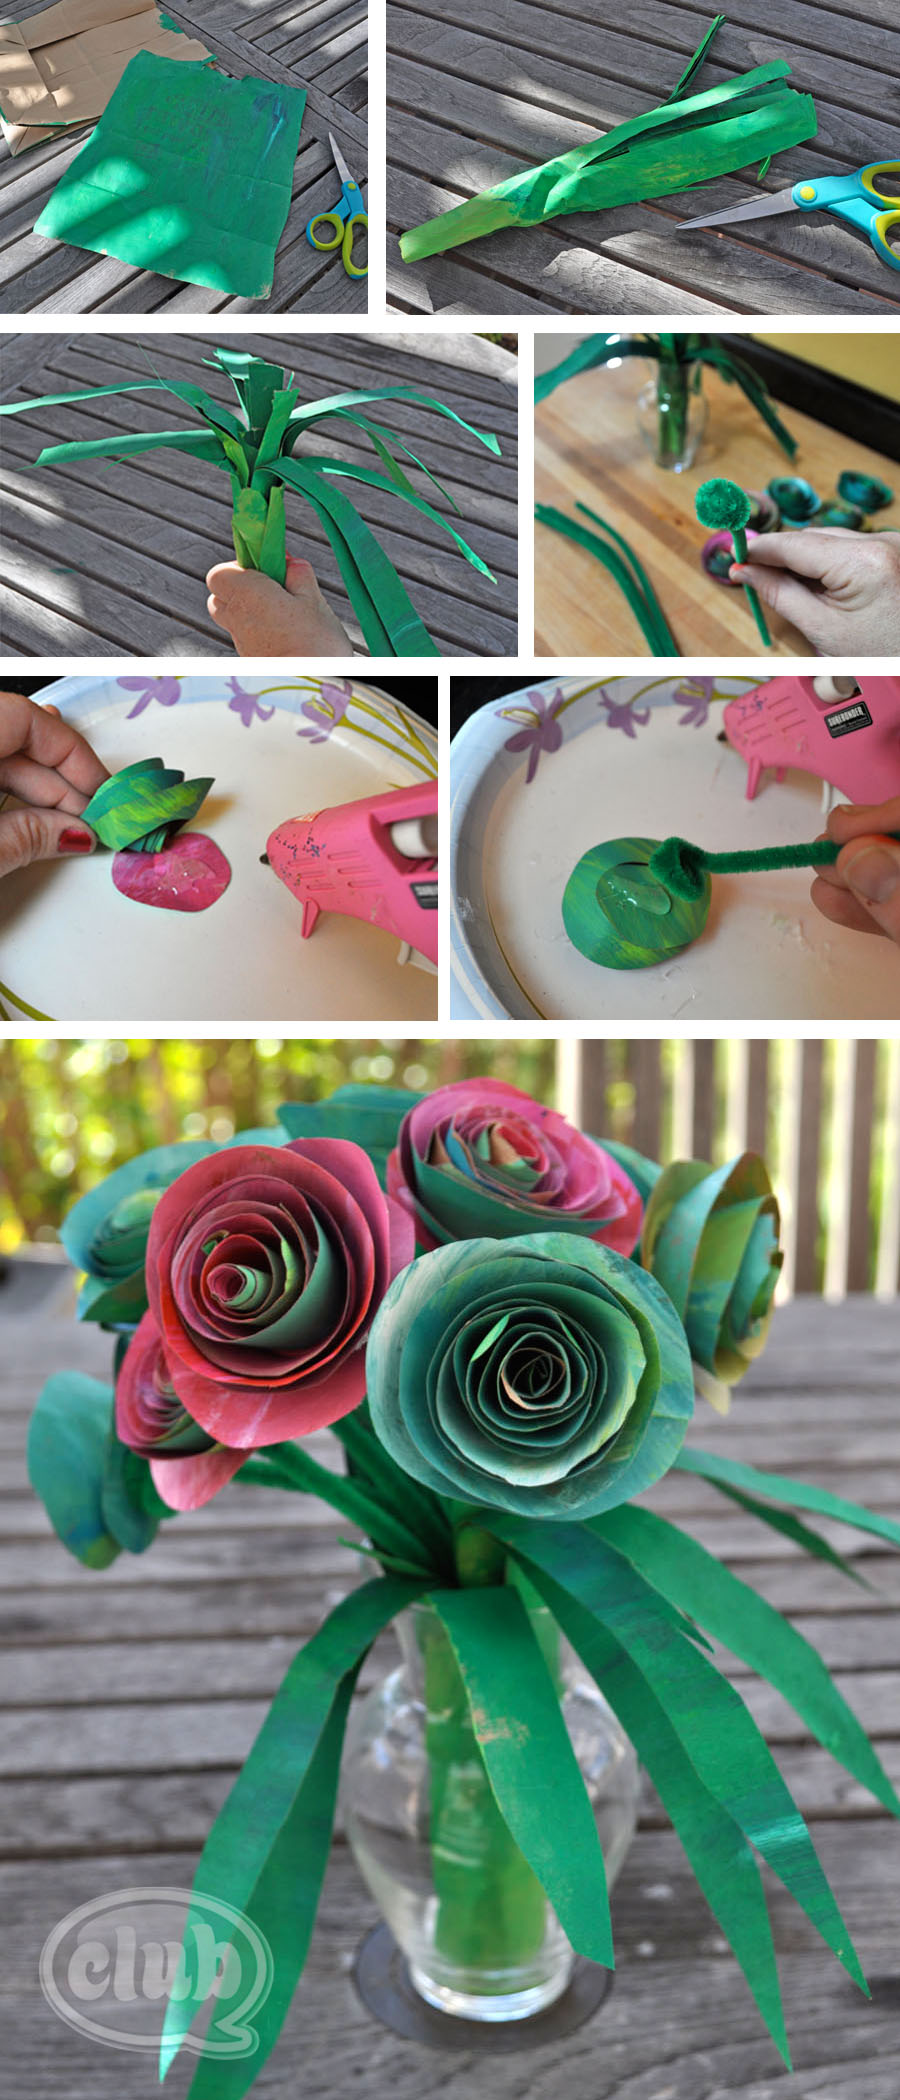
- On the second paper bag, cut out one front piece and paint both sides a variety of greens, letting one side dry at a time just like the paper bag for the roses. This will eventually become your leaves for the bouquet.
- Cut out circles from bag on painted parts about 6″ diameter. I used a small paper plate as a guide. Don’t worry, the circles don’t have to be perfect. I was able to get 9 circles cut out from one large grocery bag.
- Now you need to cut a spiral shape out of the circles. Starting from the outer edge, work your way around in a spiral with your scissors keeping about a 3/4″ width. Once you get close to the center, stop until you leave about a 1 -1/2″ circle.
- It’s time to wind your roses into shape. Starting from the outer edge again, start wrapping the spiral into a tightly wound cylinder until you get the center again. Then place on the table and let it unwind to create a beautiful rose shape. Continue with the rest of your circles to make as many roses as you would like in your bouquet.
- With a heated up glue gun, squirt a little glue in the center of the wrapped rose circle on the inside and press the spiral petals into the glue to secure. Voilá! You have just made a paper rose. Continue with the rest of the paper rosebuds.
- Now, it’s time to make the leaves for the bouquet. With your green painted paper bag front, roll into a cylinder along the shorter side. Then with your scissors, cut slits along the side about 2/3 of the way down. Place in a small vase and let it fan out. Touch up the leaves by cutting the slits into pointed leaf shapes.
- To finish up your flowers, it is time to make the stems with green pipe cleaners. Twist one end of the pipe cleaner into a small spiral. With your glue gun again, now glue the bottom of the paper rose onto the spiral end of the pipe cleaner. Place in the center of the paper leaf stems, and continue with the rest of the roses. The cylinder center of the paper leaves with help hold the pipe cleaners upright and help make a beautiful bouquet arrangement.
Now, wrap a ribbon around the vase and gift it to someone – makes a great homemade gift! Or keep for yourself and enjoy your beautifully upcycled paper bag bouquet. No one will ever guess that it started from a simple, ordinary paper bag.
If you liked this post, and want more, you can subscribe to be on our mailing list here.


14 comments for “Upcycled Paper Bag Painted Rose Bouquet”