A little insight on why my co-blogging relationship works so well with my older sister. We have a bit of a ying and yang when working together. I’m the crafty maven of the site, while she still needs a little help managing a glue gun. I love my creative messes, while she loves organizing. I love to make my to do lists on scratches of paper, and she keeps it all organized in her favorite to do list app. In the end, it works. = )
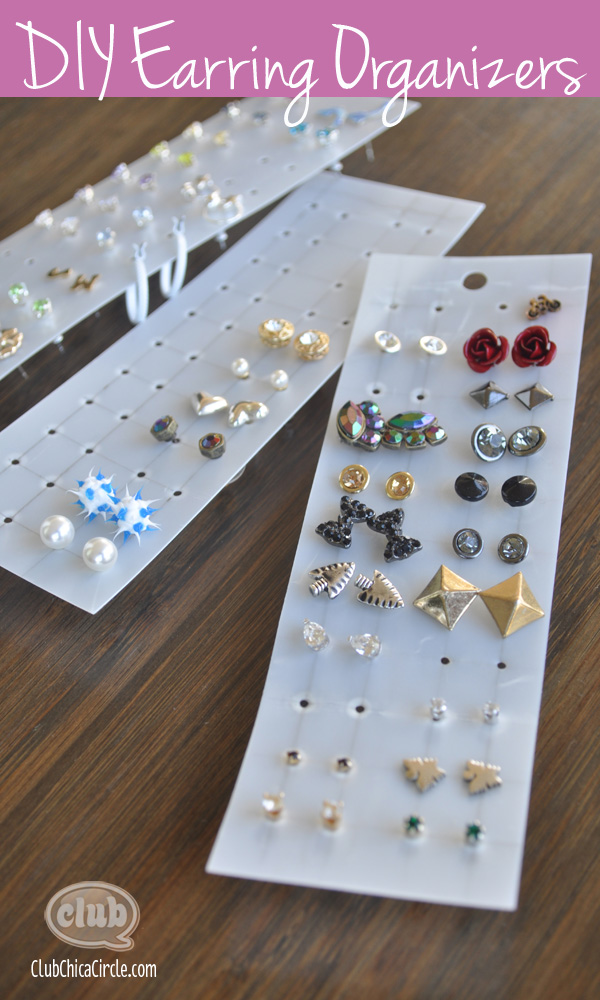
After staying with her and her family during Spring break, I had to share how her crafty tween daughter organizes her many sets of earrings. She is just like her mother, and loves to keep her room and things really organized. I have to give credit to the fabulous Grandma Rosie for this creative organization idea. She made these cool plastic organizers for my niece’s many earrings, and I knew I had to share.
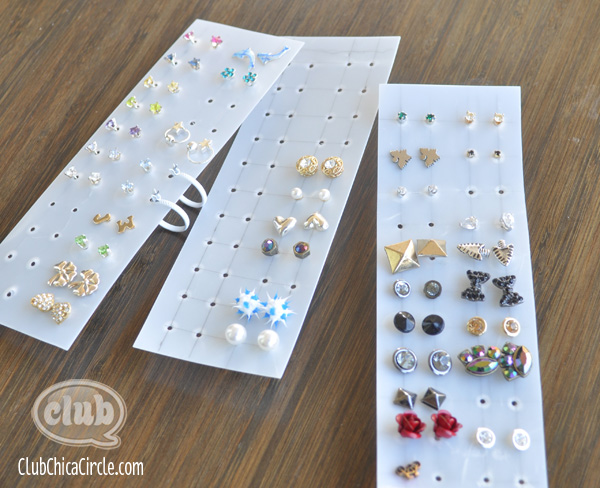
Grandma Rosie cut out long rectangles from what she calls “template plastic“. She has thick vellum sheets that she uses for her quilting patterns. I saw it, and thought it was an ingenious way to organize the many sets of earrings a tween girl can own.
I didn’t have template plastic on hand, but I knew I could re-purpose something I did have. You could use a plastic presentation folder and achieve the same thing.
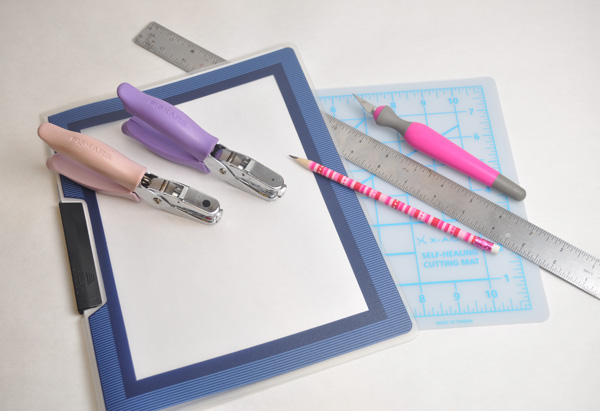
You will also need a small 1/8″ hole paper punch. This is the perfect size to secure your earrings in.
First, measure and cut a rectangle from the plastic cover of a report folder, or template plastic. You can make it as big or small as you want, but to fit two rows of earrings, like above, ours is about 2 1/2″ x 8″.
Then pencil off a grid leaving about 1/2″ between each line. With a small hole punch, punch 2 sets of holes for each pair of earring. You can see in the picture below the penciled in lines. Where they intersected, is where Grandma Rosie punched the holes.
Another crafty tip from Grandma Rosie is to punch a larger hole from a 1/4″ size paper punch at the top of each plastic rectangle. That way you can hang it on a small hook. One of these removable wall hooks would work well on a wall, or these plastic suction cup hooks would work well on a mirror.
So if you are looking for a creative way to organize your earrings, try this easy organizational craft idea. Thanks Grandma for your craftiness!
Happy crafting!
If you liked this post, and want more, you can subscribe to be on our mailing list here.
Feeling social? Follow ChicaCircle on Facebook or Twitter, and follow me on Pinterest or Instagram.


7 comments for “DIY Earring Organizer”