Have you ever barbequed beads before? No, not to eat – but for crafty purposes?
I’ve melted plenty of perler beads with my tween and turned them into cute ornaments or bowls or cupcake decorations, but I have never melted plastic pony beads.
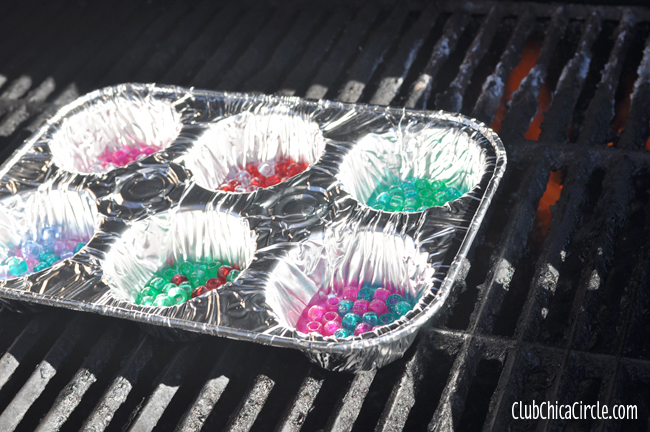
Yep, I said plastic pony beads. After seeing this inspiration from The Artful Parent, I knew I had to try this crafty experiment. I chose to melt these on the our gas grill outside. I did try melting a small batch initially in the oven, but the smell was so strong.
So I cranked our outdoor gas grill for this project – hence “BBQ Beads”. The results were perfect! And because the grill is outside, there is plenty of fresh air for the melted bead fumes. We are unseasonably warm weather in SoCal, that this is a perfect weekend family craft idea.
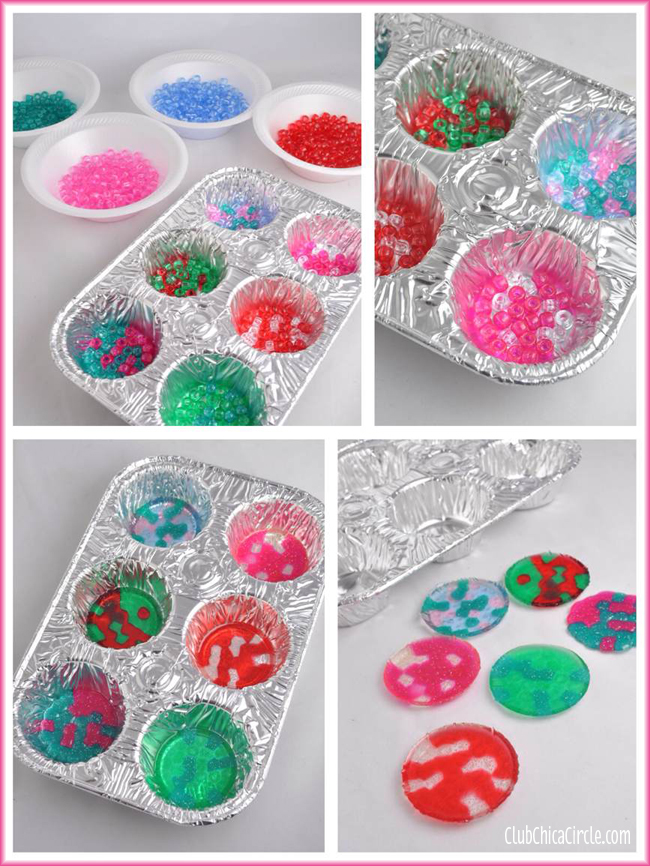
To make these really pretty melted BBQ bead suncatchers, start with translucent colored plastic pony beads.
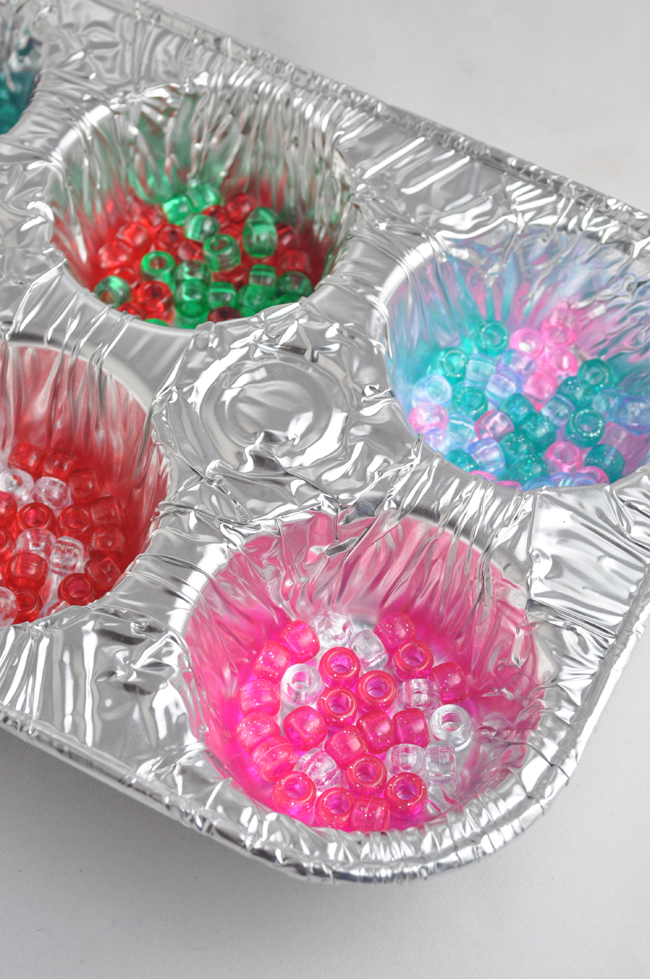
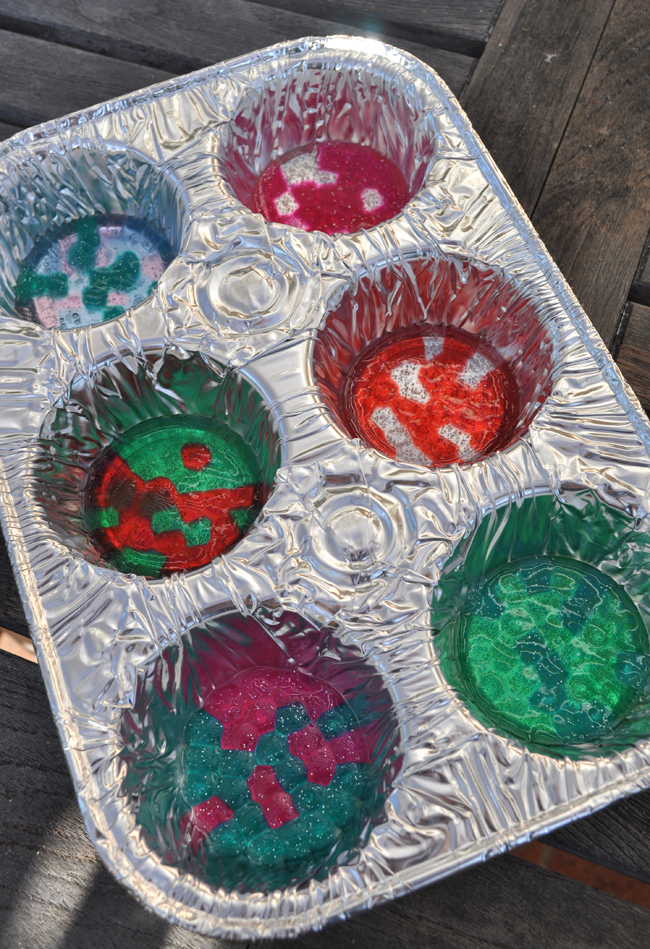
I set bowls of different colored beads out and started with tin foil disposable cupcake tins.
We arranged them in various color patterns, making sure there is one full layer of beads at the bottom of each tin.
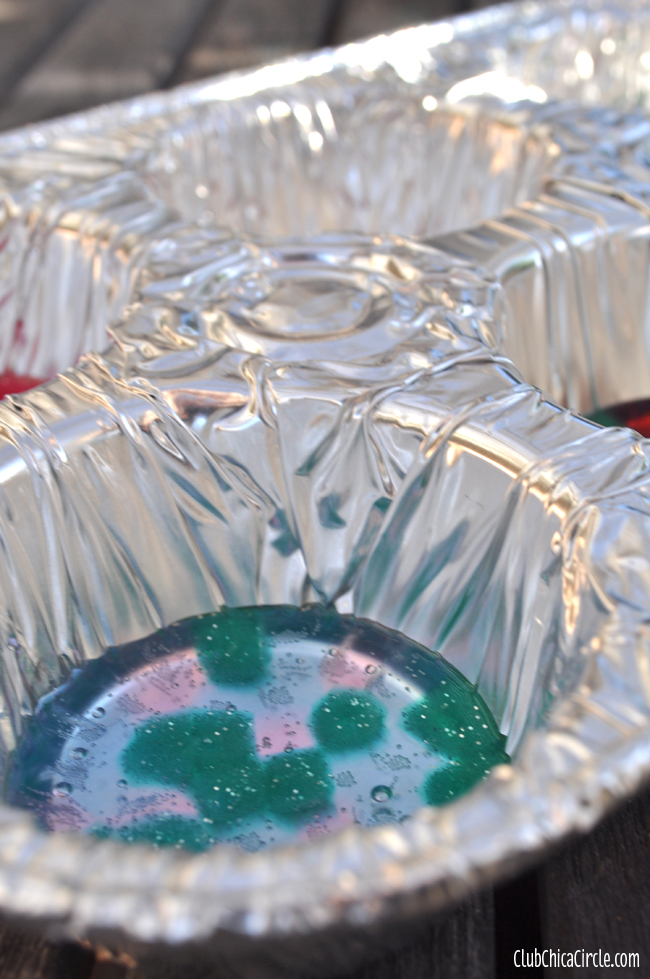
Then after letting them melt in our outdoor gas grill for about 10 minutes, the colored beads all melted together in one beautifully colored layer.
After letting them cool completely, they popped right out leaving fun colored translucent disks.
The colored beads start out looking like cups of colored beads….
…then, onto the grill for a little melting action…
… to create really pretty melted designs.
BE CAREFUL! The tins will be hot! And if the flame of your grill is too high, the pony beads are flammable and will catch on fire.
The melting of the beads on the grill is definitely for adults only. Have your oven mitts ready and pull them off the grill once melted.
I set them outside to cool off. Just as the heat expanded the beads, as they cooled we could hear the crackling of them shrinking slightly and pulling away from tin base.
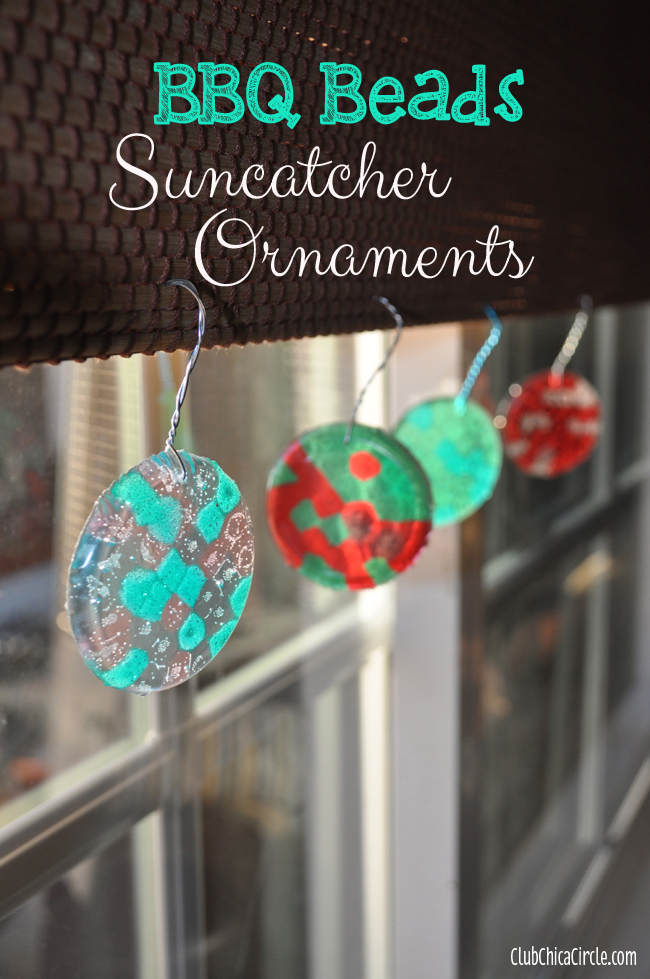
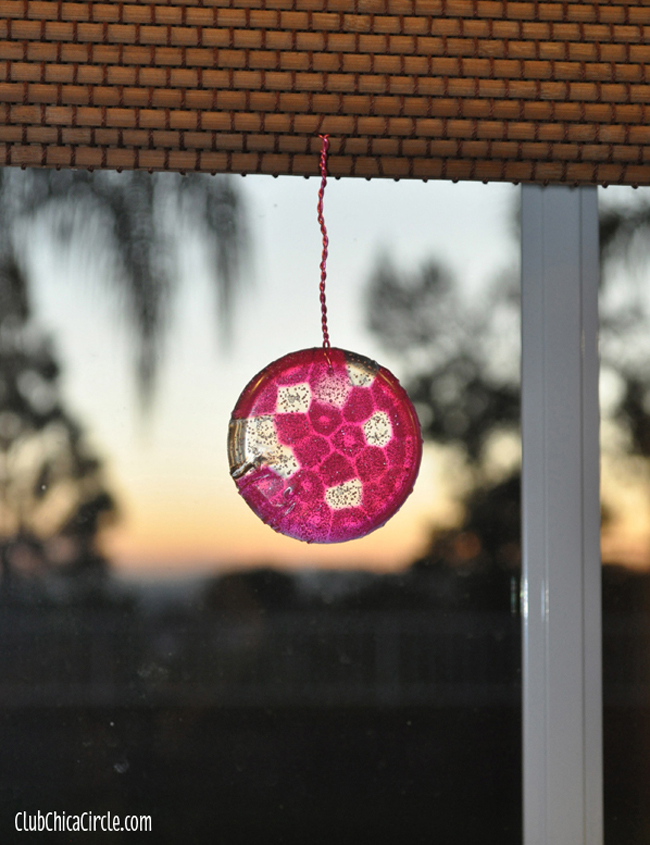
After they were cool, we popped them out and turned them into fun suncatcher ornaments.
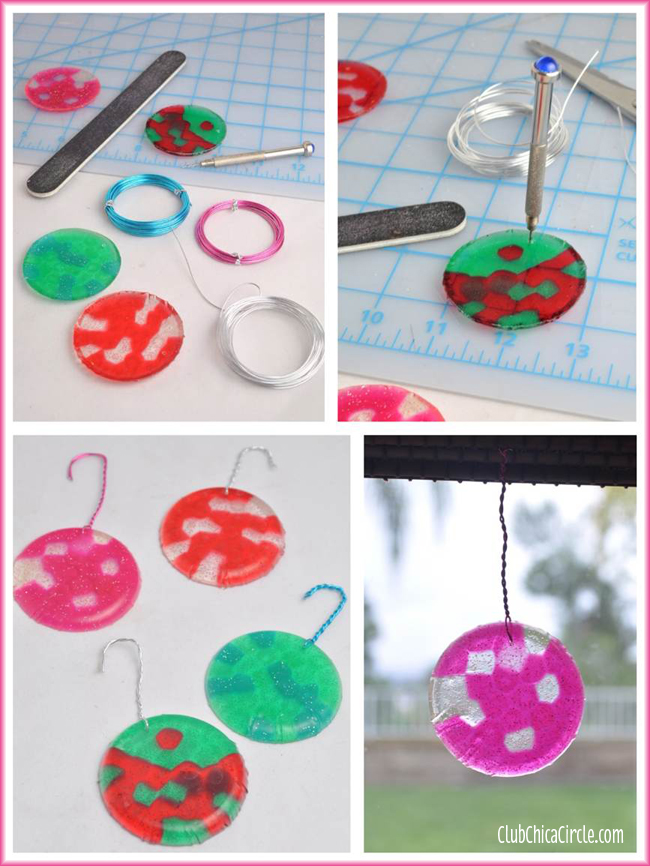
I used my jewelry hand drill, lightweight colored jewelry wire, and a nail file to complete the melted bead ornaments.
After they popped out, some of the edges were a little rough. I sanded the edges lightly with a nail file.
Then I drilled a small hole at the top with my hand drill. I attached a small length of wire through the hole and wound it together to make a hook.
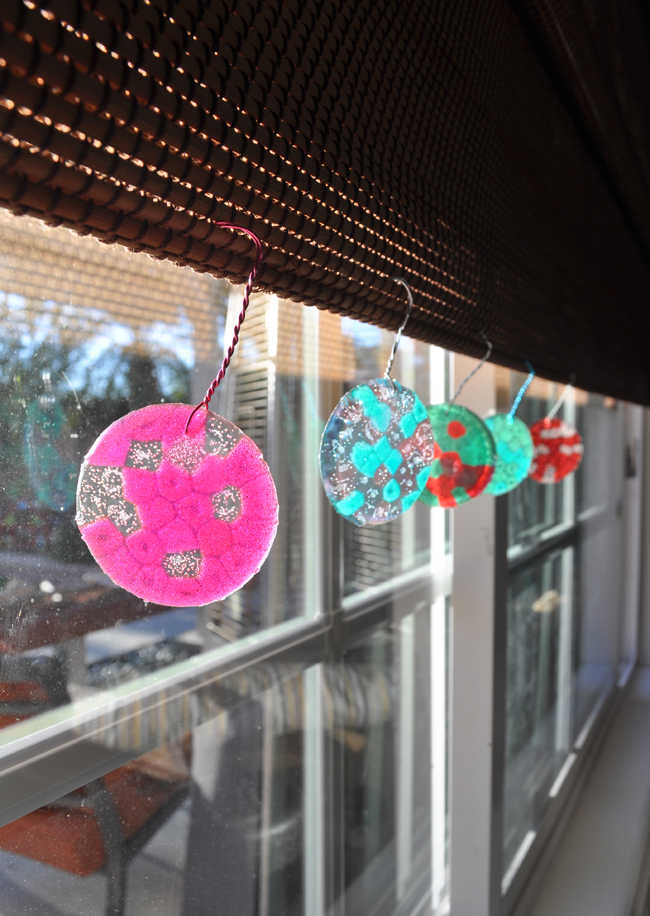
Then it was just a matter of hanging them from our window coverings so that the sun could shine through them.
They look so pretty lined up along the bottom or our shade.
I knew if the smaller cupcake tins works to make these cute ornaments, that a large cake pan would do wonders!
I used the same technique, just with many more beads.
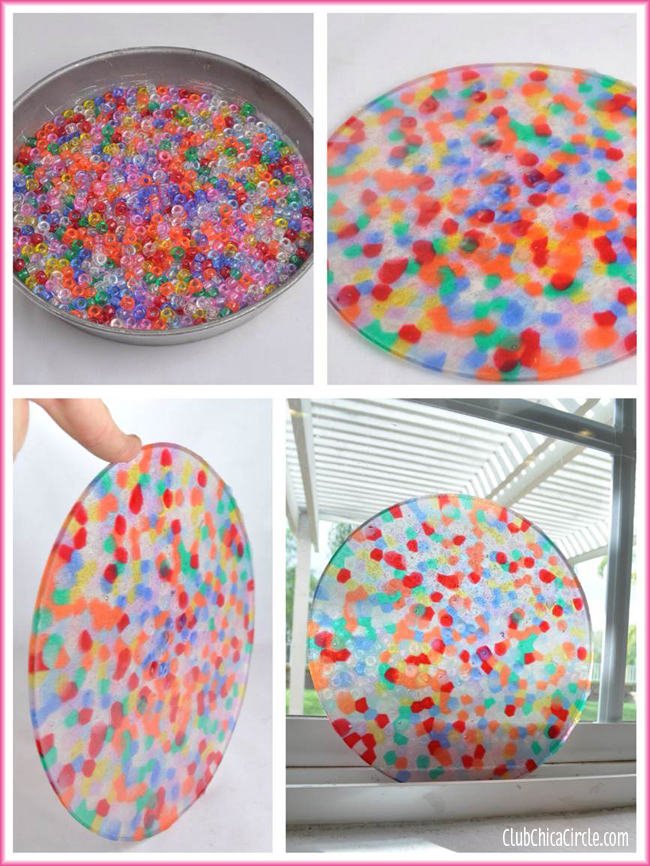
I love how it turned out! So beautiful!
I just rested them against my window for a gorgeous suncatcher!
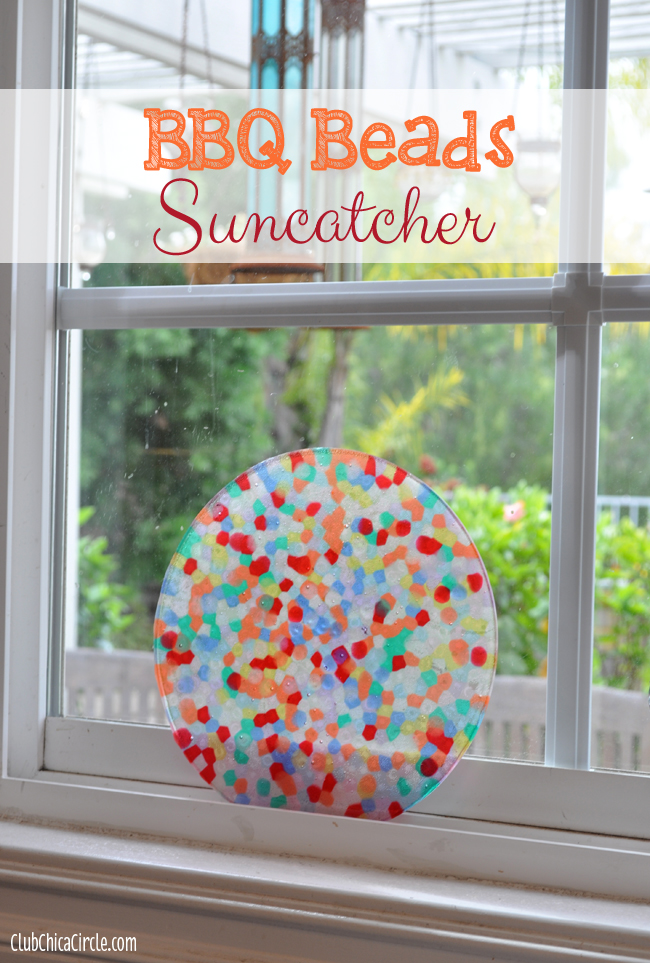
I love how they look in the sunshine and as the sun sets. So pretty!
Enjoy and Happy Crafting!
If you liked this post, and want more, you can subscribe to be on our mailing list here, and make sure to get your free Cupcake Toppers Printables for Every Occasion.
Feeling social? Follow ChicaCircle on Facebook or Twitter, and follow me on Pinterest or Instagram.


7 comments for “BBQ Beads Suncatcher Ornaments”