Santa and Elf Hat Candy Jars

As part of the Make It: Fun Team, this post is sponsored in part by FloraCraft. As always, ALL photographs, ideas, and opinions are my own.

Holiday Candy Jars Homemade Gift Idea #MakeItFunCrafts

I was so excited when I recently a “CONE-acopia” of foam cones in the mail to craft with. FloraCraft® Make it:Fun® Foam Cones come in a variety of sizes, all the way the small 3″ size to the really tall 24″ cone. My first reaction was to make some sort of cool crafty tree… which is still definitely on the craft to-do list… but I saw the little 3″ foam cones as hats!

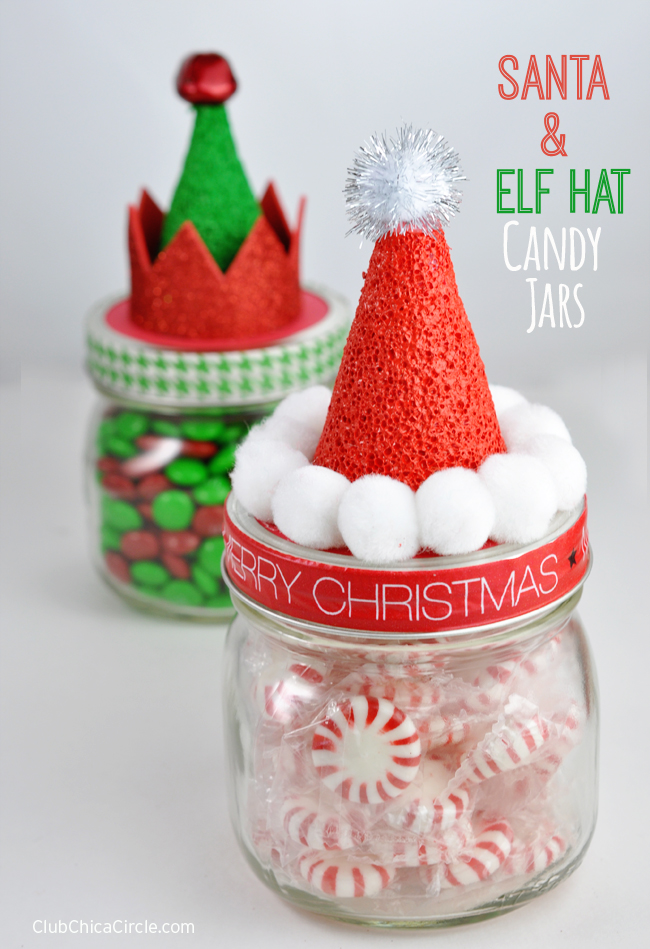
To be exact – Santa hats and cute Elf hats! And when you put them on top of a mason jar, they turn into the cutest Holiday candy jars—perfect for gift giving this season!

Here is what I used to make my Santa and Elf candy mason jars:
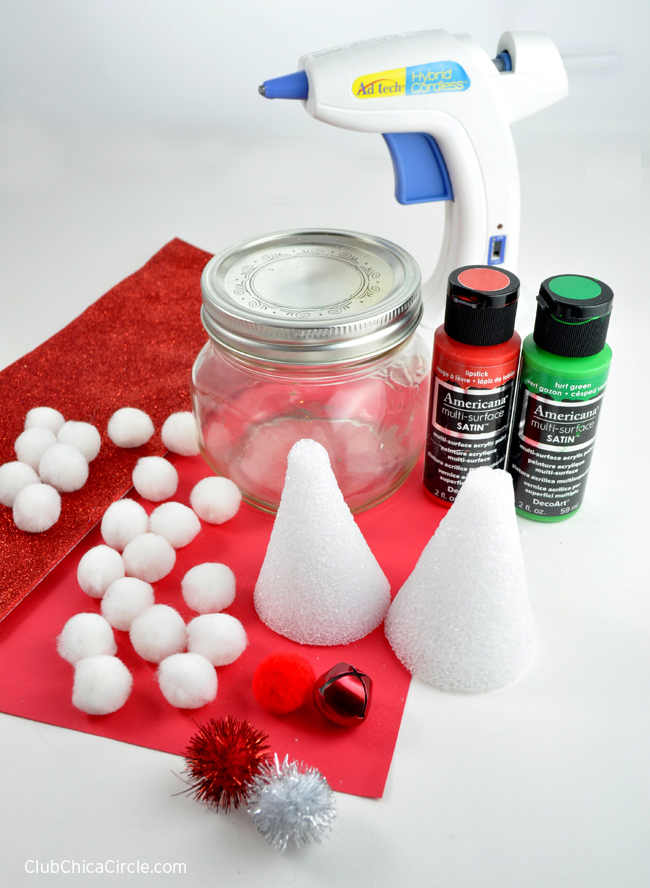
Santa and Elf Hat Candy Jars craft

  • 3″ Foam Cones
  • Red and Green paint (I used Americana® Multi-surface paint in Lipstick Red and Turf Green)
  • Spongebrushes
  • 3/4″ Pom-poms (white or sparkly)
  • Red bell or sparkly pom-pom
  • Red Cardstock Paper
  • Red Glitter Craft Foam
  • Wide Mouth Pint Mason Jars
  • Glue Gun
  • Scissors
  • Washi Tape

I started by painting my cone foams red and green, red for the Santa hat and green for the Elf hats, and let them dry.

Then, using the mason jar lid as a template I traced and cut out circles out of my red cardstock paper and placed in between the outer rim of the mason jar lid and the circle seal. When my painted cones were dry, I glued them in the center on the top of each lid onto the paper.

How to Make Santa and Elf Hat Candy Mason Jars

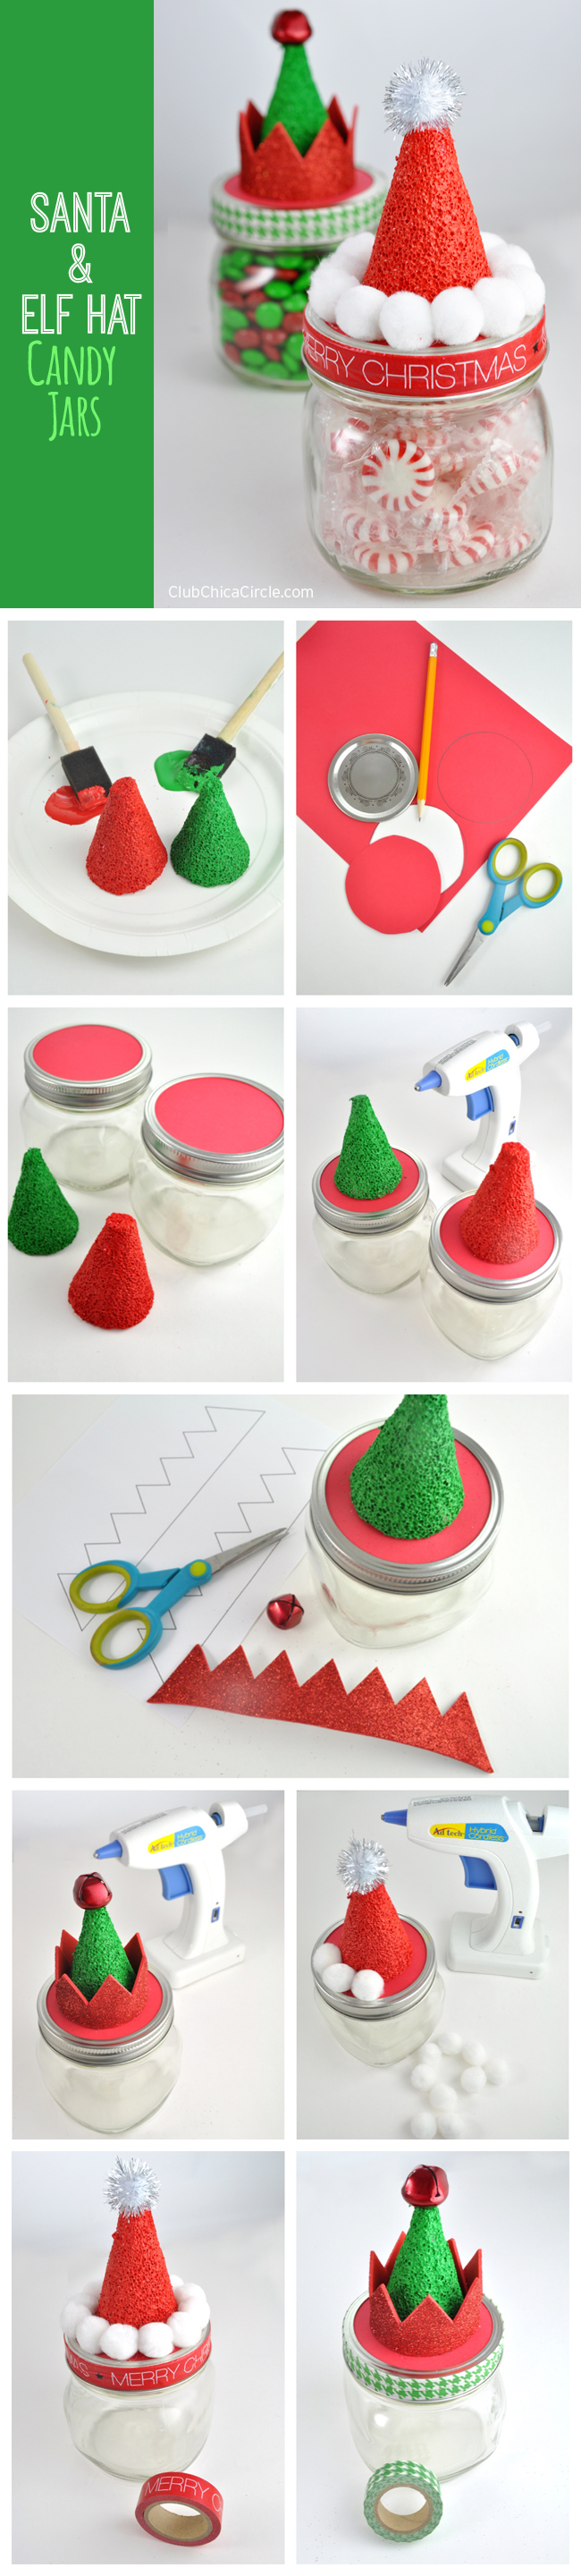
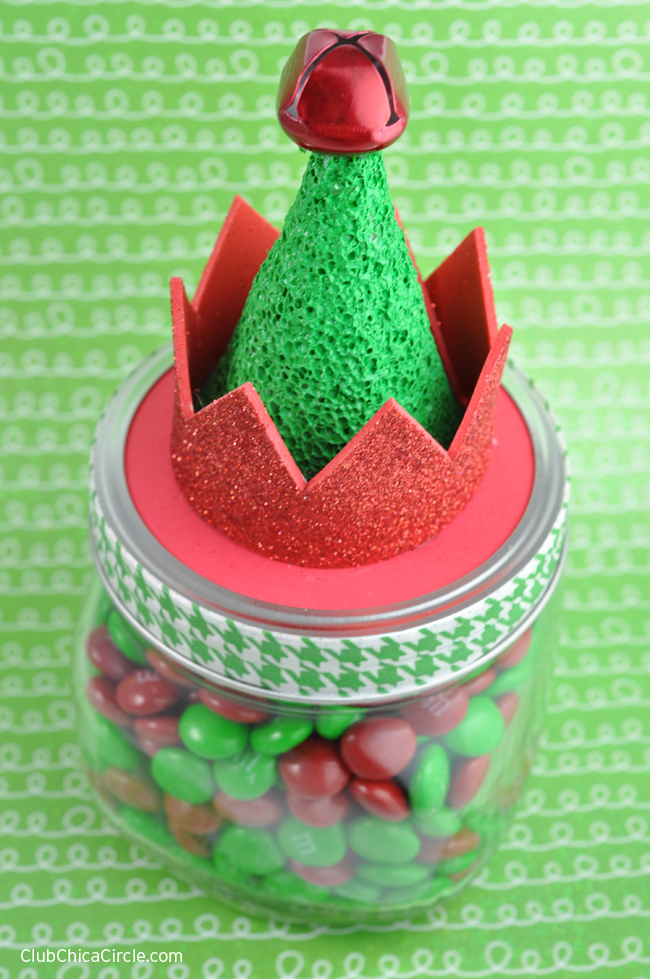
For the Elf hat, I created a template for the rim of the hat to cut out of the red glitter foam sheet.

You can grab your printable template here: Elf Hat Candy Jar Template

Then, I glued the foam “crown” around the bottom edge of my green cone, and glued a red bell on the top.

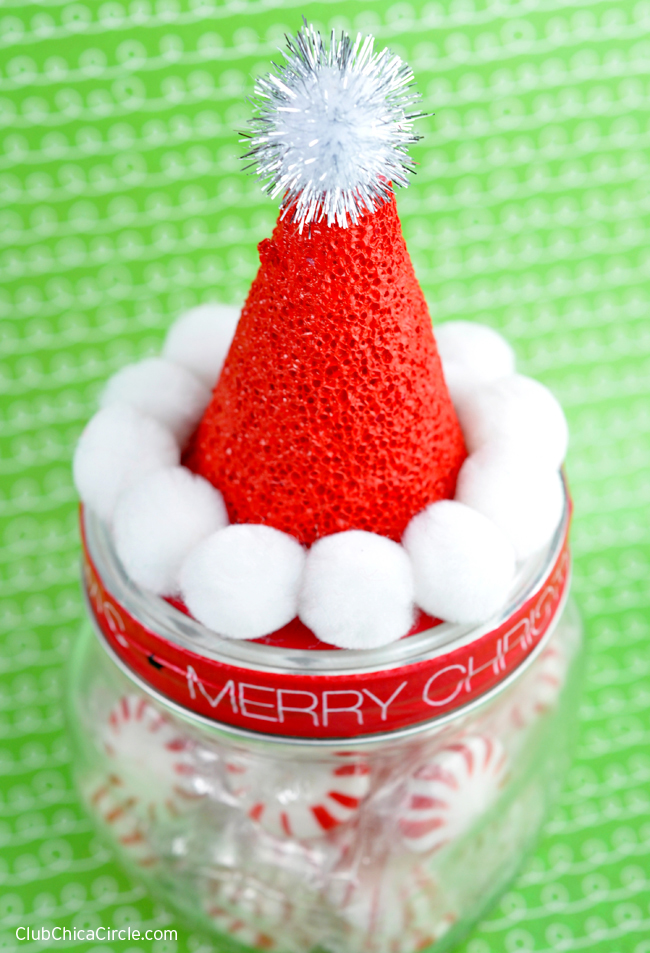
For the Santa hat, I glued white pom-poms along the outer edge of my red cone and one sparkly white pom-pom on the top.

Santa and Elf Hat Candy Mason Jars Easy Craft Idea

To finish off each jar, I used decorative holiday washi tape along the outer edge of my mason jar lid.

That’s it! So simple to make!

The only left to do was fill each of them with candy!

Santa and Elf Hat Candy Jars Homemade Holiday Gift Idea

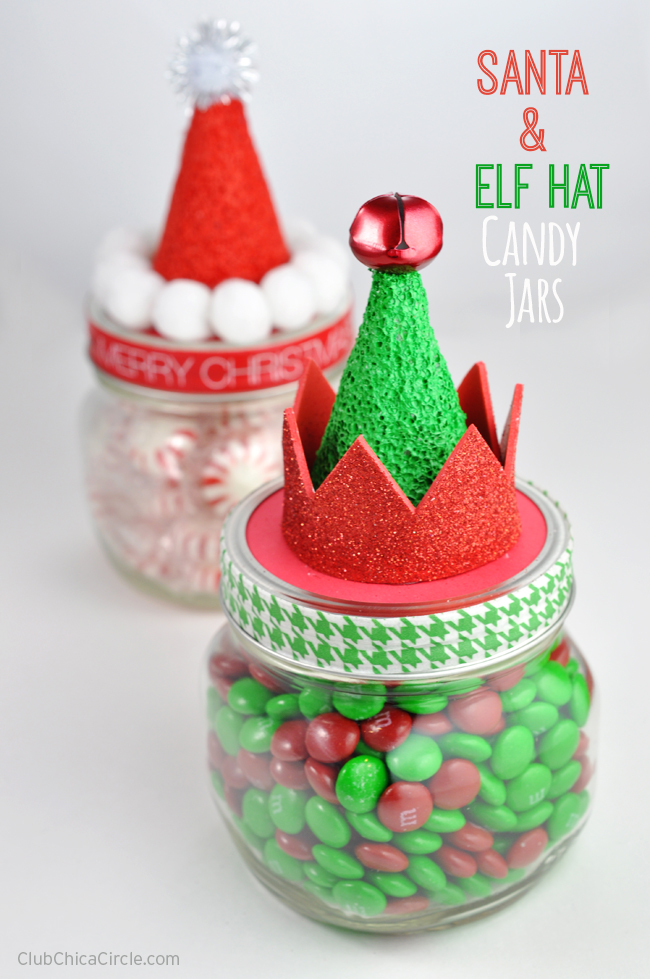
I filled my Elf hat candy jar with holiday M&Ms, and my Santa hat candy jar with peppermint candies, but you can fill them with whatever you want. You can even turn them into candy jars, like I did here.

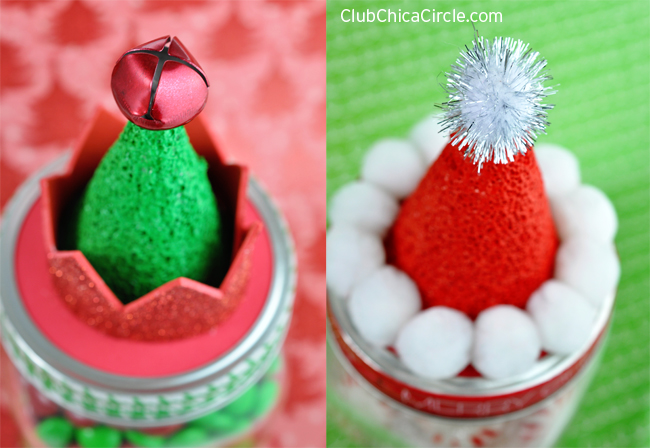
Now, I can’t decide which one I like better…. the Santa Hat Candy Jar…

Homemade Santa Hat Mason Candy Jar Gift

… or the Elf Hat candy jar.

Easy Elf Hat Mason Jar #MakeItFunCrafts

You can’t tell me these wouldn’t make cute holiday gifts for neighbors, teachers, co-workers, or yourself! = )

Happy Holidays!

pauline-sig

As part of the Make It: Fun Team, this post is sponsored in part by FloraCraft. As always, ALL photographs, ideas, and opinions are my own.


Pauline Molinari

I'm the crafty maven, and I'm on a mission to spread craftiness. With a fine arts degree, over 15 years experience in children's publishing, and a savvy, stylish, sassy tween daughter, I come armed with perspective and passion to inspire tween girls and their mothers to be crafty together. 

If you liked this post and want more, you can subscribe to be on our mailing list and make sure to get your free Cupcake Toppers Printables for Every Occasion.

  13 comments for “Santa and Elf Hat Candy Jars

  1. Sharon
    November 20, 2014 at 11:51 am

    How adorable are these? What a “sweet” gift idea! Love it.

  2. tina
    November 20, 2014 at 12:36 pm

    I have a question about the cones. How many layers of paint did you have to put on each cone and how long in between coysts did you wait?

    • November 24, 2014 at 8:55 am

      Hi Tina,
      I actually only painted on one layer of paint on the cones. I used a spongebrush to apply to make sure that the paint went into all of the little crevices. It does take a couple hours for the paint to dry.

  3. November 20, 2014 at 6:15 pm

    Wow I love it! Great gift idea too, thanks for the share love the presentation just saved!

  4. November 21, 2014 at 2:25 pm

    Pauline, these are just darling! Visiting from the Creative Collection and pinning! Have a happy weekend!

  5. November 21, 2014 at 9:50 pm

    Absolutely the cutest things ever! Definitely making these! I would love if you would share this at my blog party, Celebrate It! It’s all about celebrating our wonderful, everyday lives! http://thefreshmancook.blogspot.com/2014/11/celebrate-it-blog-party-18.html
    Reply

  6. November 22, 2014 at 5:09 pm

    These are sooo cute!!! I love them!! Definitely want to make these one day 🙂
    Lindi @ http://www.lovecreatecelebrate.com

  7. Julie
    November 23, 2014 at 5:25 pm

    I love these. What gorgeous presents. As a teacher I would love one of these homemade from my students.
    Julie

  8. December 4, 2014 at 7:57 am

    So adorable! Great job, ladies! XO

  9. Gabi
    November 2, 2015 at 11:39 am

    Very cute but I have a question from where you got the 3″ Foam Cones
    thank you

    • November 2, 2015 at 2:25 pm

      You can find them at your local craft store, like Michaels in the foam aisle. hope that helps!

  10. Chris
    June 25, 2016 at 9:17 pm

    What size are the jars, you say pint but how tall?

Comments are closed.