Thanksgiving is the perfect time of year to sit back and reflect upon what you are most grateful for in life. There is always something to be thankful for!
Practicing gratitude can really change your life. It can actually make you healthier and happier!
Quick! Right now, think of three things that you are grateful for. It can be anything – your family, that morning cup of coffee, or the beautiful fall leaves changing colors. I bet you’re feeling happier already, right?
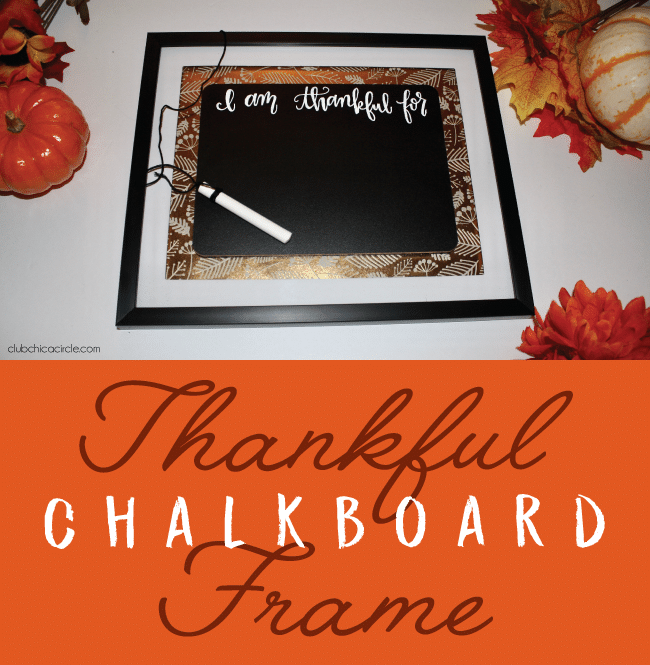
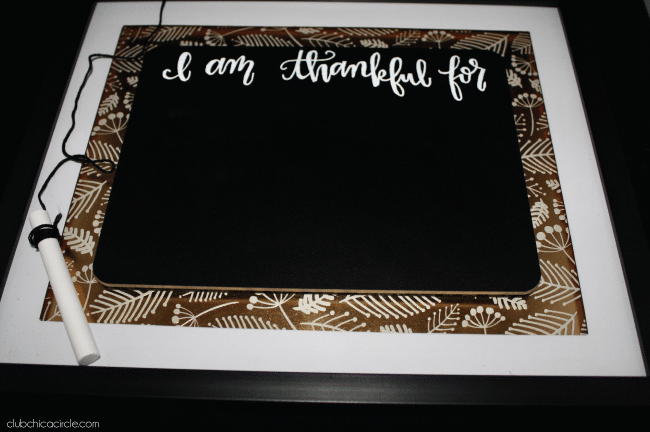
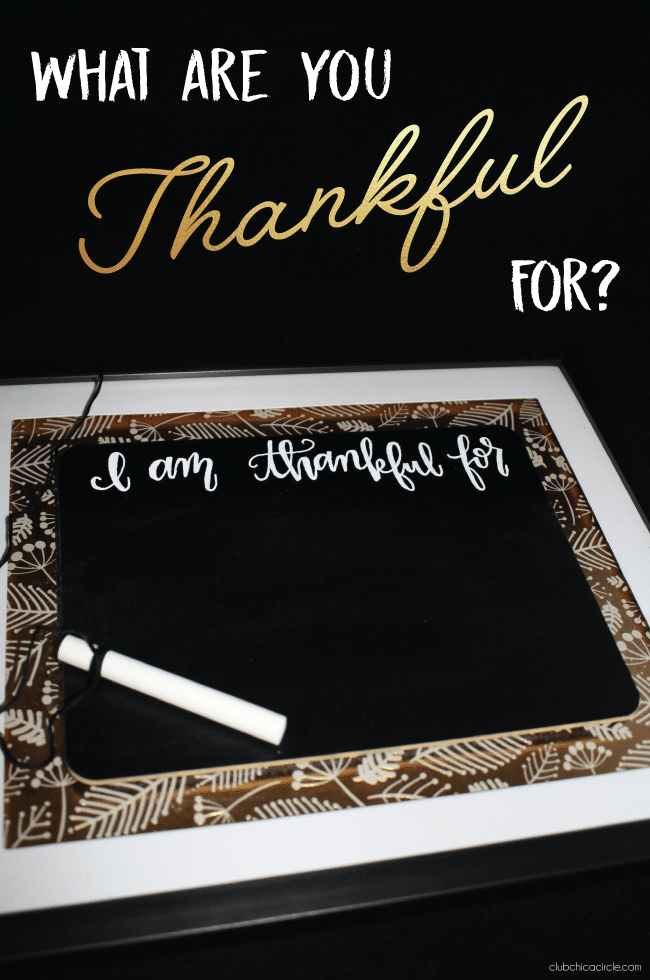
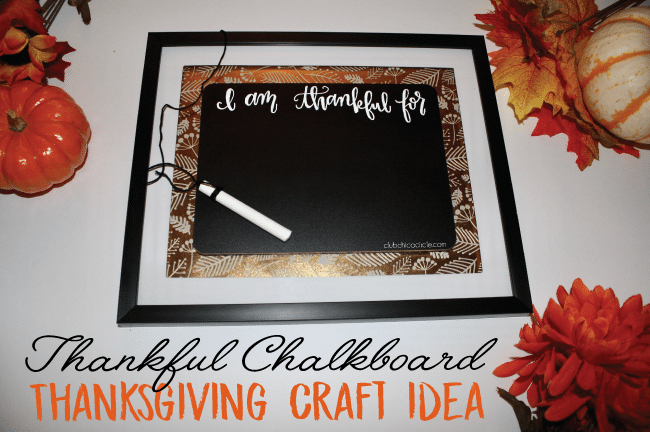
Today’s simple and inexpensive craft idea is a Thanksgiving thankful chalkboard frame. Most of the supplies I was able to purchase at my local dollar store – and you may have most of them on hand already! This is a fantastic Thanksgiving project to get the whole family involved in.
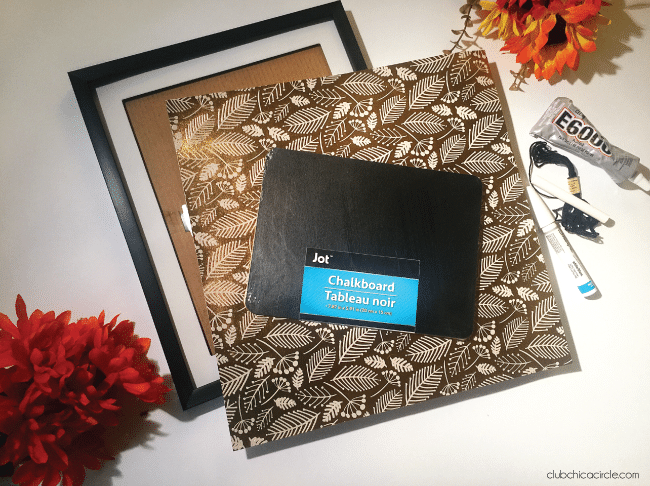
You’ll need:
- Frame – choose any size! I used an 8″ x 10″ frame.
- 1 piece of pretty scrapbook paper (Just make sure it fits in your frame!)
- Small chalkboard (I found mine at the Dollar Tree!)
- Glue (I used E6000, but I recommend hot glue.)
- Chalk
- String
- Optional: paint pen
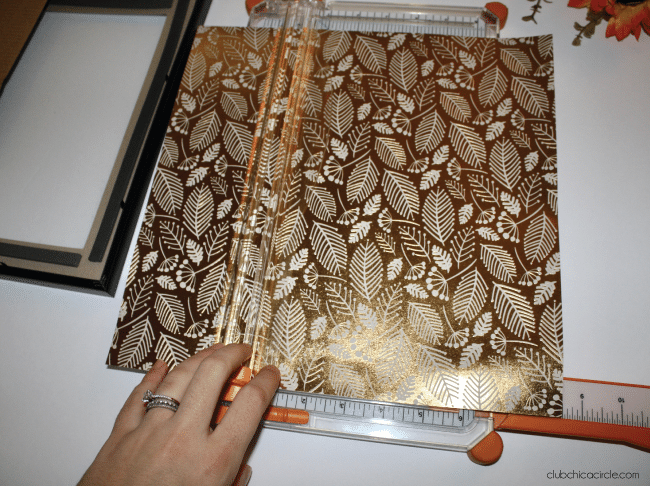
First, you’ll want to trim your paper down to fit inside of your frame if it doesn’t already. I found this gorgeous metallic paper and trimmed it down to fit in my 8″x 10″ frame. Next, insert the paper inside of your frame and close the backing.
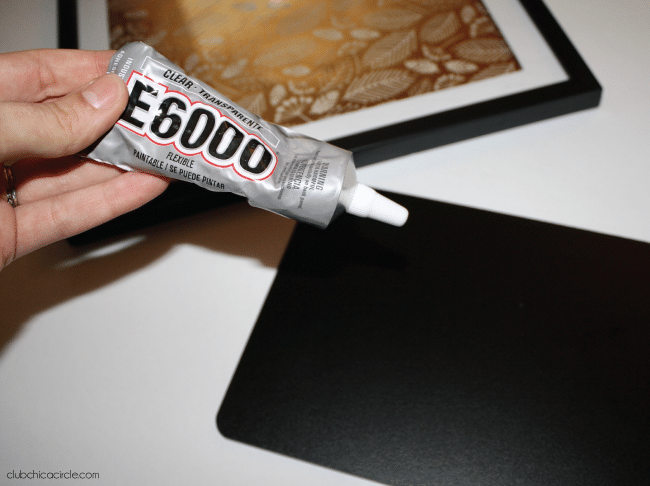
I found these cute, small chalkboards at the dollar store and couldn’t wait to create something with them! I used E6000 on one side of the chalkboard, and glued it directly onto the front glass of the frame. The E6000 glue took quite a while to dry, therefore, I would recommend using your glue gun instead. Make sure the glue on your chalkboard is dry on your frame before moving on to the next step!

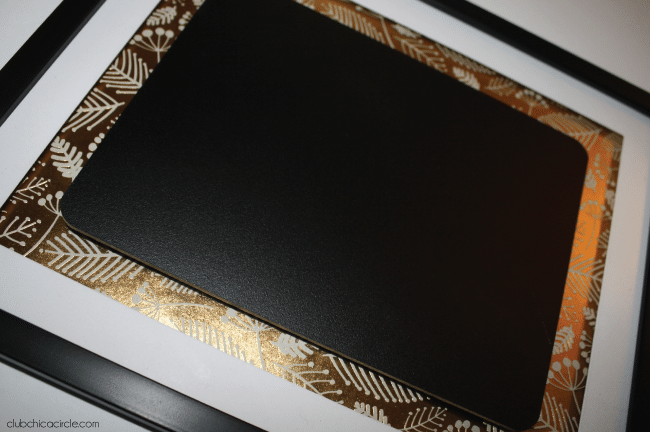
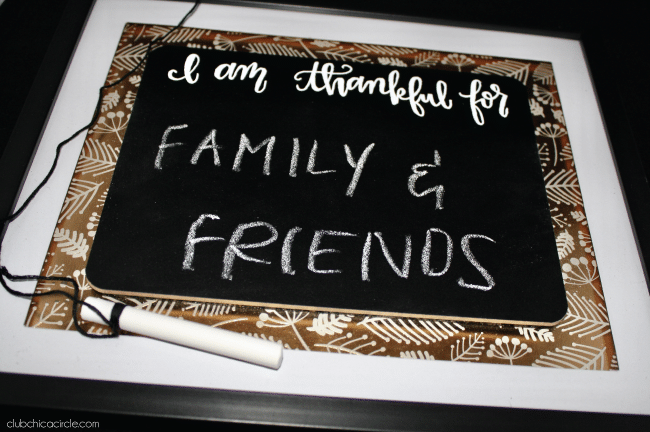
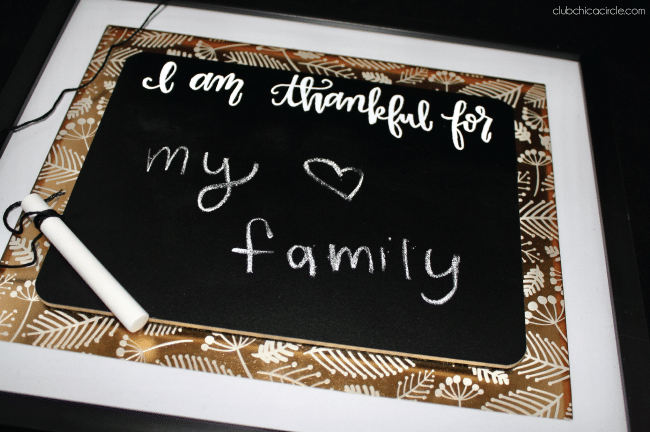
After the chalkboard is nice and secure on the frame, it’s time to decorate! I used a paint pen to write “I am thankful for” at the top of my chalkboard. I used a paint pen because I wanted this part to be permanent, but you are welcome to use regular chalk here! Make sure you leave plenty of room on the bottom to write what you are thankful for.
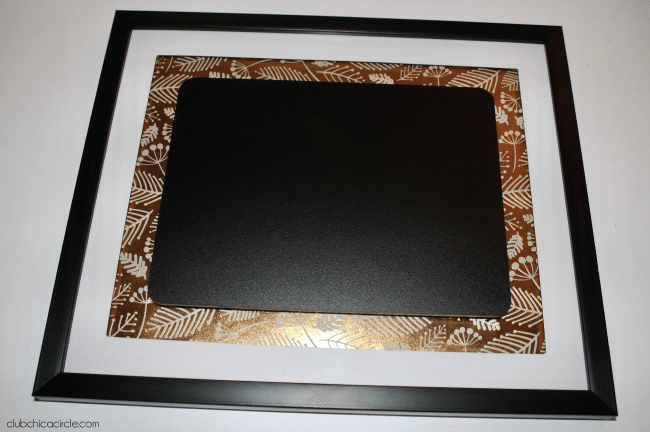
Finally, use your piece of chalk to write one thing you are thankful for today. Tomorrow, simply wipe that off, and write something new! I challenge you to use this frame every day this month.
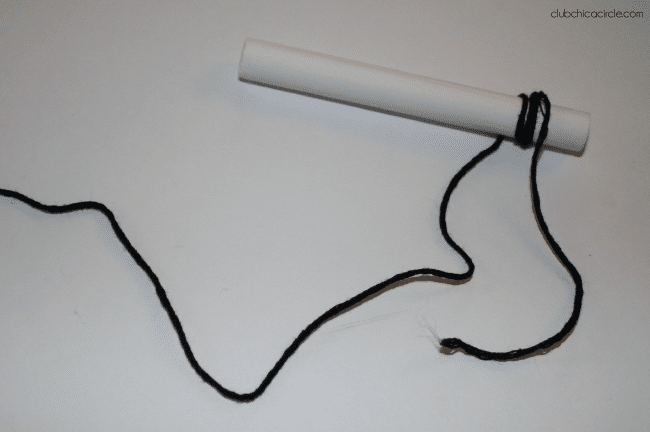
I didn’t want to misplace my piece of chalk, so I wrapped some string around the top, secured it with a knot, and attached it to the back of my frame with tape.
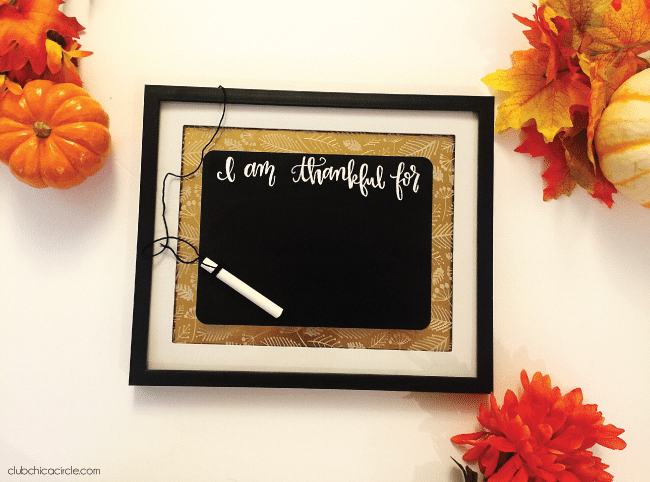
The cool thing is, you can simply change out the paper in the frame, and keep this thankful chalkboard frame up year round. It’s such a fantastic way to incorporate gratefulness into your daily life.
I hope this post inspires you and your family to take some time this month to focus on your thankfulness. I am thankful that you took the time to check out my thankful chalkboard craft idea!
What are you thankful for? Leave us a comment below and tell us what you are most thankful for this season.
Until next time,