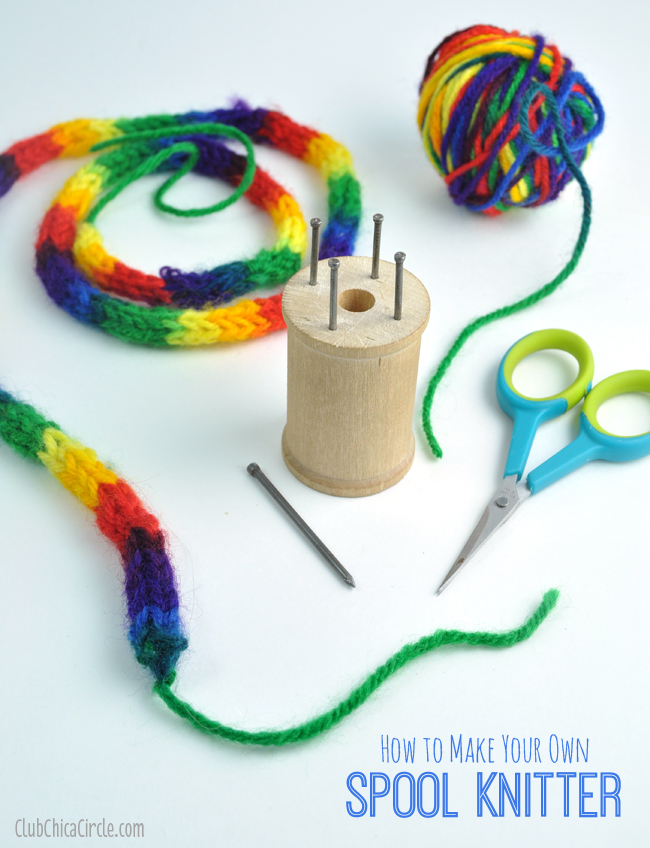
This is such a fun and easy boredom busting craft idea for kids!
Honestly, I got lost in the simplicity and the fun of this craft.
I know they sell spool knitters at craft stores molded out of plastic. Here is an old school way to get crafty and make your own! If you know me, I’m all about the homemade old school methods – like the time we made a homemade friendship bracelet wheel with a plastic oatmeal lid. Or when we knit scarves with big smoothie straws.
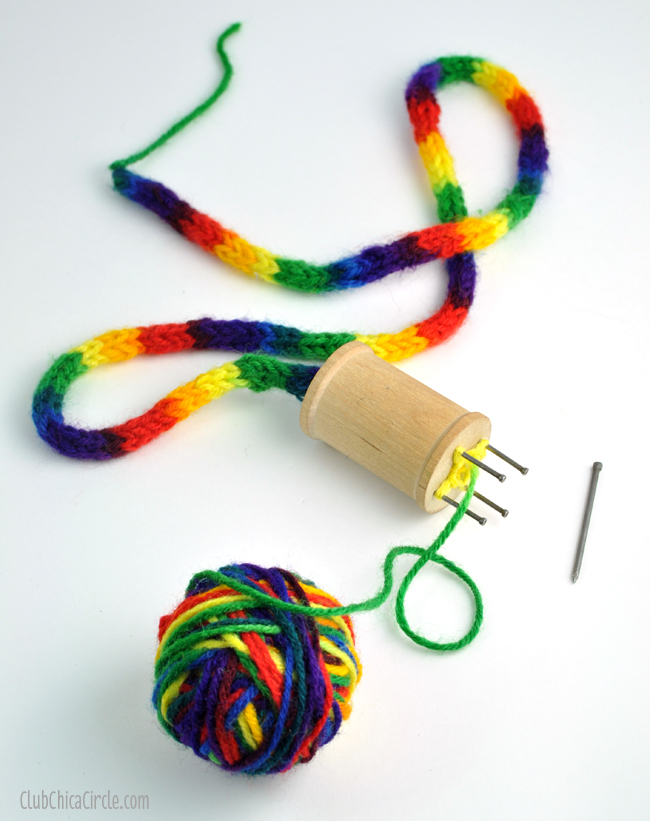
All you need are some finishing nails and a wood spool to make this super simple spool knitting tool.
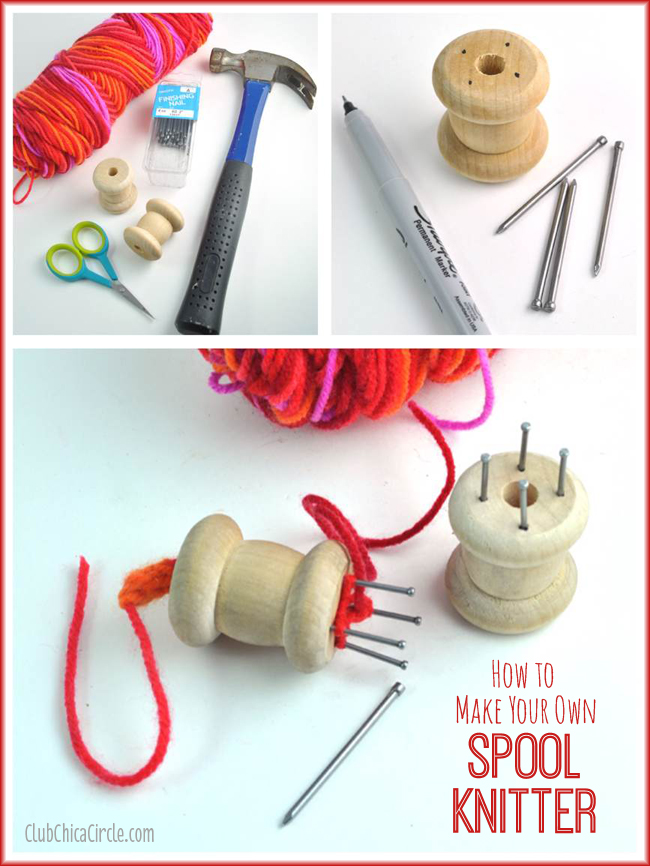
The supplies I used to spool knit are:
- 2” finishing nails (make sure they are simple nails without any grooves in them)
- 1 1/2” finishing nails
- wood spool (I found these in the wood section of my local Michaels)
- thin permanent marker
- hammer
- yarn
- scissors
First you need to make your yarn spool knitter:
Start by marking 4 dots, that create a square if you connected them, on the top of your wood spool. Then hammer in 4 1 1/2” nails in each marked dot on the top until about 1/2” – 3/4” is sticking out of the top.
That’s it! Your spool knitter is made!
If you thought that was easy, you are going to love how easy it is to spool knit.
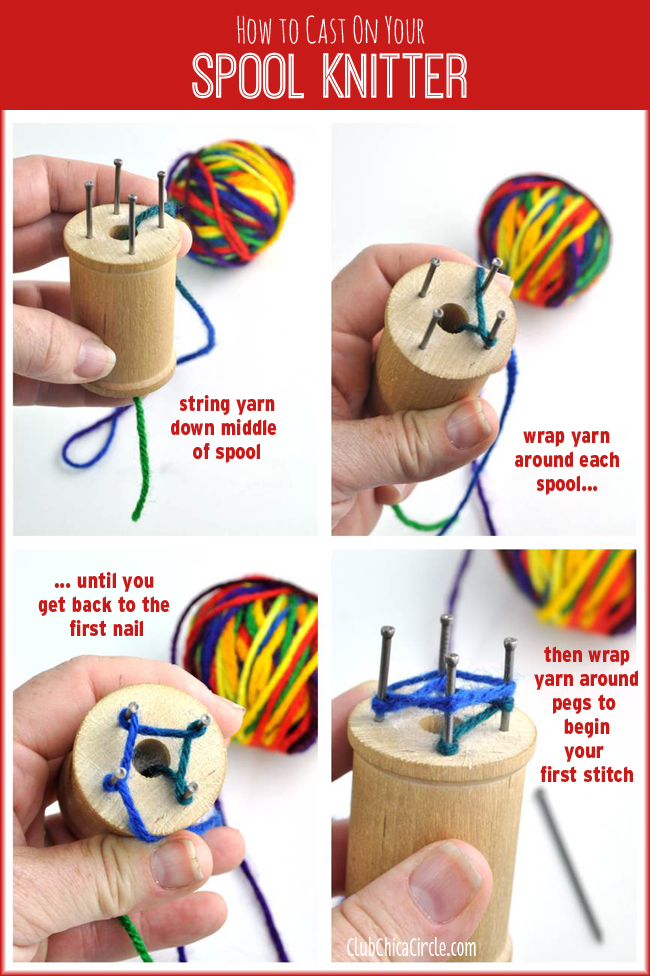
First you need to “cast on” your yarn, or start your first stitch.
Begin by stringing the end of your yarn down the middle of your spool with the nails on the top.
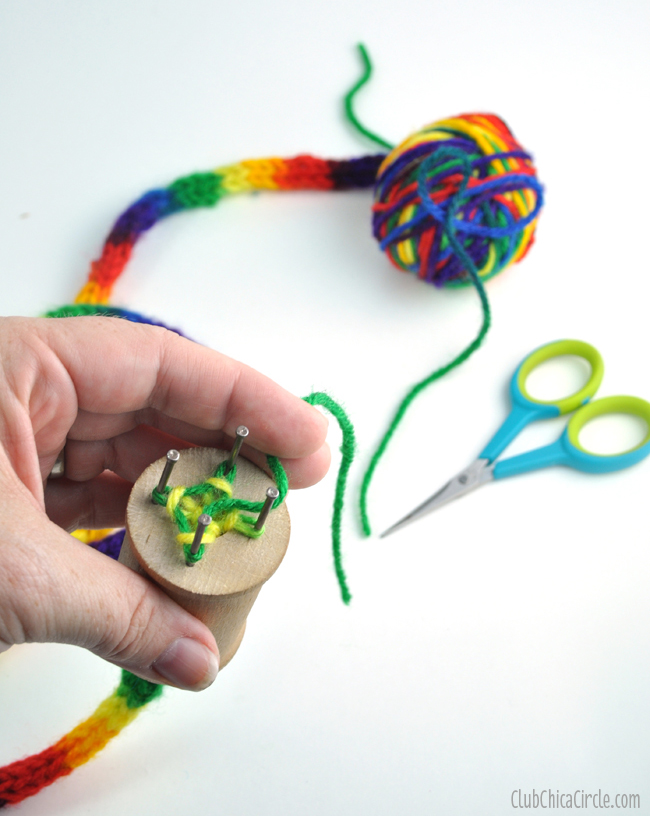
Then loop or string your yarn around each nail or peg counterclockwise – like the picture show below.
When you reach the first nail (the one you began looping your yarn on) wrap the yarn around the outer edge of the nails, just over the loops.
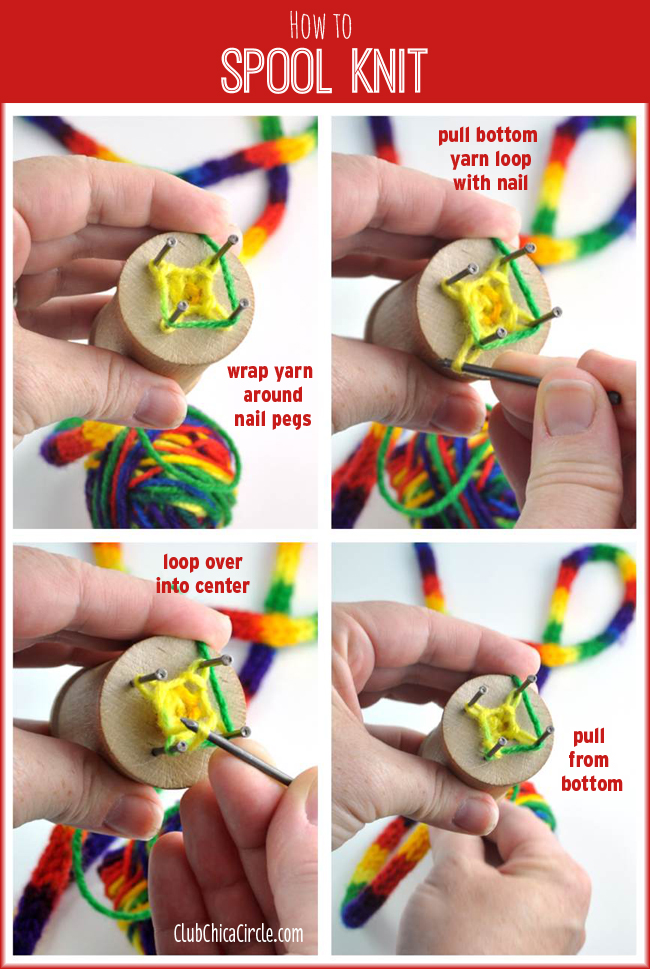
Using a 2” nail as your knitting needle, take the bottom loop and string it over the yarn. See picture above for reference.
Continue around your spool counterclockwise with this same process—taking the loop from the bottom and looping it over the top into the center of your yarn. In between each loop you can pull the yarn string from the center of your spool down to tighten and feed it through the middle.
Continue spool knitting until you have the desired length of knitted yarn.
When you are ready to take your knitting masterpiece off of the spool, or “cast off” your yarn, start by cutting the end off of the top of your yarn.
With the last stitch that you made, take your nail needle and string it back out and pull to tighten. See picture below for reference.
Then, working counterclockwise again, take that yarn string and make another stitch. Again, take that last stitch and string it back out and tighten. Continue on all four nails with the same technique, until you tighten the last loop. See below for reference.
That’s it! You are done!
Now, what would you do with your string of spool knitted yarn? If you do a short piece, you could make a cool bracelet. A longer piece could make a belt or even a headband.
What would you make with yours? This is such a fun and stress free craft idea. Once you make your spool knitter, you can knit for hours. We knit this one in many different sessions. We simply put our “knitting needle” nail in the center of our spool when we weren’t using it to keep it together.
This craft is a great road trip craft idea too! It really does travel well.




7 comments for “How to Make Your Own Spool Knitter”