Ever since I saw this cool technique on how to burn the edges of satin fabric to make it curl and give the illusion of a pretty flower petal, I knew I had to try it with my tween! And with St. Patrick’s Day right around the corner, I couldn’t resist using this crafty technique in making a shamrock-inspired headband.
Here is what you will need:
- Satin fabric in shades of green
- Scissors
- Torch lighter
- Embroidery thread and needle
- Fabric covered headband
- Jewel for embellishment
- Glue gun

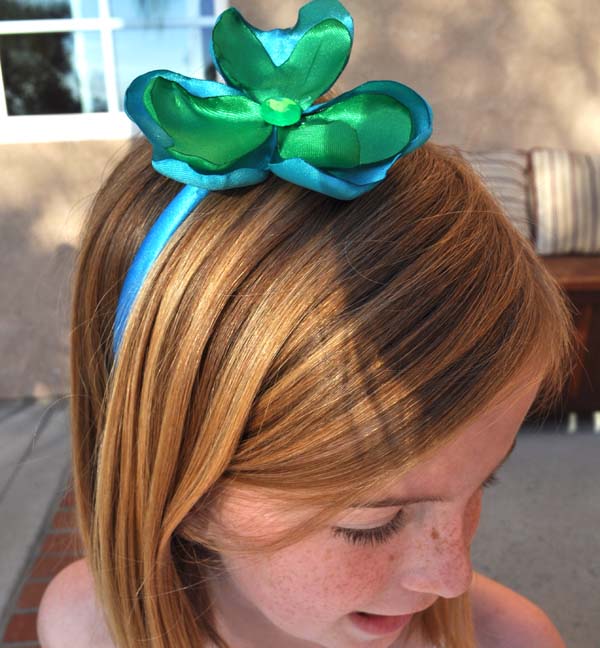
To make a shamrock clover shape, I cut out 2 sets of heart shapes (one smaller than the other) from 2 different colors of satin fabric. I used a bright green for the smaller top layer, and a pretty complimentary teal for the larger bottom layer.
Then, one by one, I placed each heart shape on a heat resistant ceramic plate, and lightly singed the edges with a torch lighter until they started to curl up and create almost a heart bowl shape. I paired up one small green petal and placed it on a corresponding teal petal.
Next, with coordinating embroidery thread, I made a quick stitch in each of the bottoms of the pairs of hearts to attach them together. I started with one pair, and then added the second pair of heart petals, and then the third creating the clover shape, using my fingers to adjust the petals. Then a few quick stitches and a knot attaching it to the headband. I knew I didn’t need to make the stitches perfect, because I would be attaching a pretty green jewel in the middle right over the stitches with a glue gun.
I made the shamrock headband, while I let my tween and her friends design their own satin flower creations. They wanted to make the traditional circular shaped flowers. I set out different colored satin and scissors, and let them pick which and how many colors they wanted to use. My only suggestion was that once they picked how big they wanted the biggest petal, each layer after that should be a little smaller in a descending order. I also set out a variety of jewels, and either elastic headbands, cloth covered headbands, or ponytail holders for them to choose from.

Once they cut out their circle shapes I let them try and singe the edges one by one with my supervision. That was my only rule: THAT I HAD TO BE IN THE ROOM AND SUPERVISING WITH THE FIRE.
This is what it looks like when you burn the edges slightly:


It was fun to see what each girl came up with. They made headbands, and either bracelets on elastic ponytail holders or headbands for their American Girl Dolls. They ended the sunny Spring afternoon with a little tea party. It was a great ending to a crafty afternoon with tweens. Cheers!

If you liked this post, and want more, you can subscribe to be on our mailing list here.


