It’s the day before Turkey Day, and I can almost guarantee there will be just one more trip to the grocery store for something. So much prep work and cooking go into preparing a Thanksgiving meal. It is a day generally spent with lots of family, lots of food, and hopefully lots of good memories. We are lucky enough to spend this Thanksgiving with some of our closest family members. Four kids and five adults makes for a hectic and plentiful day! And I know the day is also going to be a juggle of managing the food prep and the kids. That was the inspiration for this craft. I say, let the tweens set the table this year and give them a crafty project to do so.
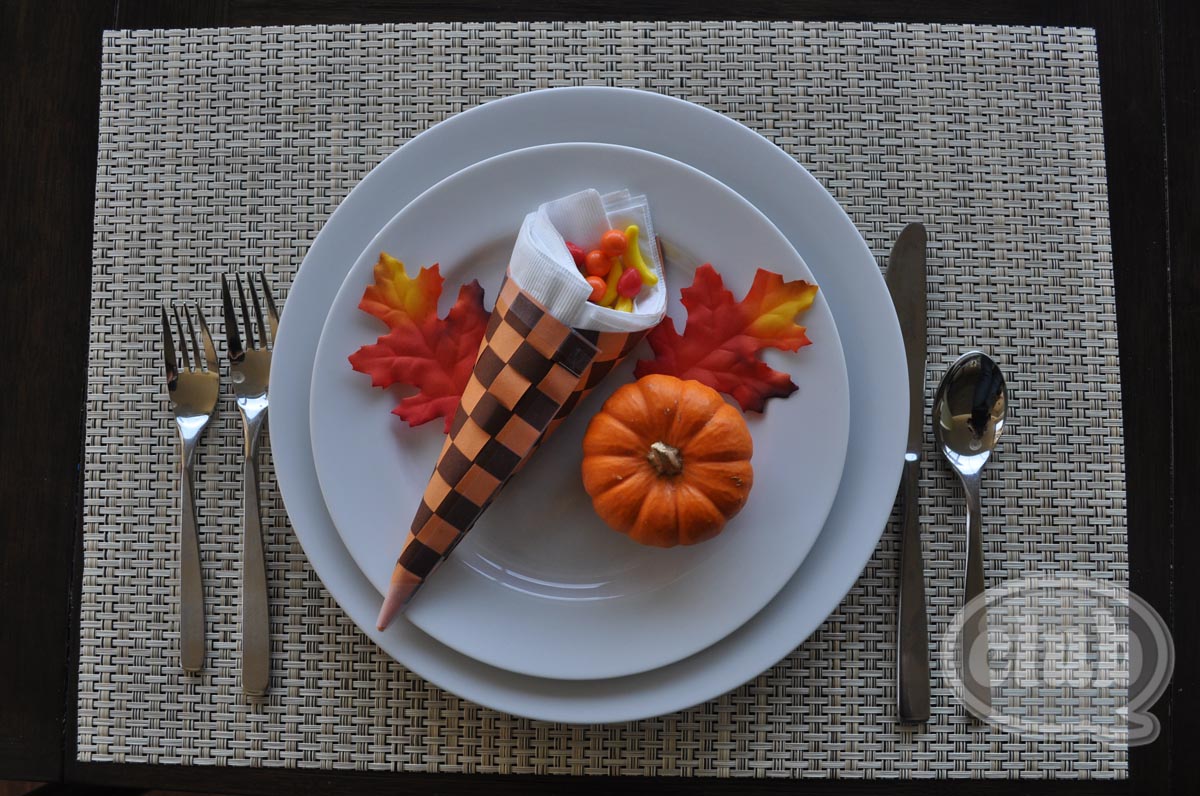
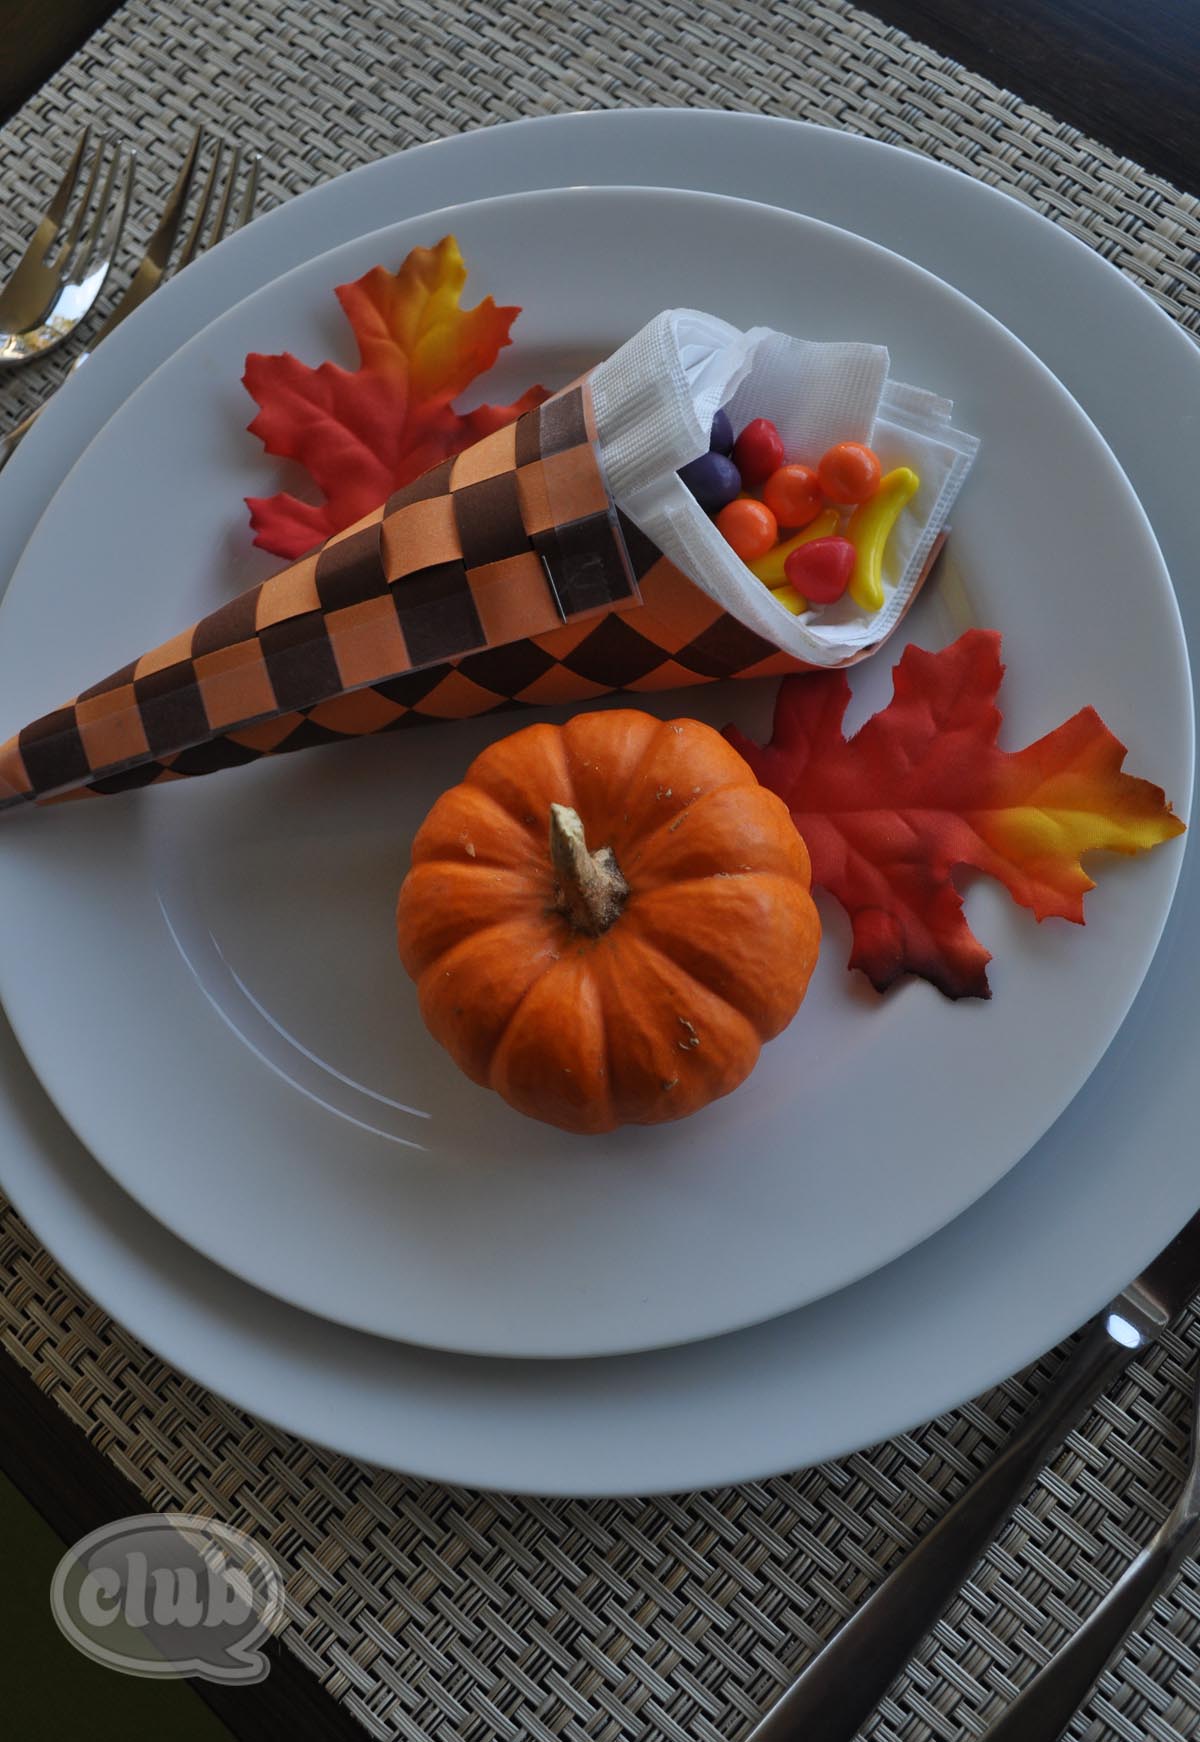
Here is a quick and easy DIY on how to make this super cute woven paper cornucopia table setting filled with a sweet treat for any age. I raided my niece’s craft center to find things that most tweens might have at their disposal. She loves to do origami, and sheets of orange and brown origami are perfect to weave my cornucopia creation.
Here are the supplies I used:
- 6″ x 6″ origami paper in orange and brown (construction paper would work just as well)
- paper cutter
- cutting mat (or some other surface like a placement)
- tape
- scissors
- stapler
And here is the fruit shaped treats I couldn’t resist filling the cornucopia with:
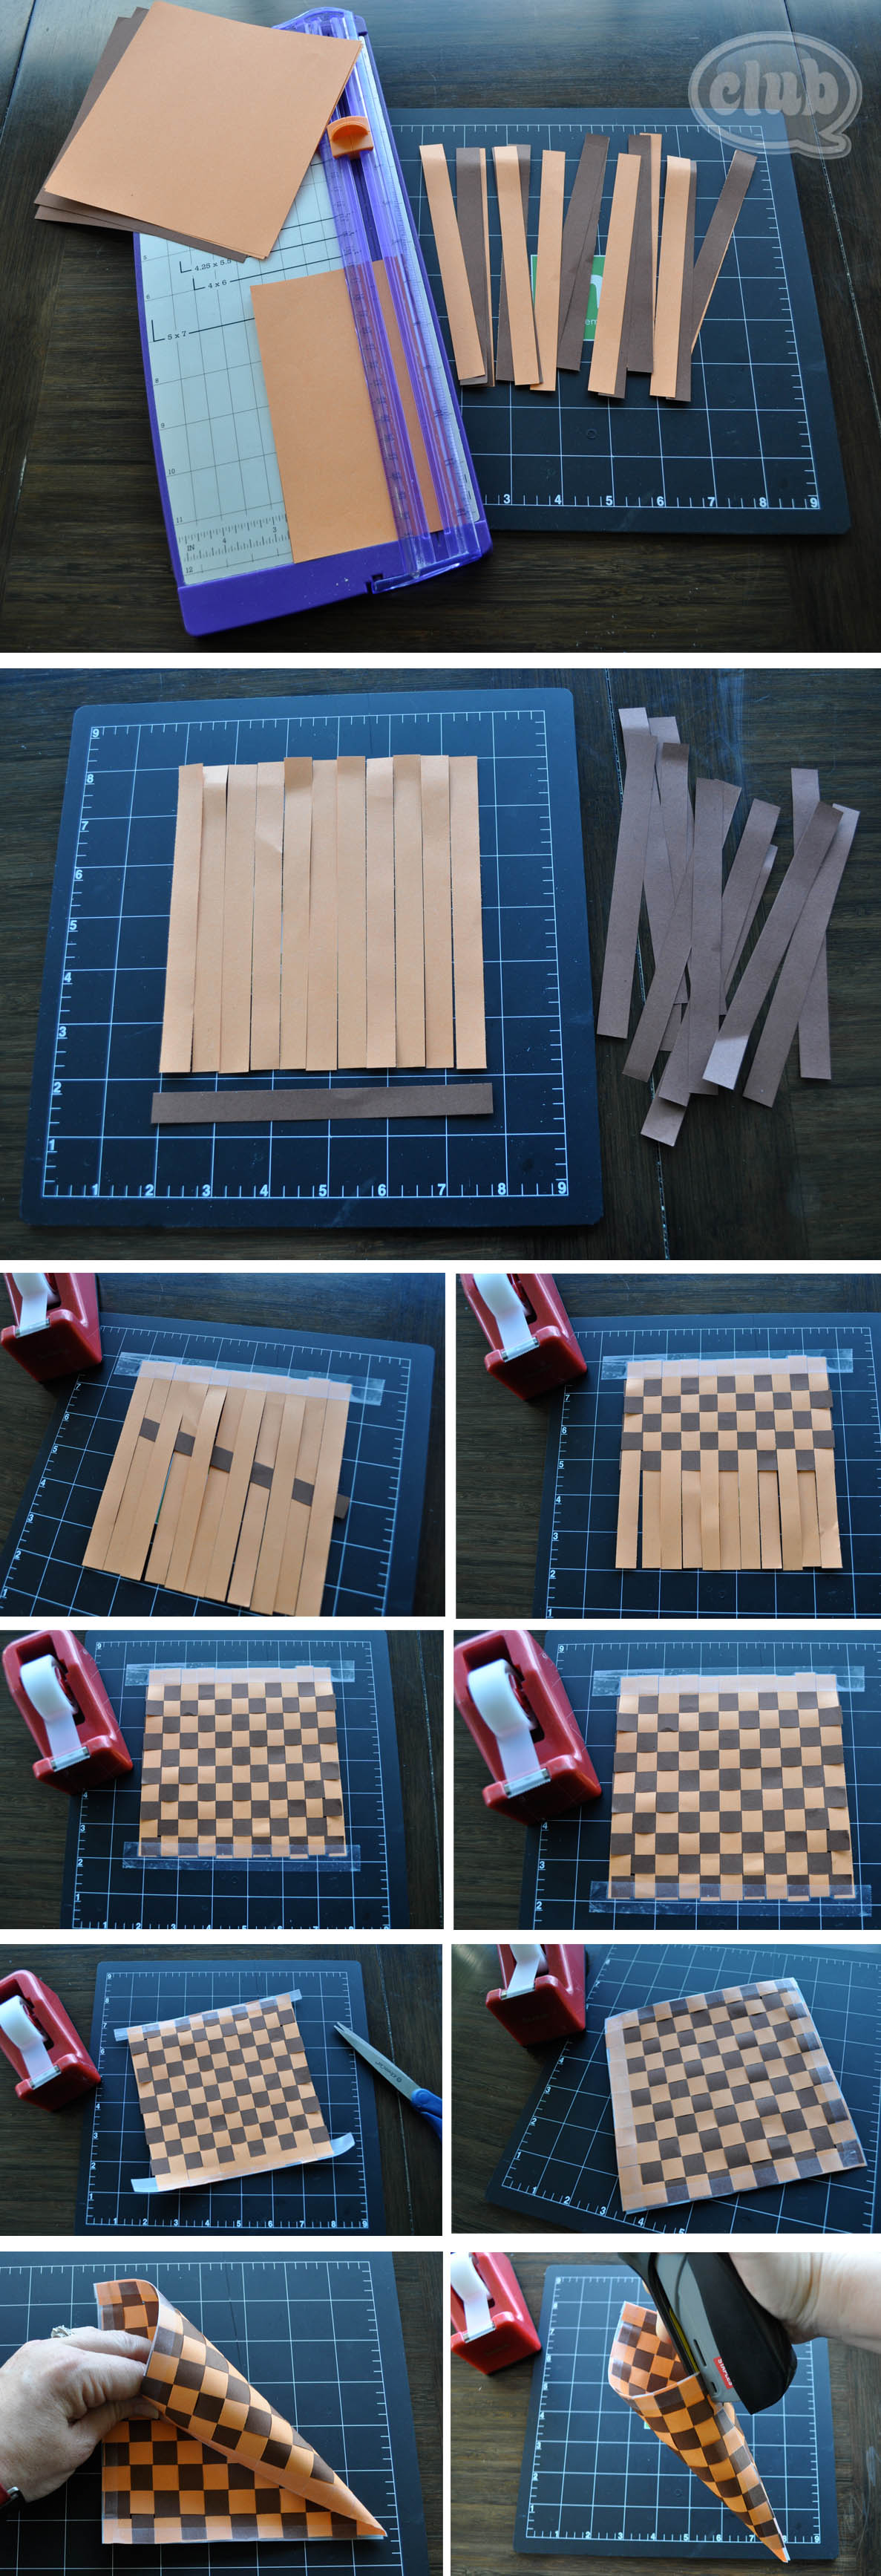
Here is the DIY for the woven paper cornucopia:
Start by cutting 1/2″ strips of paper from each 6″ x 6″ square. To make it quicker, I was able to cut 4 pieces of origami paper at a time. One piece of orange and one piece of brown make one woven cornucopia.
Line up one color to recreate a square on a mat. You will know you have enough strips lined up when it is the same width as one of the other color strips.
With a piece of tape, longer than the all the strips put together, tape them down in place on the mat at the top. With a strip of paper from the opposing color, start weaving in and out of the paper strips and push all the way to the top. Weave a second strip in the opposite over/under direction as the previous strip. Continue weaving and pushing up so that all the strips are as close as possible together until you have reached the end of the square.
With a second long piece of tape, secure the bottom of the weave on the mat as well. Pull both pieces of tape off the mat and the woven square should come with it. Flip over and wrap the tape over the edge to secure. Cut off the tape ends that hang past the woven square.
Finish by taping the other two edges with tape and wrapping over the edges as well. Now you have a secure woven square.
Starting by rolling the solid edge into the center, create a paper cone shape and secure with a stapler at the the top edge. Voilá!
After all of your cornucopias are made, you can move on to styling and filling your paper cone cornucopias to make a beautiful Fall table setting for your Thanksgiving celebration.
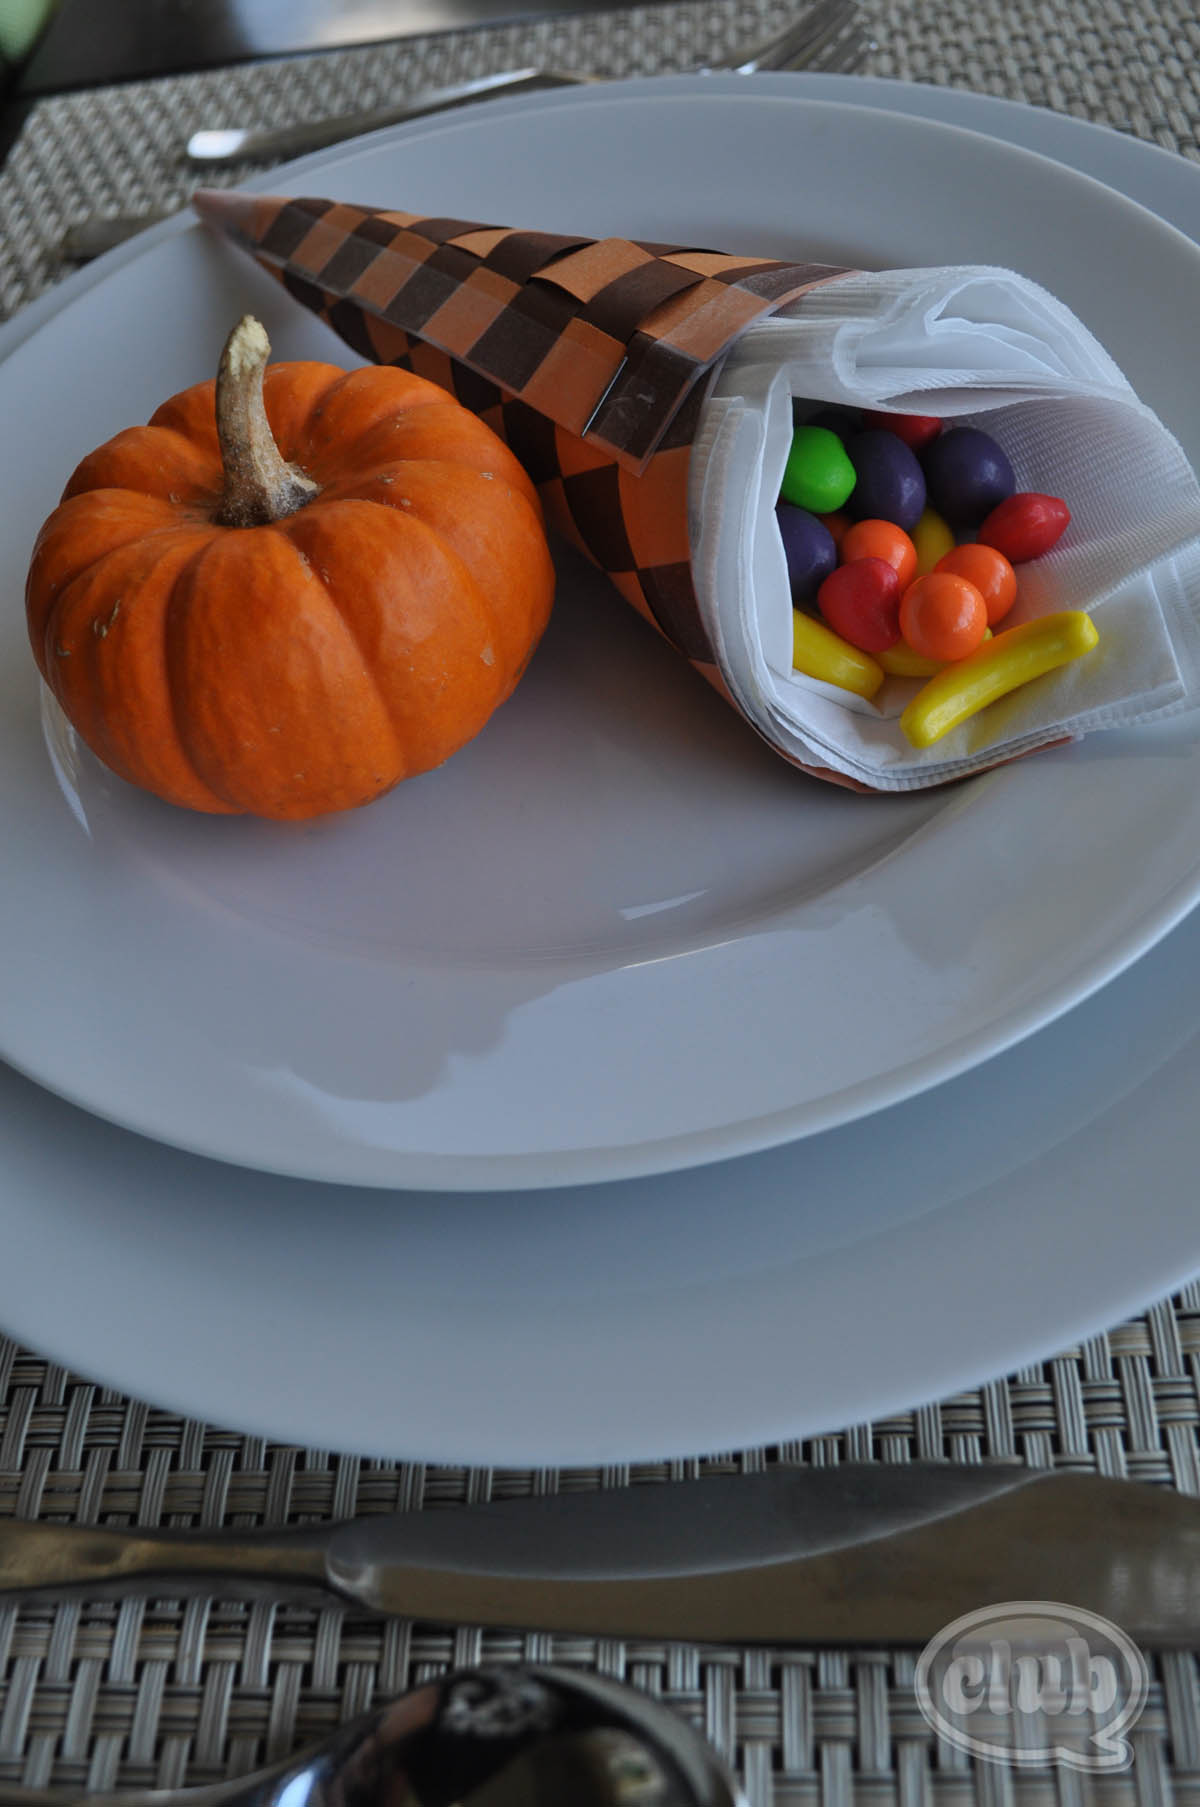
For the finishing touches, I folded a large napkin into quarters and also shaped it into a cone shape and placed in the center of the woven paper cone. I placed it on top of the plate and then filled it with my fruit candy treats. You can certainly fill your cornucopia with different treats. How about grapes, Hershey’s® kisses, candy corn, etc? I finished the table setting with a small pumpkin gourd and some silk Fall colored leaves. Lovely!
Wikipedia defines the cornucopia or horn of plenty as a symbol of abundance and nourishment, commonly a large horn-shaped container overflowing with produce, flowers, nuts, other edibles, or wealth in some form. This year my cornucopia is filled with the wealth of being with family, spending it with my sisters and enjoying having the nieces and nephews together. Here at Club ChicaCircle we want to send a heartfelt wish to everyone to have a safe and happy holiday! Thank you for being a part of our community and thank you for being crafty with us. Happy Thanksgiving to all!

