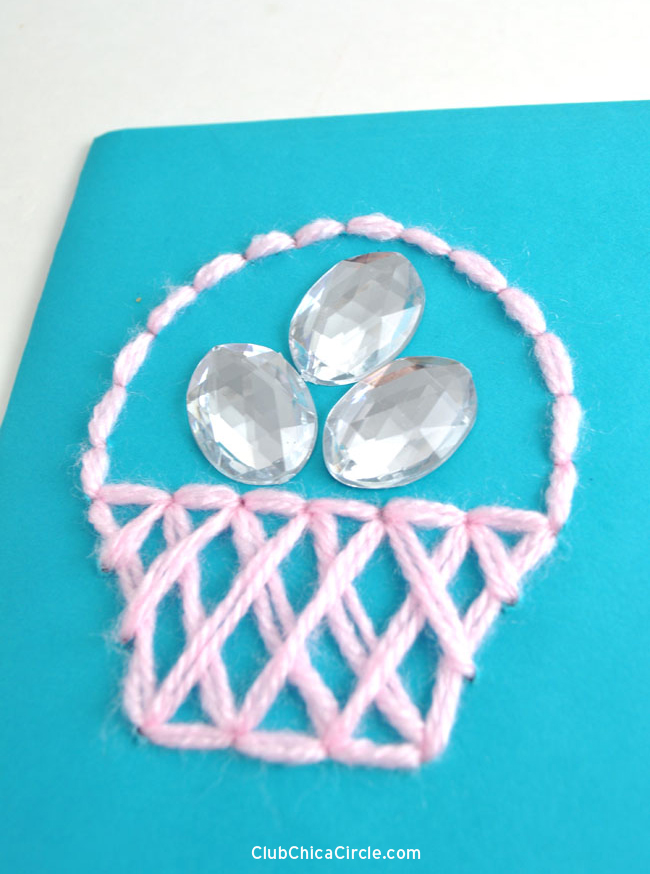
I was recently working on a my daughter’s end-of-year cheer scrapbook and adding some sparkle to it with some jewels. When I was fishing through my craft jewel collection, I came across these gorgeous oval-shaped jewels and with Easter right around the corner, I immediately thought they resembled Easter eggs. And these sparkly Easter eggs needed to be put into a pretty basket. Am I right?
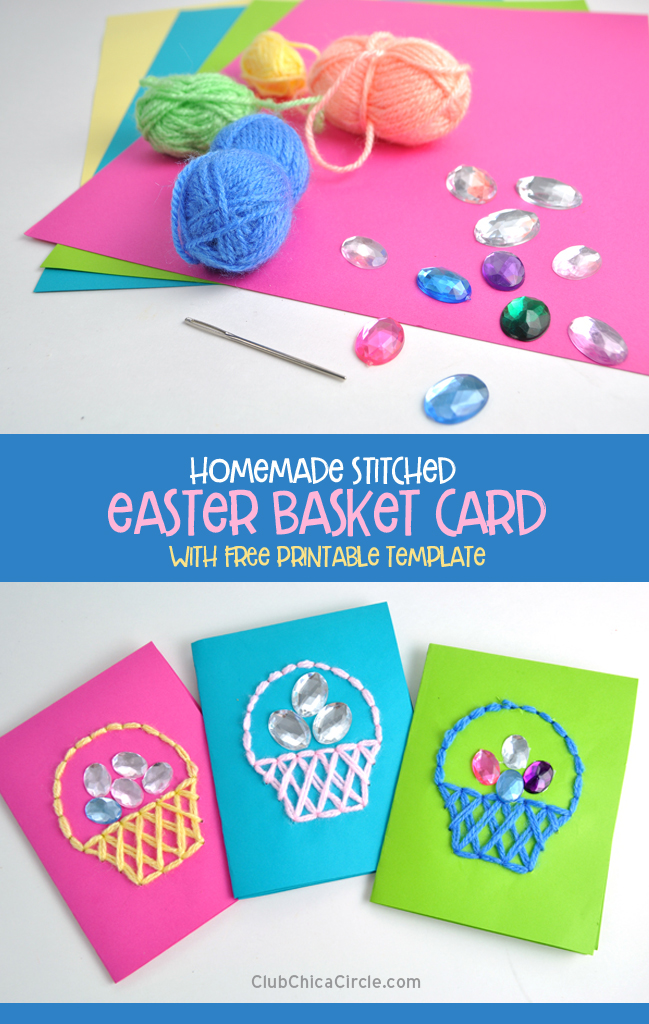
I wanted to craft something that could be a homemade Easter gift, I created these pretty Easter cards. Here is what I used for this fun craft idea:
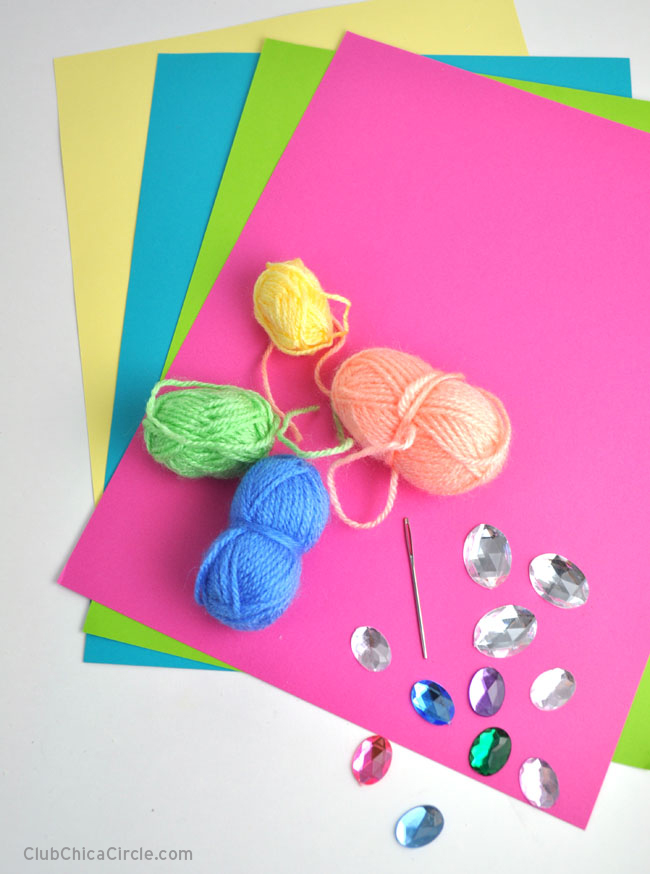
- oval shaped jewels – you can use self-adhesive jewels or regular rhinestones. I used 13 x 18mm and 18 x 25mm
- colored card stock paper or scrapbook paper that you can run through your printer
- pretty spring colored yarn (embroidery thread would work too) – I bought a multi-pack of colored yarn similar to this
- large eye needle used mainly for knitting or crocheting like these. These needles have blunt end, so they aren’t as sharp at the end.
- double-stick tape or glue (to attach the jewels on the card)
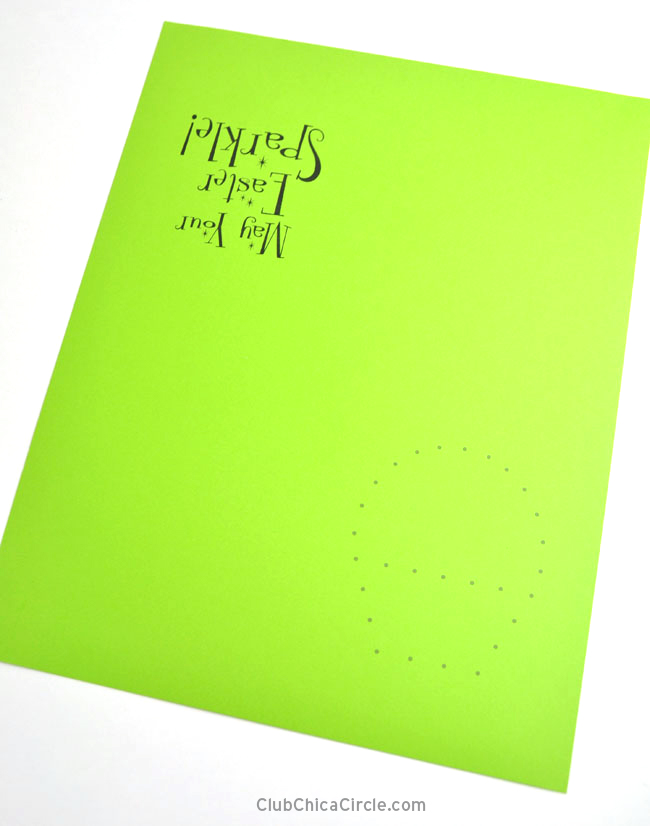
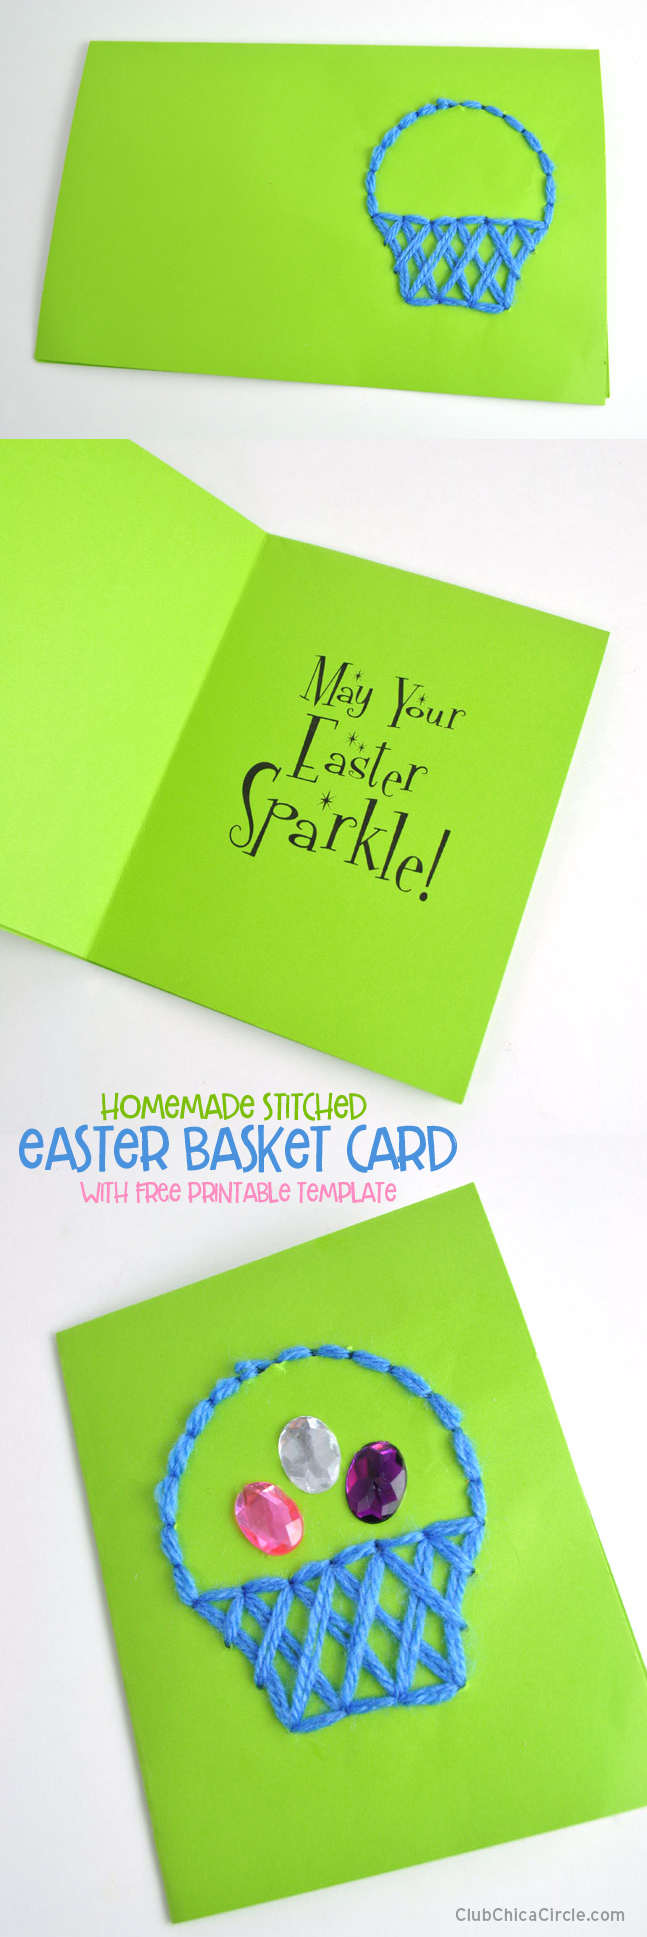
I created this free printable template that you can use to make your own sparkly Easter cards. I know it looks like I made it with the type upside down, but trust me, it’s on purpose. After you stitch your design, and fold the card up, the inside message, “May Your Easter Sparkle”, will be in the perfect position.
Get your Stitched Easter Card Craft Template here.
STEP 1: download the template and printout onto card stock paper (color of choice).
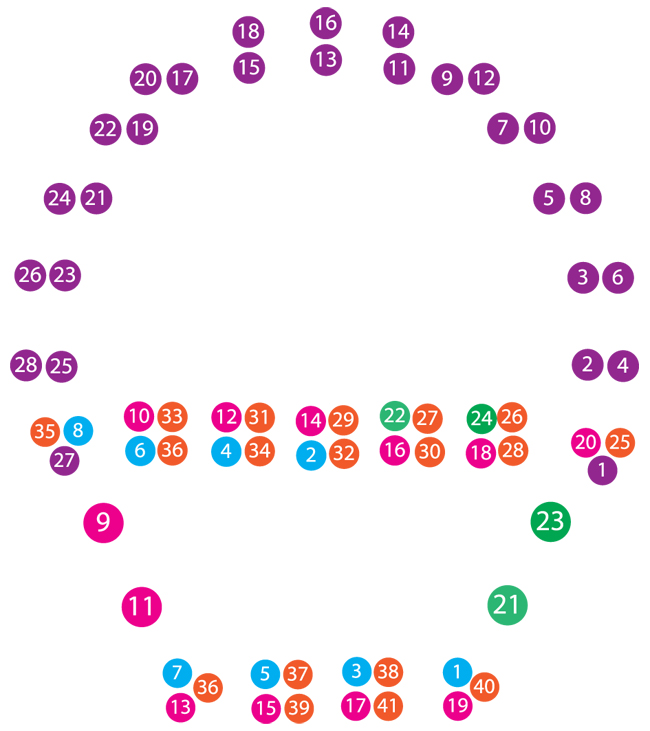
I created a stitching template for the basket. Every dot on the template is where the needle and yarn go through.
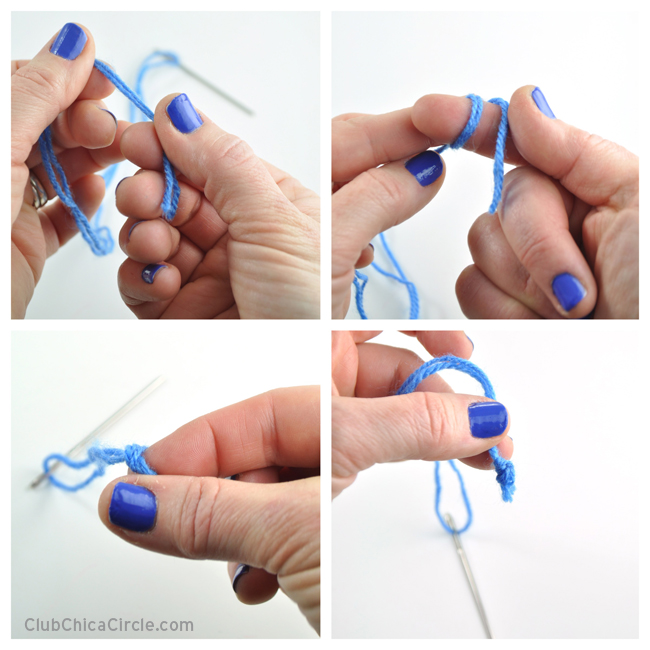
STEP 2: Thread a needle and knot the end. When using a needle with a large eye, it is pretty easy to thread your yarn through it. I cut a long length of yarn, about 36″ long, and thread it through the needle eye. Then I matched up both ends of the yarn, so that the yarn was doubled. An easy trick to knot the end together is to first pull the two ends tight in one hand. I am right handed, so the pictures below show I knot my yarn with my right hand. I pull the ends tight and then wrap the end around my right index finger a 2-3 times. The with my thumb I roll the yarn to the end of my finger and pull. This should create an easy knot at the end.
STEP 3: stitch your card. First push your needle through the BACK of printout in the lower right corner. A trick to being able to find the holes from the back is to first poke all of the holes on the template from the front. The paper is thin enough that the needle will easily go right through. You want the knot to be on the back side of the card, so start on the bottom right dot first. Then to create the basket weave pattern, make your first stitch by going through the middle hole (4th dot from the left). See the step by step stitching guide below. Continue by stitching in from the back of the 2nd hole on the left on the bottom to the next hole to the left of the one you just did. This creates long yarn stripes or stitches. When you have made four long stitches, you can start to go the other direction to create the criss-cross basket weave. Then outline the basket with simple straight stitches.
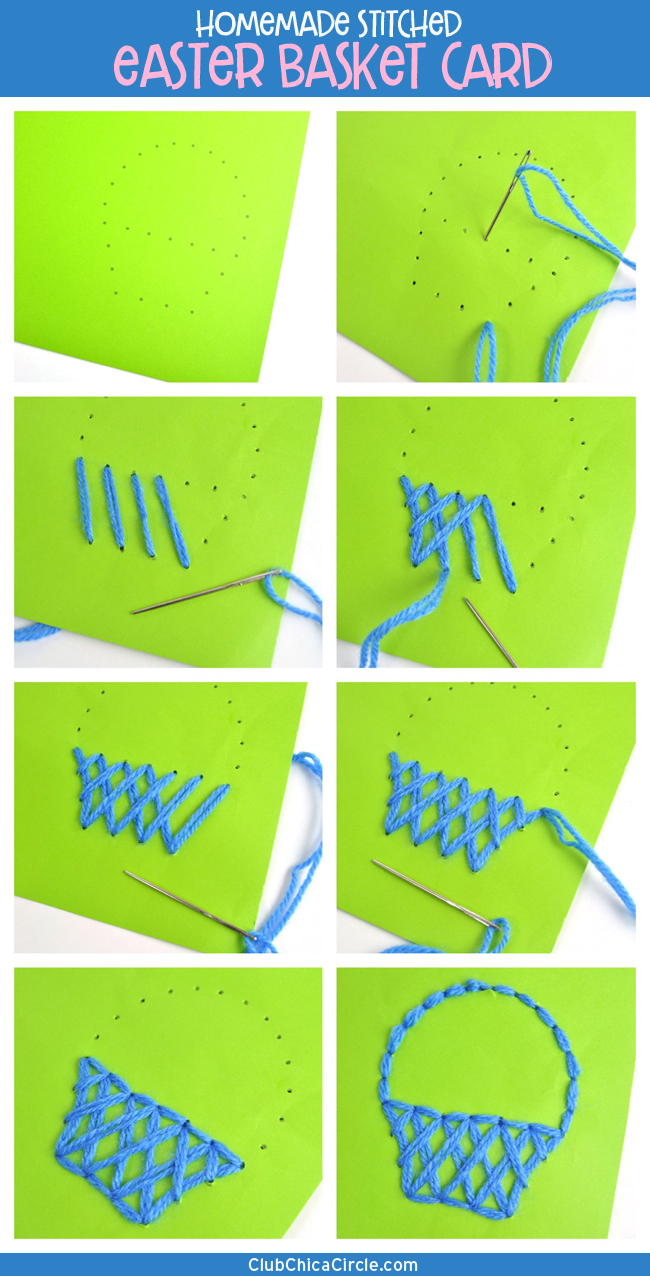
After I finished the basket pattern, I needed a new length of yarn. I finished with the basket handle with simple back stitches. I also created a numbered template below that you can use as a guide on the exact order I used to create my stitched pattern. Start with the blue number 1 for the basket to make the left diagonal stitches, then move to the pink stitches that start the weave pattern, onto the green and then the orange. Thread a new length of yarn and complete the basket handle with the purple numbers.
STEP 4: Fold the paper. Once you have finished stitching your Easter basket, finish up by folding the card in half (hiding the back side of your stitches) and then half again. This creates the perfect sized homemade card.
STEP 5: Apply the jewels on the front. I used double-stick tape, but glue would work too, unless you have self-adhesive jewels.
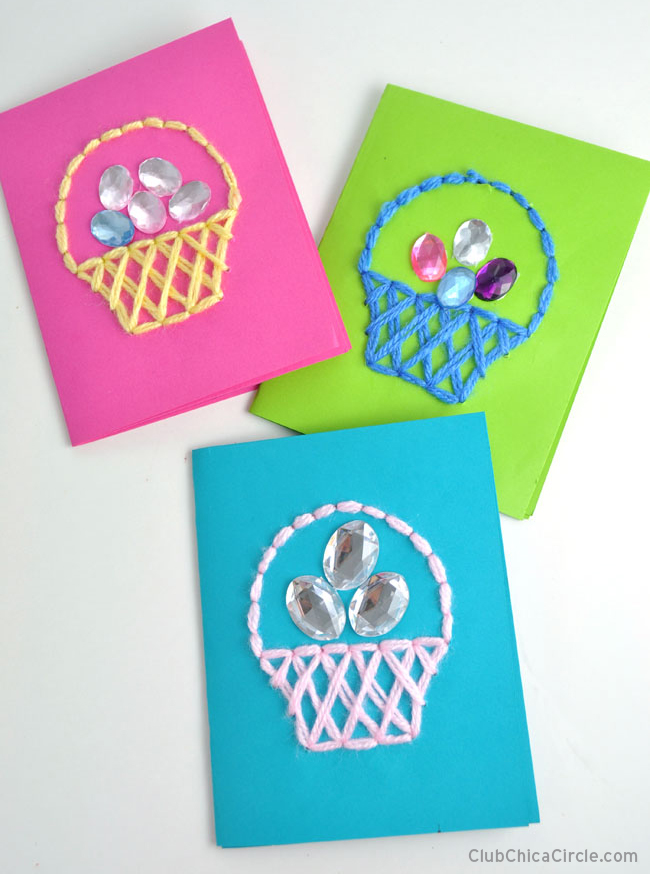
I used pretty Spring colored papers and paired each with a contrasting yarn color.
I love how they turned out!
Grab your supplies and have fun making your own hand-stitched Easter cards!