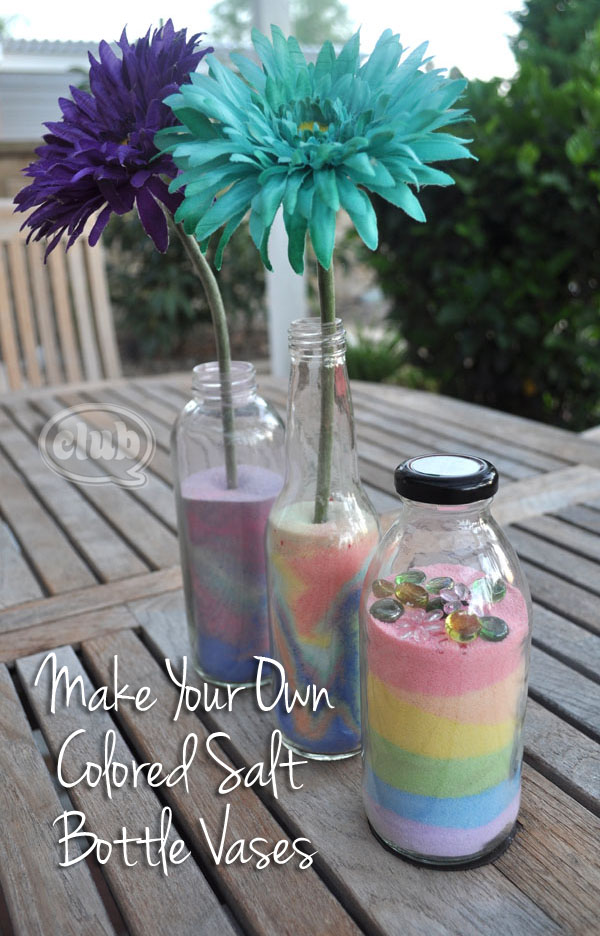
One of our favorite outdoor weekend crafts has been coloring salt and creating colorful salt art creations. In the summer we filled recycled bottles with layers and layers of colored salt and turned them into beautiful mini vases. The technique is super simple using only two ingredients – salt and colored chalk or pastels. You can check out the full tutorial with video here.
We also recently participated in DecoArt’s Twelve Days of Christmas ornament promotion, and I loved working with the 3D enamel paint writers so much, I thought of a way to combine the two with these cute snowman and Santa belly ornaments. The Santa belly ornament actually comes from one of my daughter’s friends. Since her friends know me as the “crafty mom”, I am always getting good ideas from them and what they might want to craft. She had worked on the colored salt vases with us, and thought it would be a fun idea to fill clear glass ornaments using the same technique. Perfect, right! This one is for you Miss Elise.
For these cute salt art ornaments, I used:
- clear glass ornaments
- table salt
- Sculpey Pluffy white clay
- DecoArt 3D Frost Gloss Enamel Writers
- Soft chalk pastels

For extra decoration I used some red pom poms and ribbons. I used tape rolls of different sizes as stands to hold the ornaments while we worked on them – duct tape ones for bigger ornaments, and washi tape rolls for the smaller.
For the Santa belly ornament, my tween colored salt by rubbing colored chalk pastels back and forth onto a pile of salt on a piece of paper. The coarseness of the salt actually rubs off the chalk pastel and colors the salt. After she got the color she wanted, she used the paper as a funnel to pour into the ornament. She did a layer of red at the bottom, then a stripe of black, and then topped it off with more red.

Then, she used a small piece of pluffy clay to seal off the top and prevent the colored salt from falling out. It is soft enough clay that stays soft until you bake it. It is also soft enough to then push back in the top of the ornament through the clay. We were going to bake the ornaments anyway to set the paint, so the clay will harden as well to form a hard seal at the top and secure the top to it. Filled salt ornaments are not light, so this is a great way to ensure that the top doesn’t fall off.
After replacing the top back on the ornament, she used 3D silver opaque gloss enamel paint to draw in a silver belt buckle for Santa’s belly. We let it dry completely, and set the clay and paint in an over at 275 degrees for about 20 minutes.
While she was making the Santa belly ornament, I couldn’t resist trying a snowman version. What color is snow? White, of course. What color is salt? White again. It was meant to be a snowman craft, right?
We used the same exact technique, except we didn’t color the salt at all. We filled each ornament with salt, sealed it with clay, and painted on snowman faces with orange and black 3D enamel paint writers.

These were so easy, we ended up making a family of them! I added a little extra flair by painting on red earmuffs and gluing on red pom poms for the mama snowman. It’s mom and me snowmen, don’t you think? = )

Try this super fun and easy craft this weekend with your kids. Decorate a present with them, give them to a special teacher or friend. They look great on a tree!

And don’t forget to enter to win a stocking full of goodies from DecoArt. Contest ends Friday.
Happy crafting!
If you liked this post, and want more, you can subscribe to be on our mailing list here.


1 comment for “Colored Salt Art Ornaments”